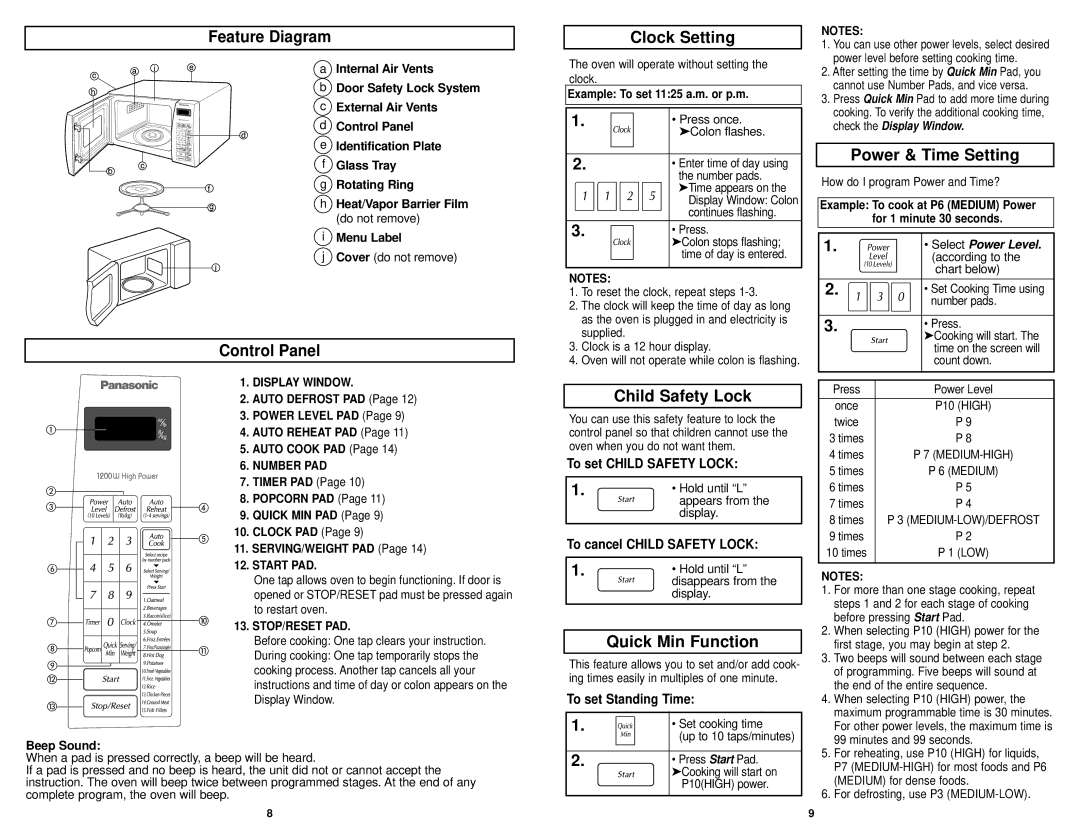
Cooking Techniques
Spacing
Cooking Techniques
Shielding
Thin areas of meat and poultry cook more quickly than meaty portions. To prevent overcooking, these thin areas can be shielded with strips of
Using Your Microwave Oven
WARNING: Do not use aluminum foil during cooking cycle.
COOKING TIPS
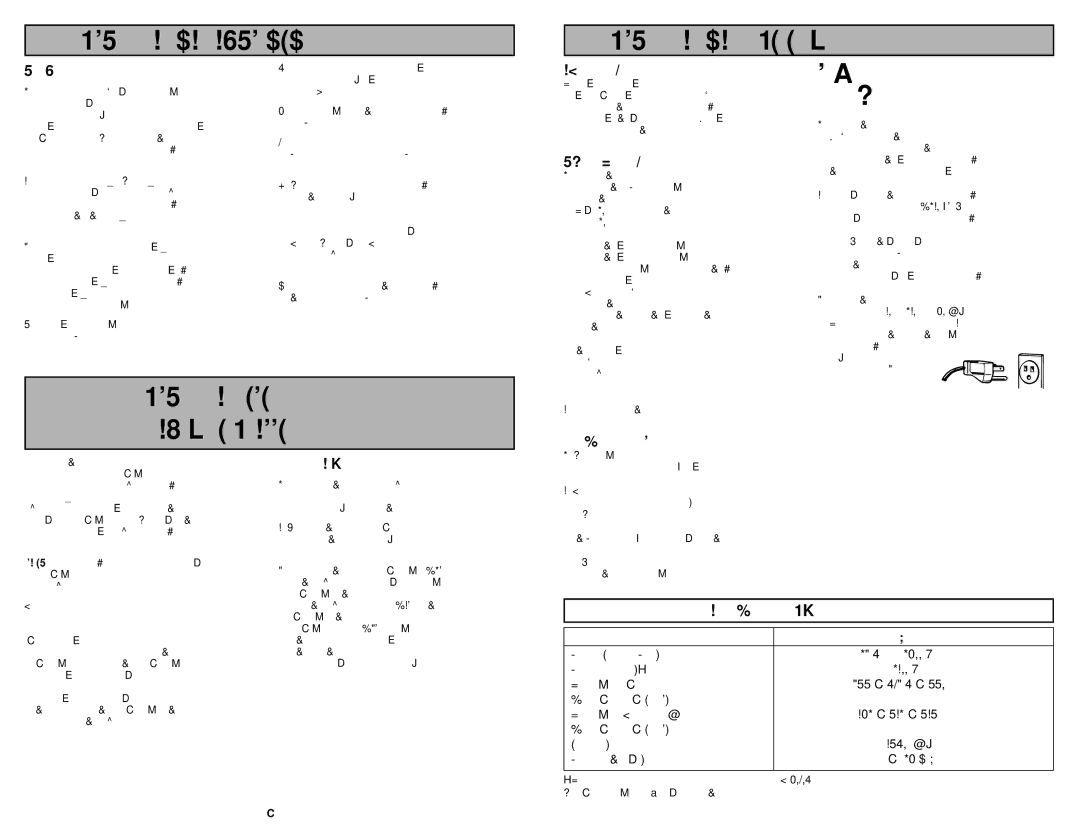
Individual foods, such as baked potatoes, cup- cakes and appetizers, will cook more evenly if placed in the oven equal distances apart. When possible, arrange foods in a circular pattern.
Covering
As with conventional cooking, moisture evapo- rates during microwave cooking. Casserole lids or plastic wrap are used for a tighter seal. When using plastic wrap, vent the plastic wrap by fold- ing back part of the plastic wrap from the edge of the dish to allow steam to escape. Loosen or remove plastic wrap as recipe directs for stand time. When removing plastic wrap covers, as well as any glass lids, be careful to remove them
away from you to avoid steam burns. Various degrees of moisture retention are also obtained by using wax paper or paper towels. However, unless specified, a recipe is cooked covered.
aluminum foil. Wooden toothpicks may be used to hold the foil in place.
Timing
A range in cooking time is given in each recipe. The time range compensates for the uncontrol- lable differences in food shapes, starting temper- ature and regional preferences. Always cook food for the minimum cooking time given in a recipe
and check for doneness. If the food is under- cooked, continue cooking. It is easier to add time to an undercooked product. Once the food is overcooked, nothing can be done.
Stirring
Stirring is usually necessary during microwave cooking. We have noted when stirring is helpful, using the words once, twice, frequently or occa- sionally to describe the amount of stirring neces- sary. Always bring the cooked outside edges toward the center and the less cooked center por- tions toward the outside of the dish.
Rearranging
Rearrange small items such as chicken pieces, shrimp, hamburger patties or pork chops. Rearrange pieces from the edge to the center and pieces from the center to the edge of the dish.
Turning
It is not possible to stir some foods to redistribute the heat. At times, microwave energy will concen- trate in one area of a food. To help insure even cooking, these foods need to be turned. Turn
over large foods, such as roasts or turkeys, halfway through cooking.
Stand Time
Most foods will continue to cook by conduction after the microwave oven is turned off. In meat cookery, the internal temperature will rise 5°F to 15°F (3°C to 8°C), if allowed to stand, tented with foil, for 10 to 15 minutes. Casseroles and vegetables need a shorter amount of standing
time, but this standing time is necessary to allow foods to complete cooking to the center without overcooking on the edges.
Testing Doneness
The same tests for doneness used in convention- al cooking may be used for microwave cooking.
Meat is done when
16
Meat
1.No special techniques are required. Meat should be prepared as with conventional cooking. Season if desired. Always thoroughly defrost meat before cooking.
2.Place the meat on a microwave roasting rack or
3.Cook according to the Meat Cooking Chart (below). Use the longer time for large meats and the shorter time for smaller meats. For thicker chops, use the longer time.
4.Turn the meat once halfway through the cooking
time.
5.Let stand for
6.Make sure meat, especially pork, is thoroughly
cooked before eating.
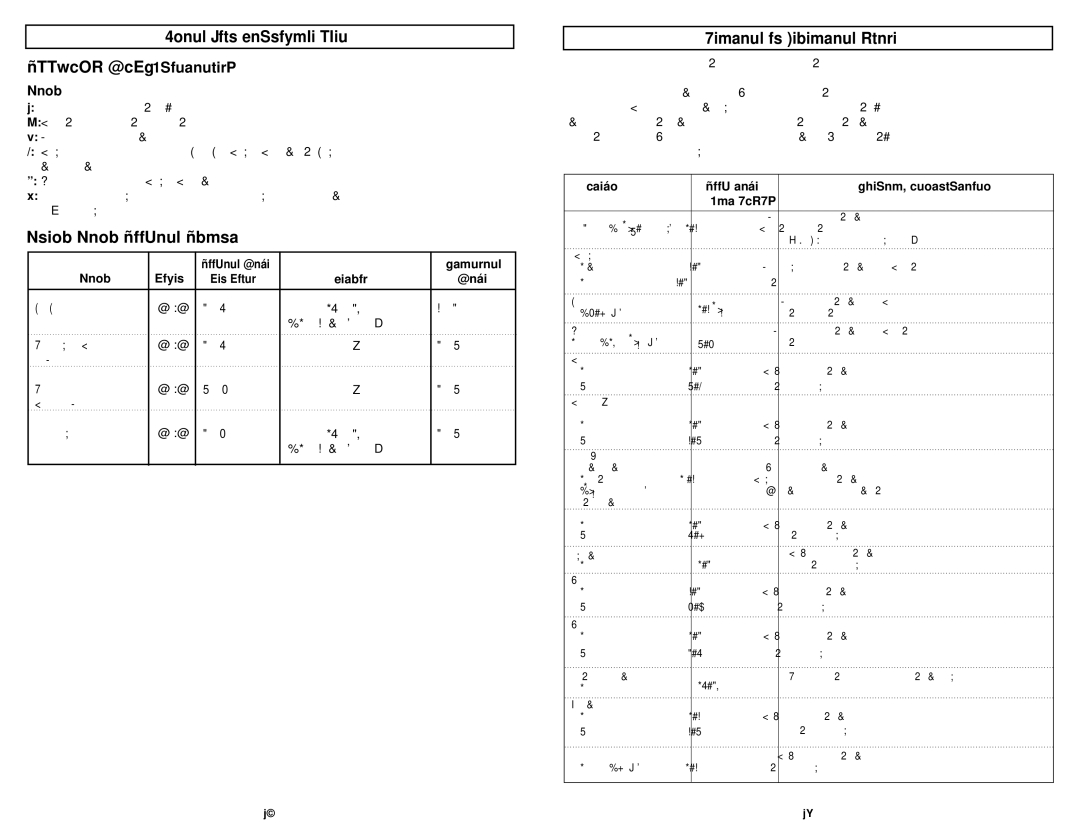
Meat Cooking Chart
| Microwave | Cooking Time |
Meat | Power | Per Pound |
|
|
|
BEEF |
|
|
Standing/Rolled |
|
|
Rib |
|
|
– Rare | 8 | 7 to 9 minutes |
– Medium | 8 | 8 to 10 minutes |
– | 8 | 9 to 12 minutes |
Ground Beef (to | HIGH(100%) | 5 to 7 minutes |
brown for casse- |
|
|
role) |
|
|
Hamburgers, |
|
|
Fresh or defrost- |
|
|
ed |
|
|
(4 oz. each) |
|
|
– 2 patties | HIGH(100%) | 1 to 3 minutes |
– 4 patties | HIGH(100%) | 2 to 4 minutes |
PORK |
|
|
Loin, Leg | 8 | 9 to 14 minutes |
Bacon |
|
|
– 4 slices | HIGH(100%) | 2 to 4 minutes |
– 6 slices | HIGH(100%) | 3 to 5 minutes |
|
|
|
NOTE: The times listed above are only a guide. Allow for difference in individual tastes and preferences. The times may
also vary due to the shape, cut, and com- position of the food.
Poultry
1.No special techniques are required. Poultry should be prepared as with conventional cooking. Season if desired.
2.Poultry should be thoroughly defrosted. Remove giblets and any metal clamps.
3.Prick the skin and brush lightly with vegetable oil unless the poultry is
4.All poultry should be placed on a microwave
roasting rack or a
5.Cook according to the instructions in the Poultry Cooking Chart below. Turn over halfway through the cooking time. Because of its shape, poultry has a tendency to cook unevenly, especially in very bony parts.Turning during roasting helps to cook these areas evenly.
6.Let stand for
7.Make sure poultry is thoroughly cooked before eat-
ing. Whole po | ultry is completely cooked when the | ||
juices run clear from the inside thigh when it is |
| ||
pierced with a sharp knife. Poultry pieces should |
| ||
be pierced with a sharp knife through the thickest |
| ||
part to ensure that the juices are clear and the |
| ||
flesh is firm. |
|
|
|
Poultry Cooking Chart |
|
| |
|
|
| |
| Microwave | Cooking Time | |
Poultry | Power | Per Pound | |
|
|
|
|
CHICKEN |
|
|
|
Whole | 8 | 6 | to 9 minutes |
Breast | 8 | 5 | to 7 minutes |
(boned) |
|
|
|
Portions | 8 | 5 | to 7 minutes |
TURKEY |
|
|
|
Whole | 8 | 6 | to 9 minutes |
|
|
|
|
NOTES:
•The times listed above are only a guide. Allow for difference in individual tastes and preferences. The times may also vary due to the shape, cut, and composition of the food.
•If whole poultry is stuffed, the weight of the stuffed bird should be used when calculating the cooking time.
17
