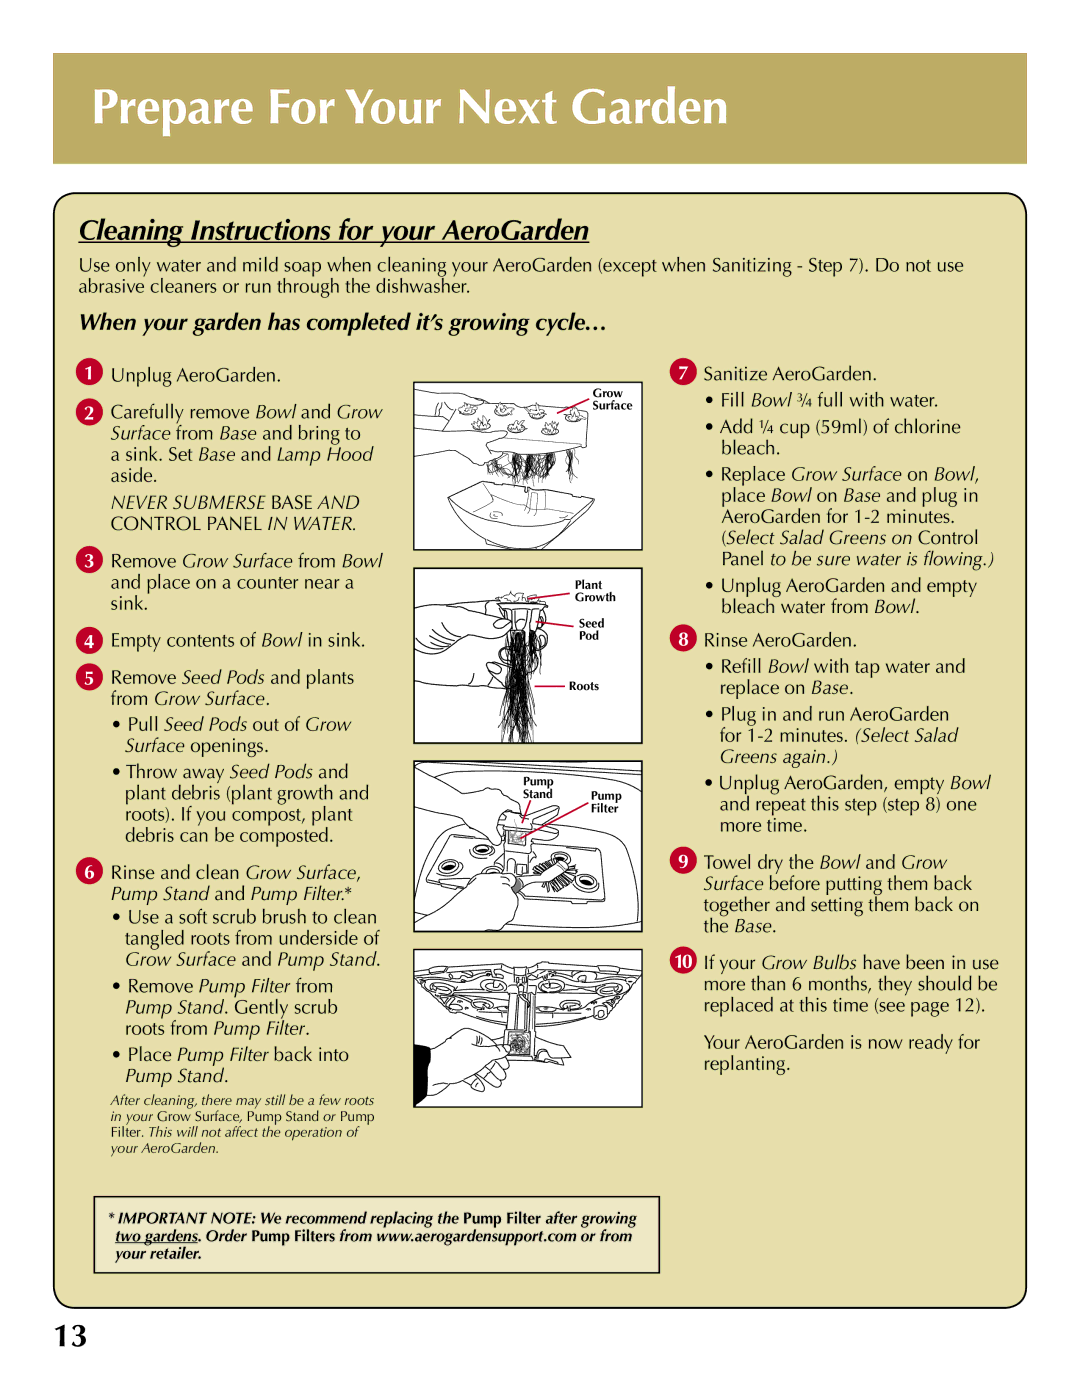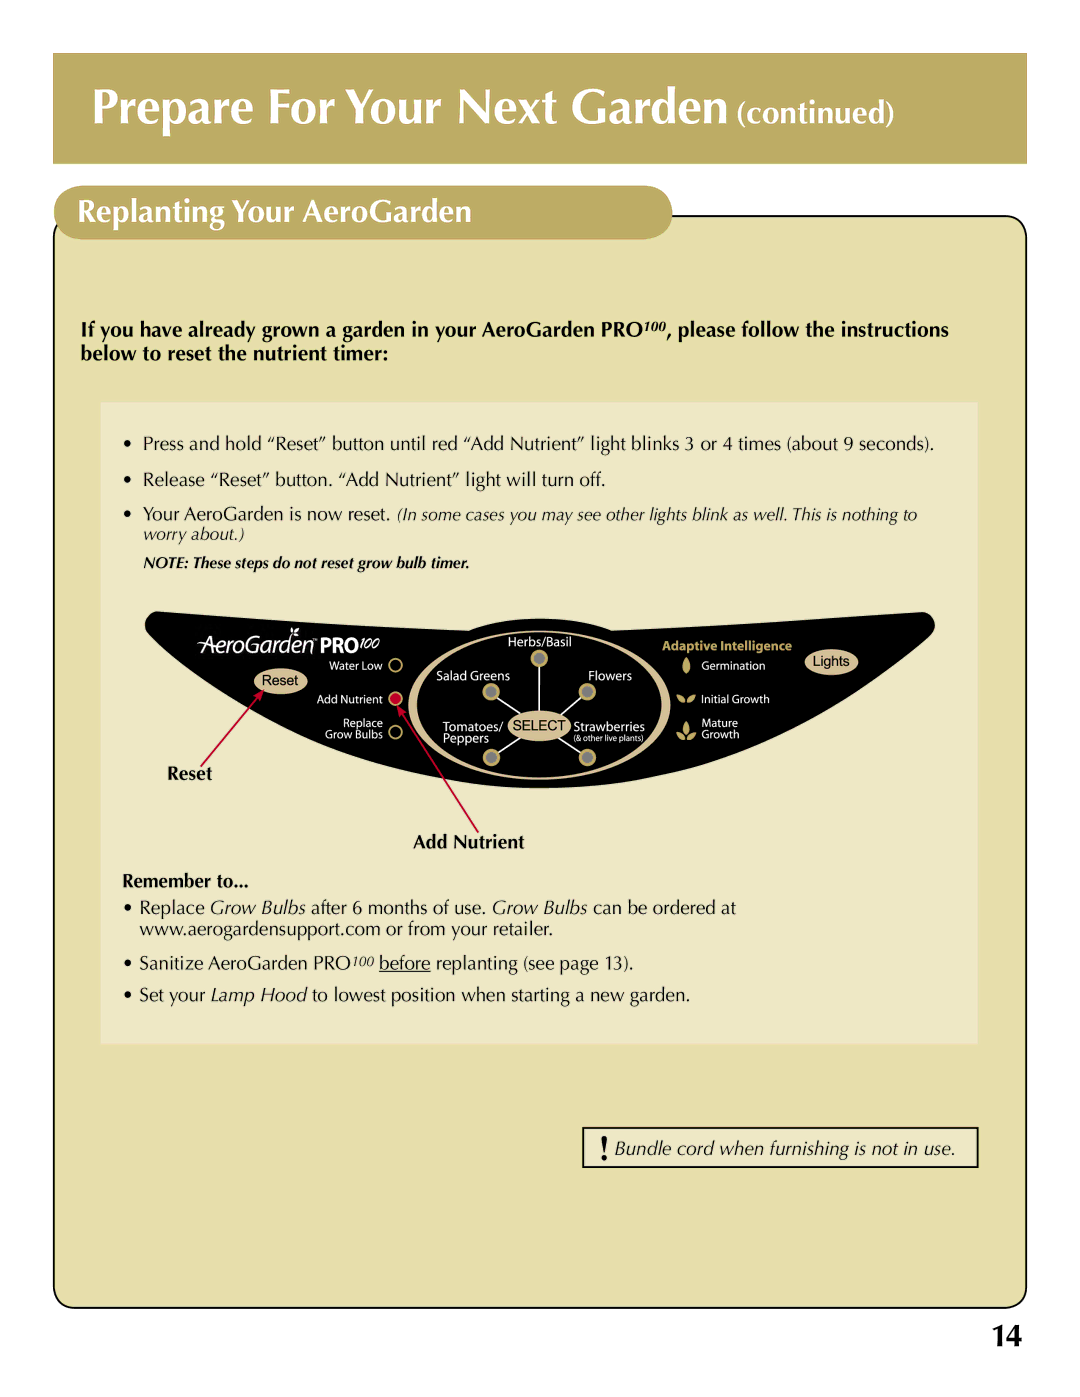
3Starting Your Garden
APlug Cord into Electrical Outlet
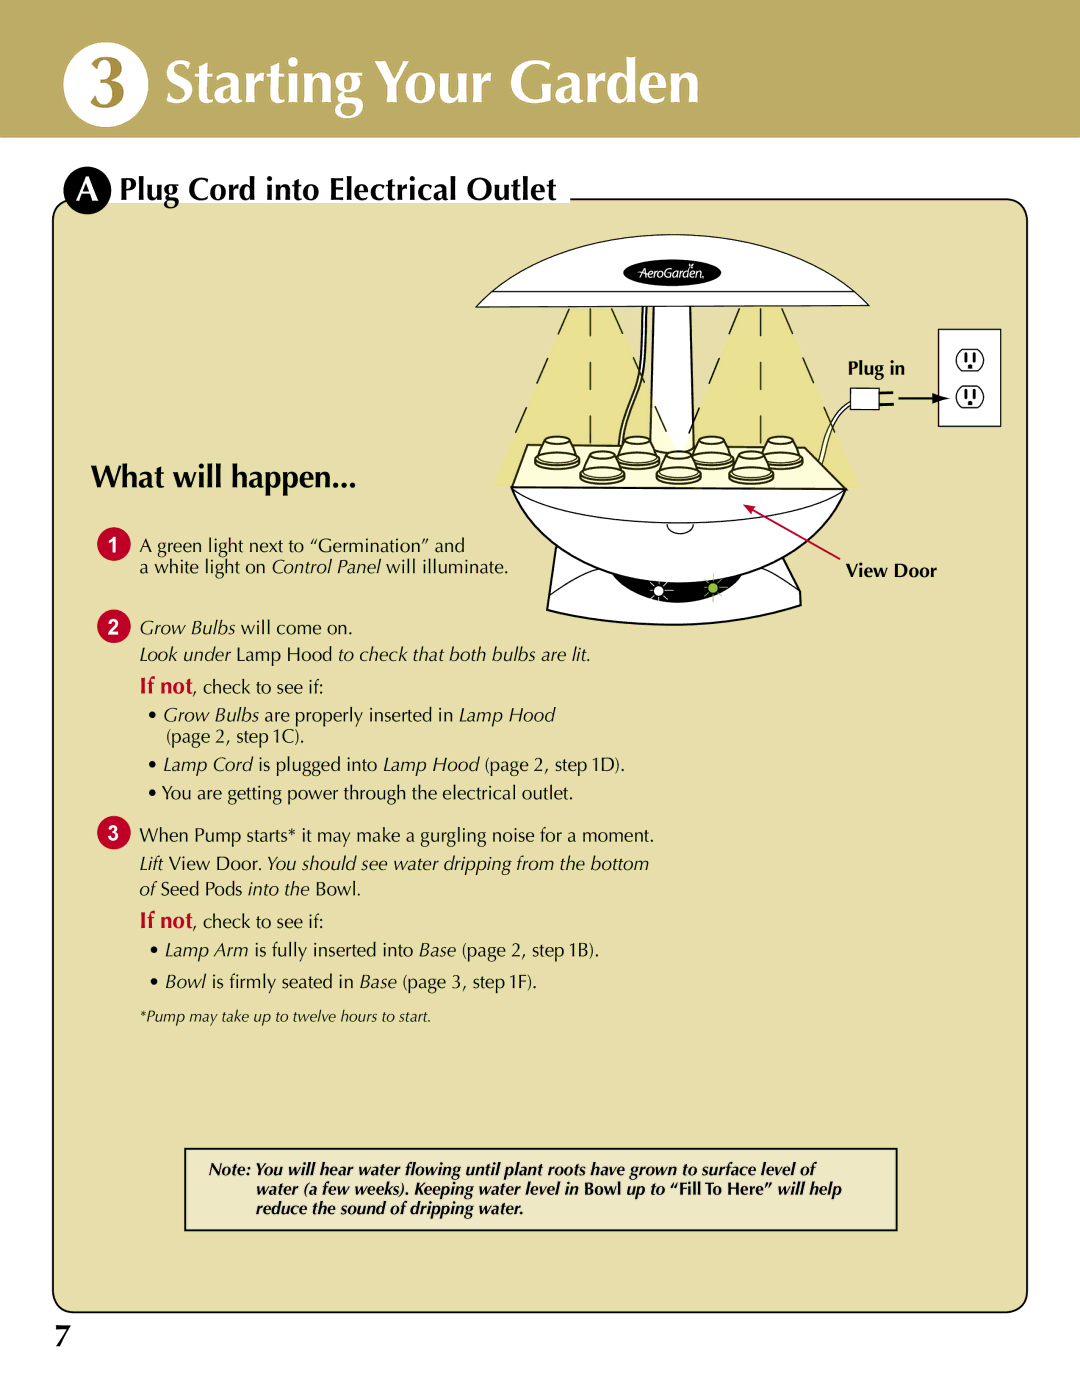
What will happen...
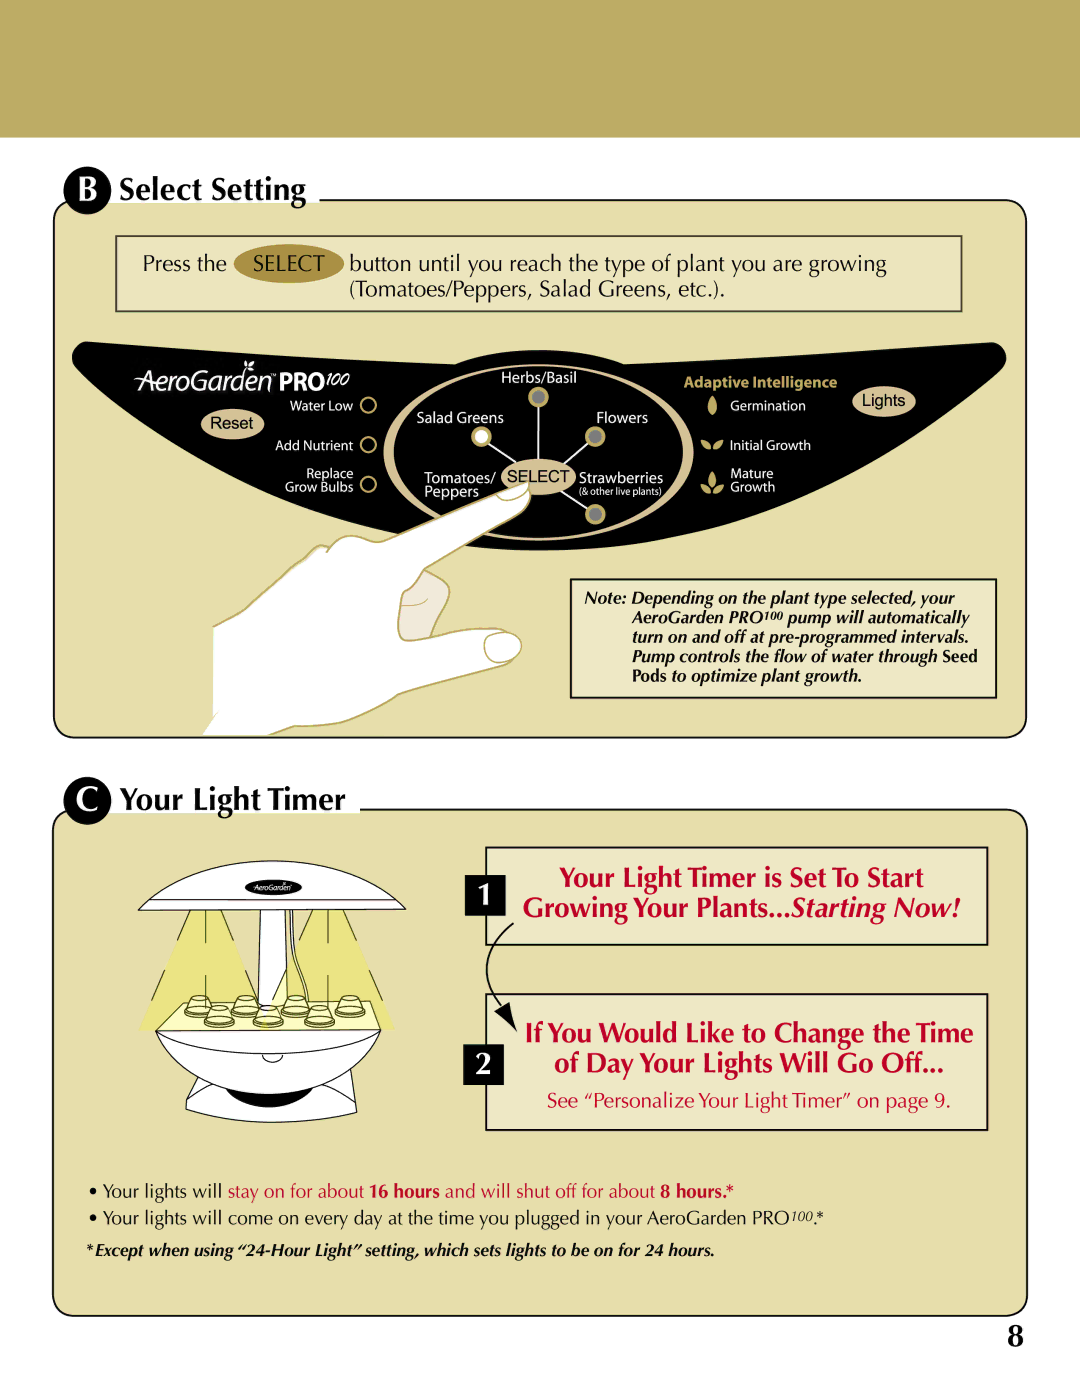
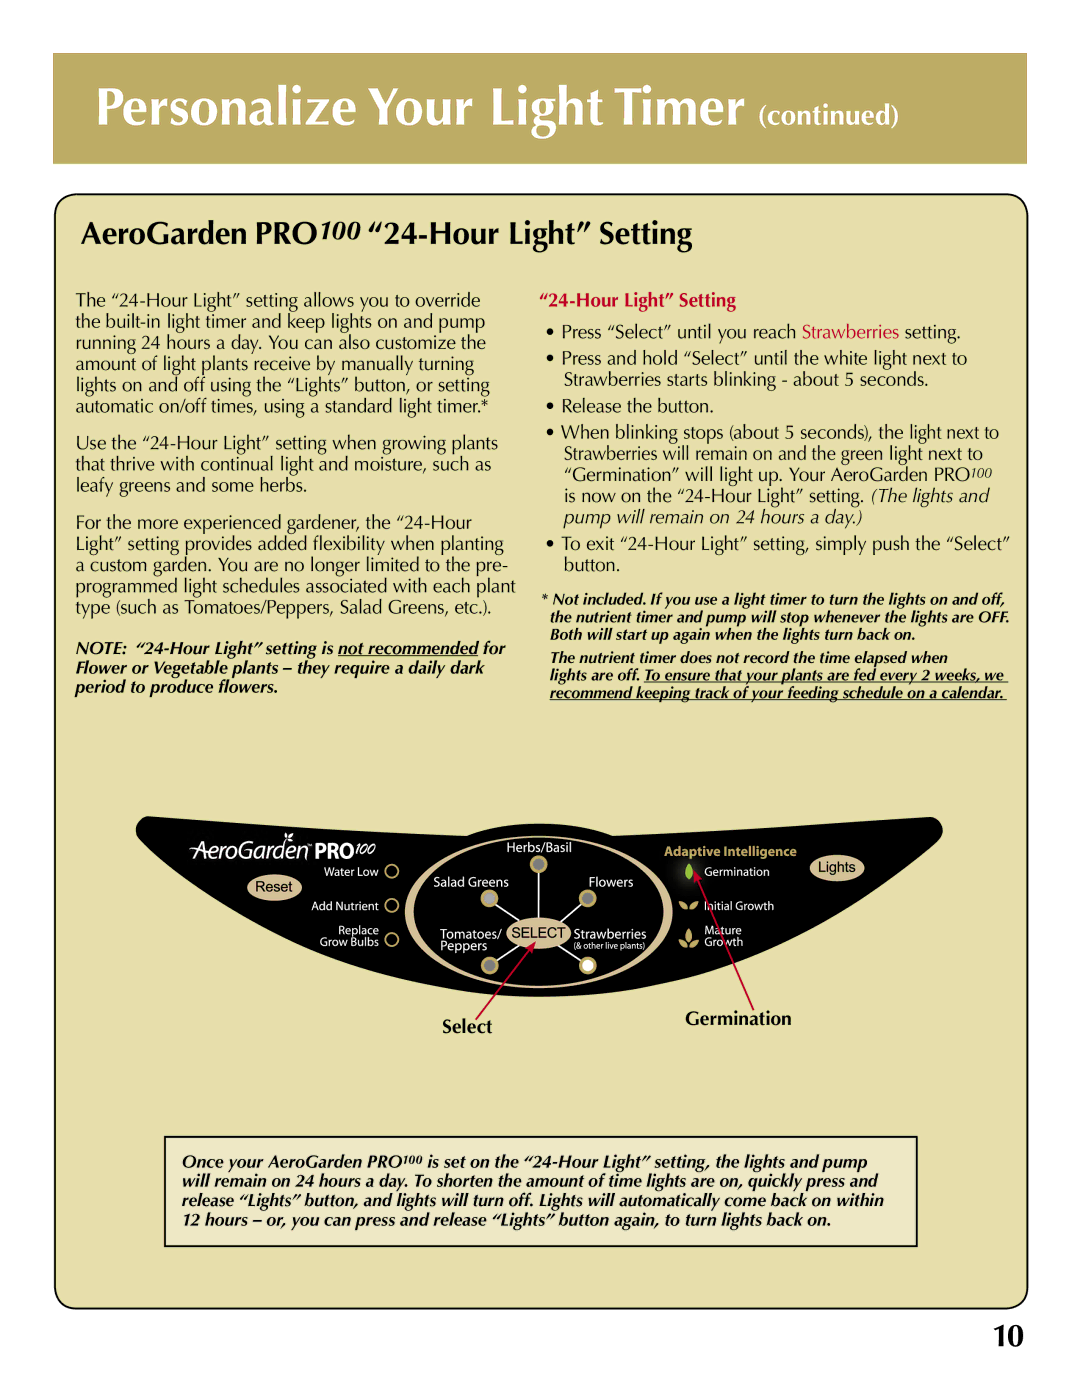
1A green light next to “Germination” and
a white light on Control Panel will illuminate.
2Grow Bulbs will come on.
Look under Lamp Hood to check that both bulbs are lit. If not, check to see if:
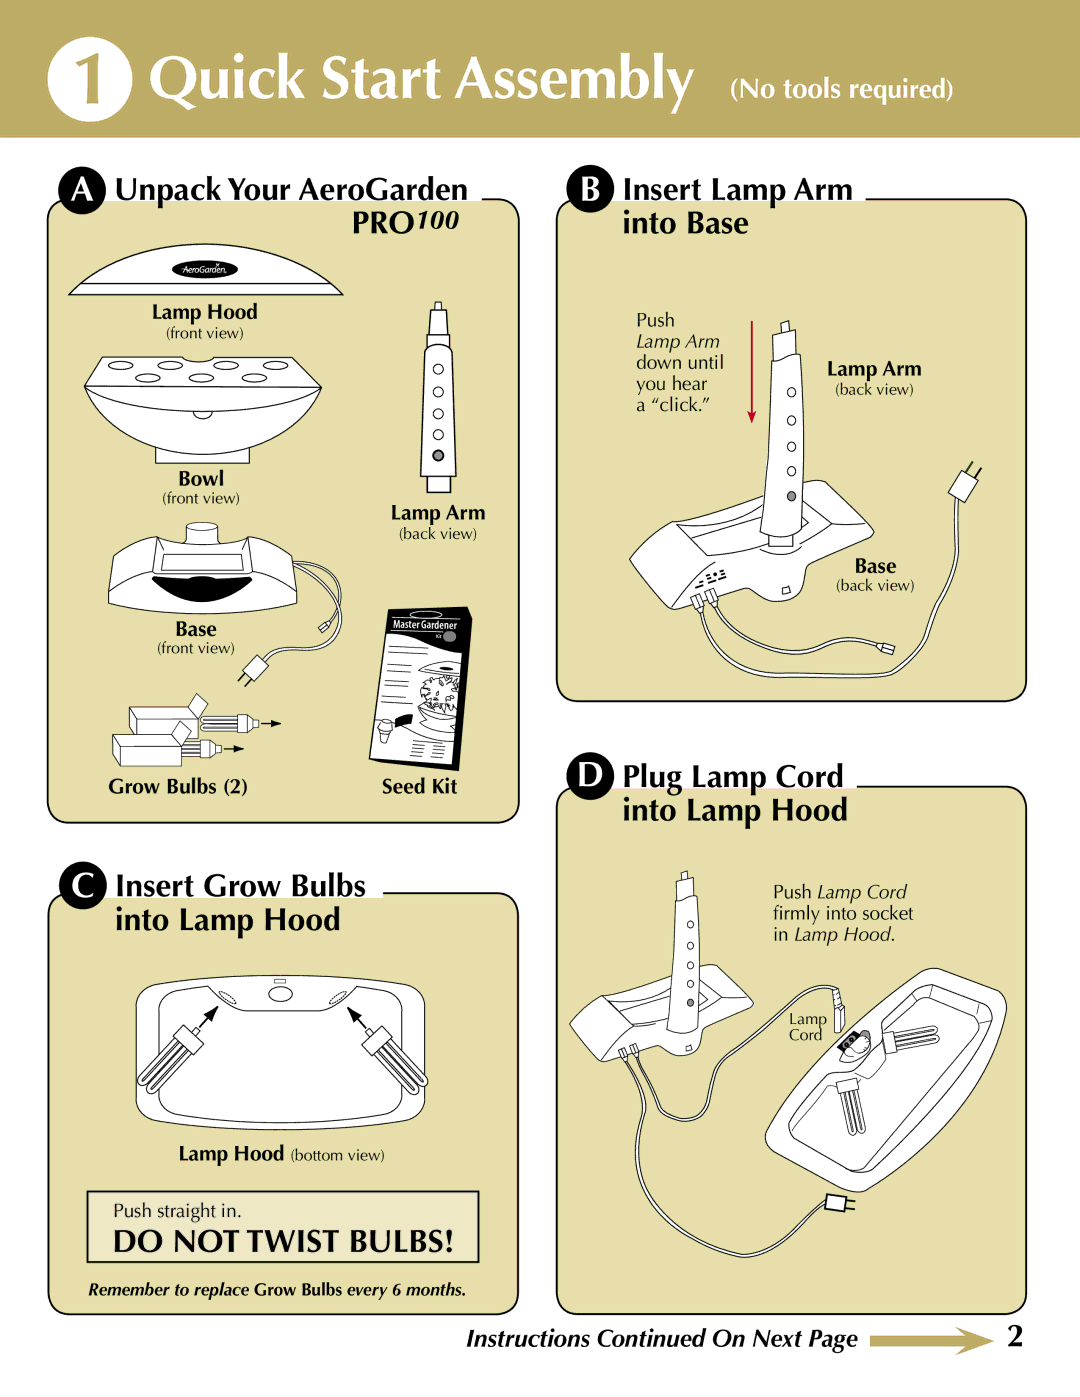
•Grow Bulbs are properly inserted in Lamp Hood (page 2, step 1C).
•Lamp Cord is plugged into Lamp Hood (page 2, step 1D).
•You are getting power through the electrical outlet.
3When Pump starts* it may make a gurgling noise for a moment. Lift View Door. You should see water dripping from the bottom of Seed Pods into the Bowl.
If not, check to see if:
•Lamp Arm is fully inserted into Base (page 2, step 1B).
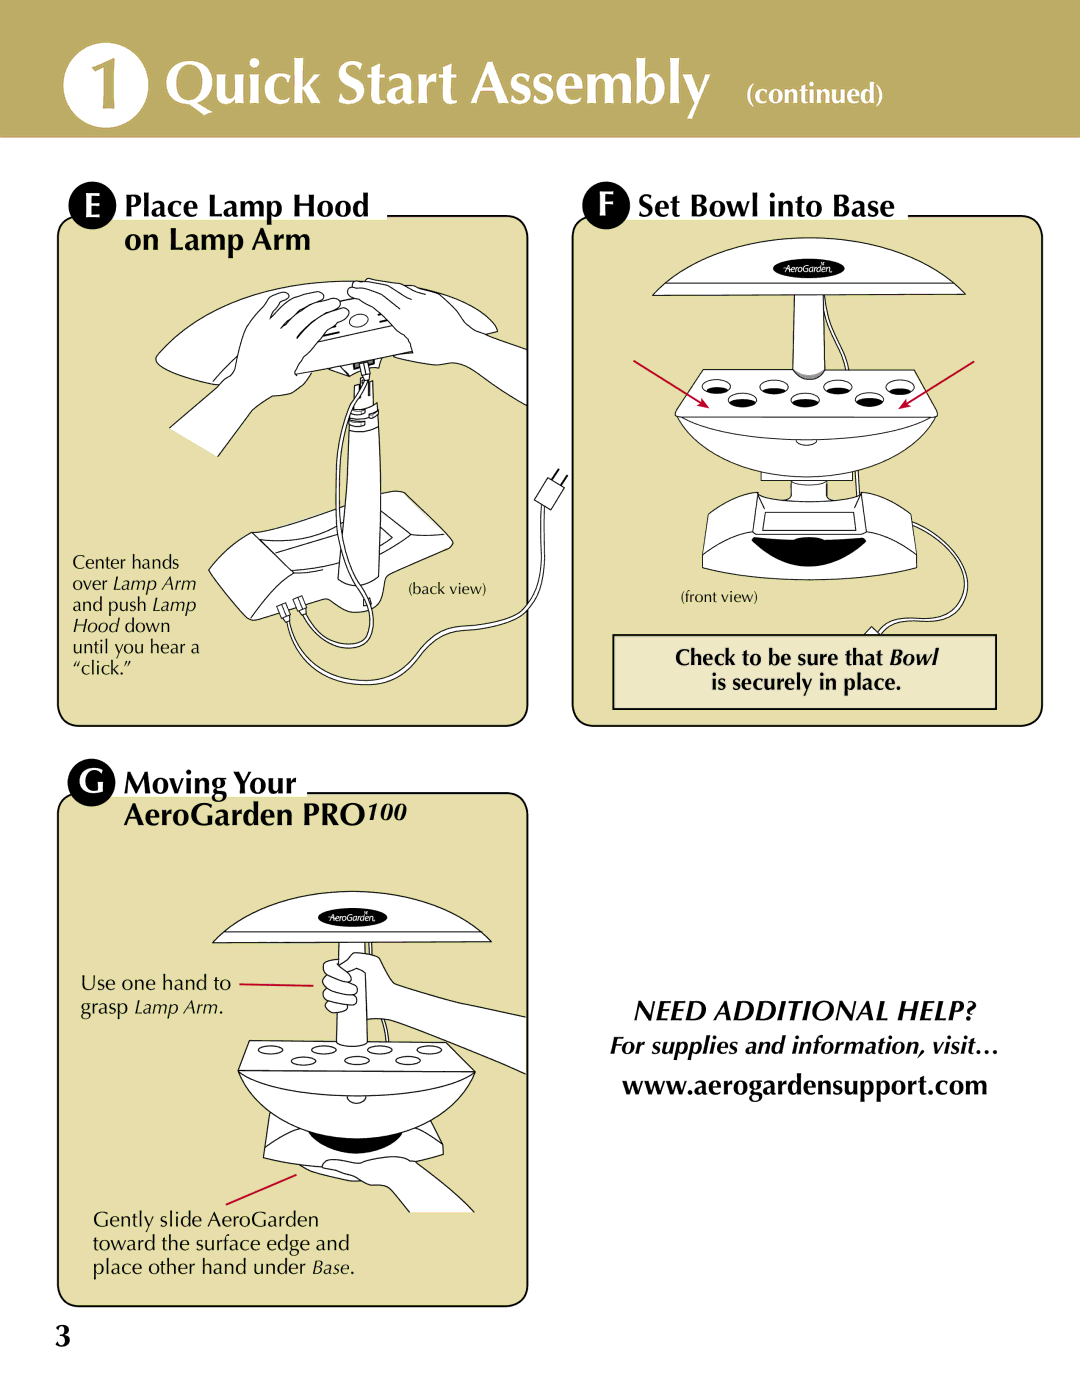
•Bowl is firmly seated in Base (page 3, step 1F).
*Pump may take up to twelve hours to start.
Plug in
View Door
Note: You will hear water flowing until plant roots have grown to surface level of water (a few weeks). Keeping water level in Bowl up to “Fill To Here” will help reduce the sound of dripping water.
7
