Step 9: Connect 3Com AirProtect Sensors to the Network
Power and Connect to the Network
A. Ensure that the 3Com AirProtect Enterprise Server is already running on your network.
Note: Make sure that a DNS entry ‘wifi‐security‐server’ is set up on all DNS Servers. This entry should point to the IP address of the Server. Otherwise, configure the Sensor manually. Please refer to the 3Com AirProtect Enterprise Installation Guide for details.
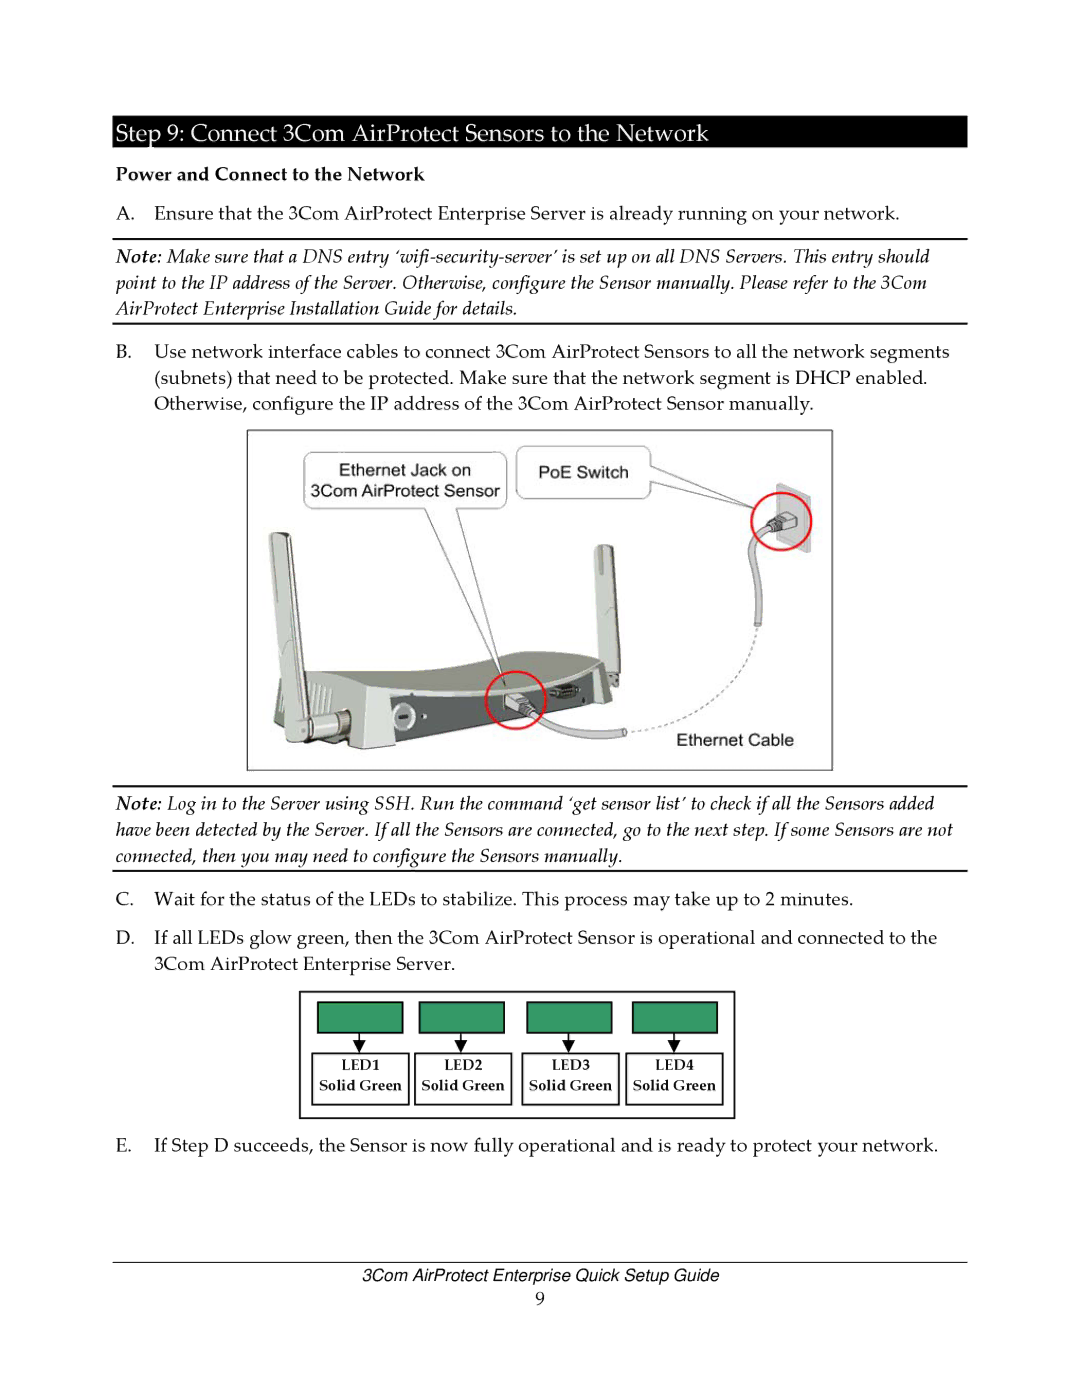
B.Use network interface cables to connect 3Com AirProtect Sensors to all the network segments (subnets) that need to be protected. Make sure that the network segment is DHCP enabled. Otherwise, configure the IP address of the 3Com AirProtect Sensor manually.
Note: Log in to the Server using SSH. Run the command ‘get sensor list’ to check if all the Sensors added have been detected by the Server. If all the Sensors are connected, go to the next step. If some Sensors are not connected, then you may need to configure the Sensors manually.
C.Wait for the status of the LEDs to stabilize. This process may take up to 2 minutes.
D.If all LEDs glow green, then the 3Com AirProtect Sensor is operational and connected to the 3Com AirProtect Enterprise Server.
LED1 | LED2 | LED3 | LED4 |
Solid Green | Solid Green | Solid Green | Solid Green |
E.If Step D succeeds, the Sensor is now fully operational and is ready to protect your network.
3Com AirProtect Enterprise Quick Setup Guide
9