Important! If the LED status at the end of Step D does not match the status shown in this Quick Setup Guide, refer to the 3Com AirProtect Enterprise Installation Guide for more details.
Step 10: Begin the System Setup Wizard and Select Installation Type
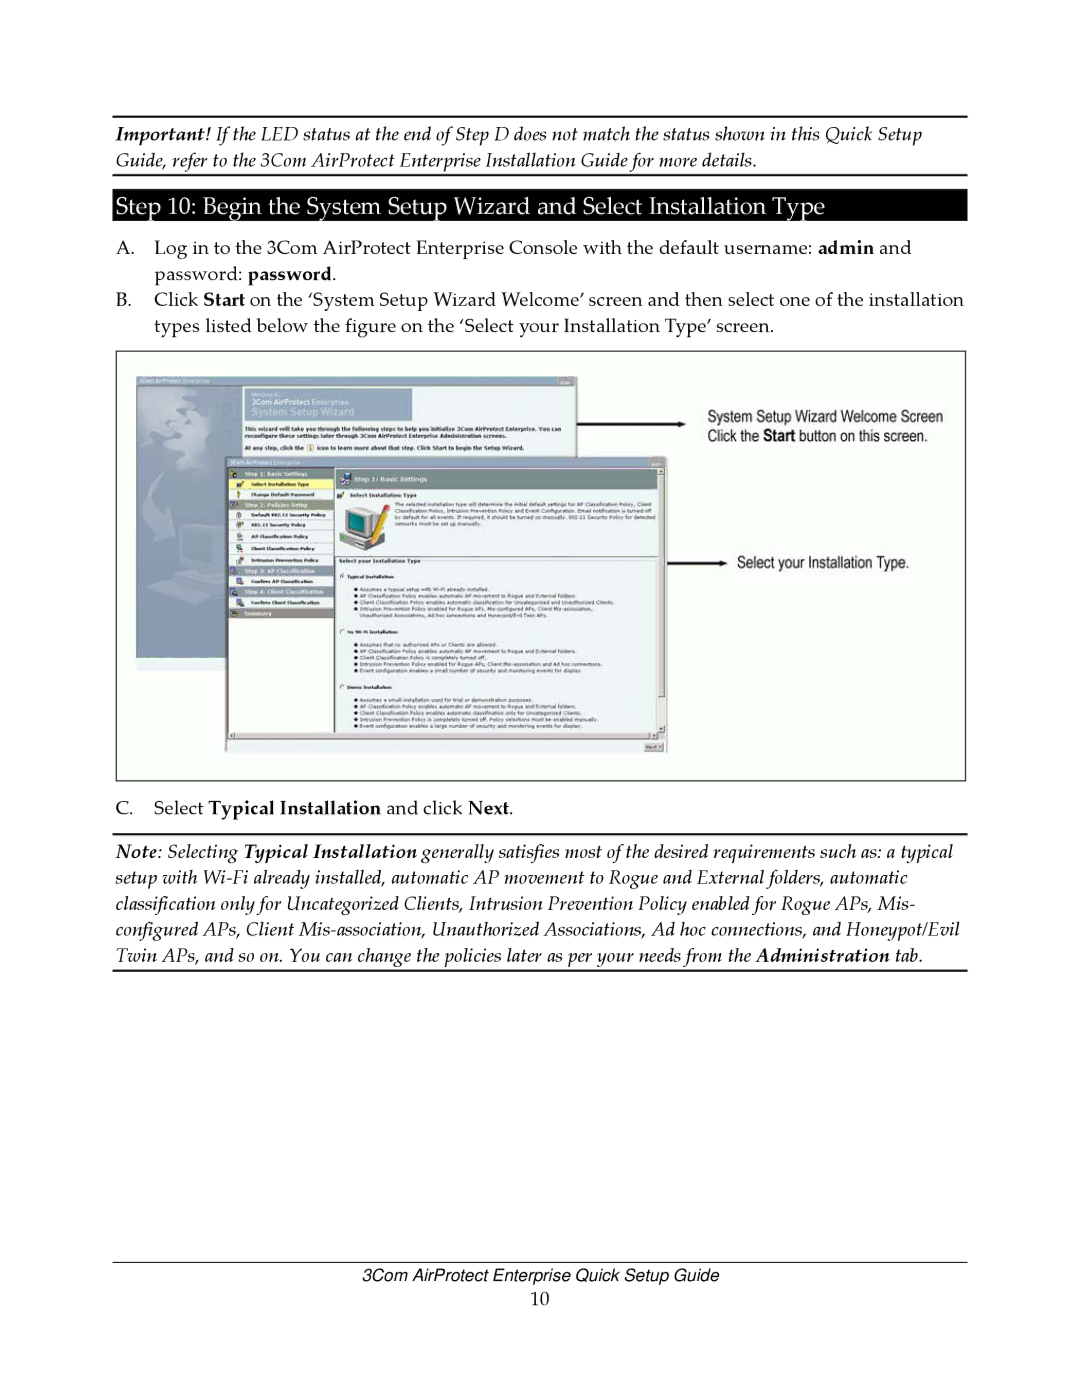
A.Log in to the 3Com AirProtect Enterprise Console with the default username: admin and
password: password.
B.Click Start on the ‘System Setup Wizard Welcome’ screen and then select one of the installation types listed below the figure on the ‘Select your Installation Type’ screen.
C.Select Typical Installation and click Next.
Note: Selecting Typical Installation generally satisfies most of the desired requirements such as: a typical setup with Wi‐Fi already installed, automatic AP movement to Rogue and External folders, automatic classification only for Uncategorized Clients, Intrusion Prevention Policy enabled for Rogue APs, Mis‐ configured APs, Client Mis‐association, Unauthorized Associations, Ad hoc connections, and Honeypot/Evil Twin APs, and so on. You can change the policies later as per your needs from the Administration tab.
3Com AirProtect Enterprise Quick Setup Guide
10