Maintenance/Cleaning
Sensors Locations
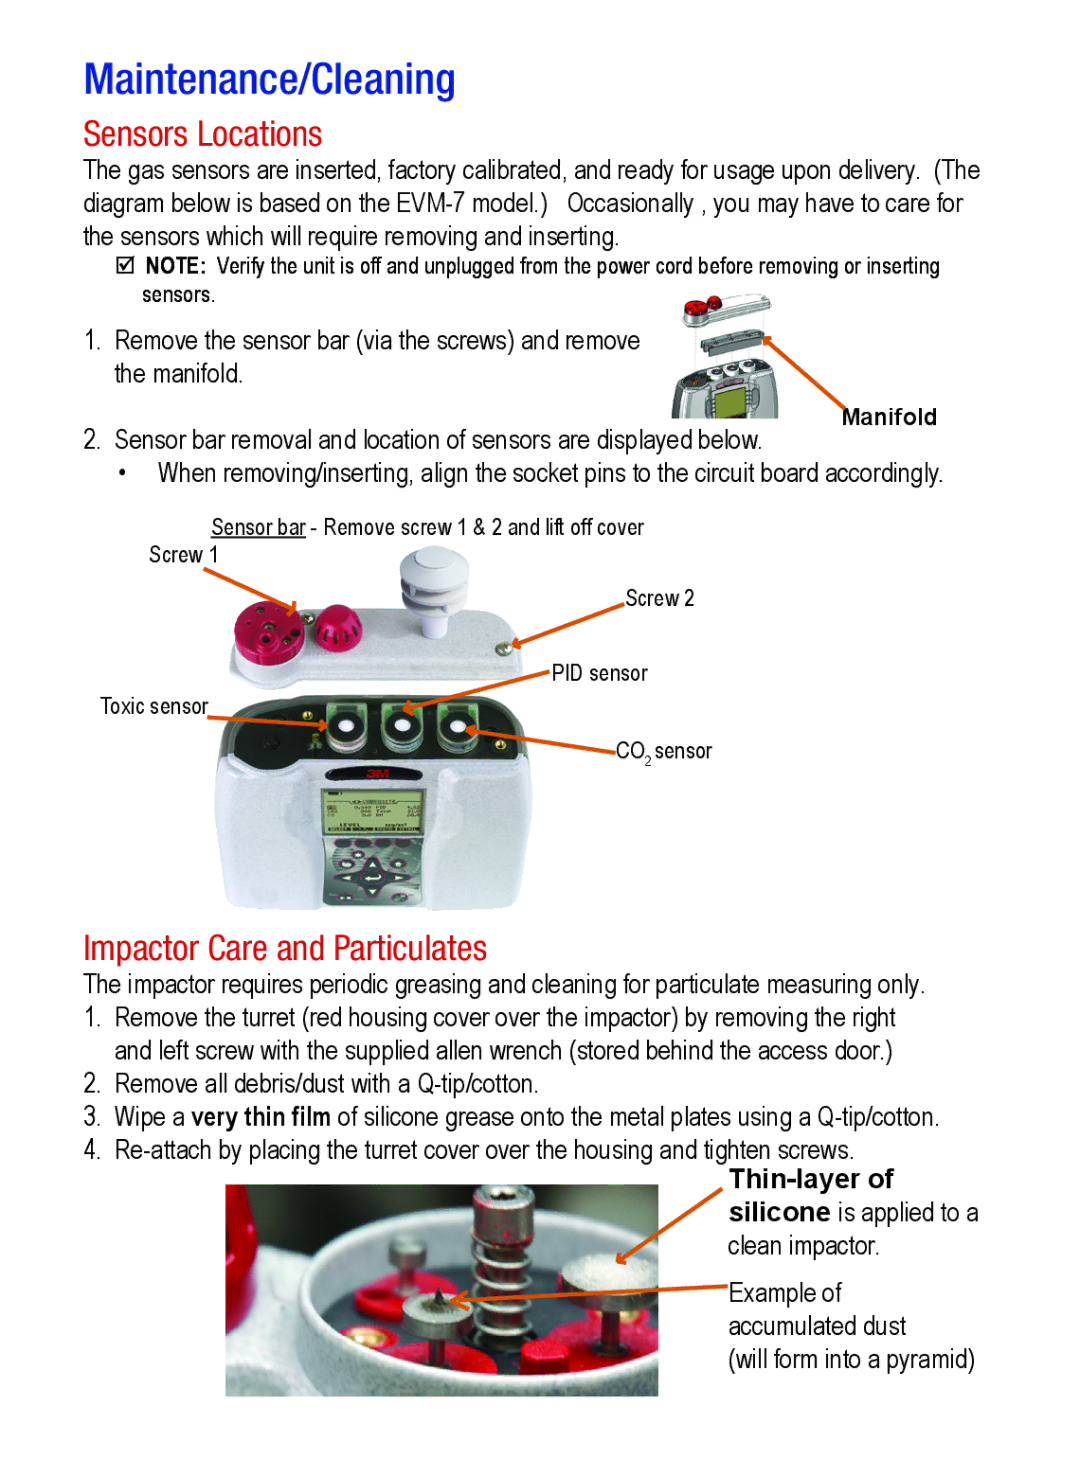
The gas sensors are inserted, factory calibrated, and ready for usage upon delivery. (The diagram below is based on the
;; NOTE: Verify the unit is off and unplugged from the power cord before removing or inserting
sensors.
1. Remove the sensor bar (via the screws) and remove the manifold.
2. Sensor bar removal and location of sensors are displayed below.
Manifold
• When removing/inserting, align the socket pins to the circuit board accordingly.
Sensor bar - Remove screw 1 & 2 and lift off cover
Screw 1
Screw 2
PID sensor
Toxic sensor
![]() CO2 sensor
CO2 sensor
Impactor Care and Particulates
The impactor requires periodic greasing and cleaning for particulate measuring only.
1.Remove the turret (red housing cover over the impactor) by removing the right and left screw with the supplied allen wrench (stored behind the access door.)
2.Remove all debris/dust with a
3.Wipe a very thin film of silicone grease onto the metal plates using a
4.
Thin-layer of silicone is applied to a clean impactor.
![]() Example of
Example of
accumulated dust
(will form into a pyramid)