System Setup
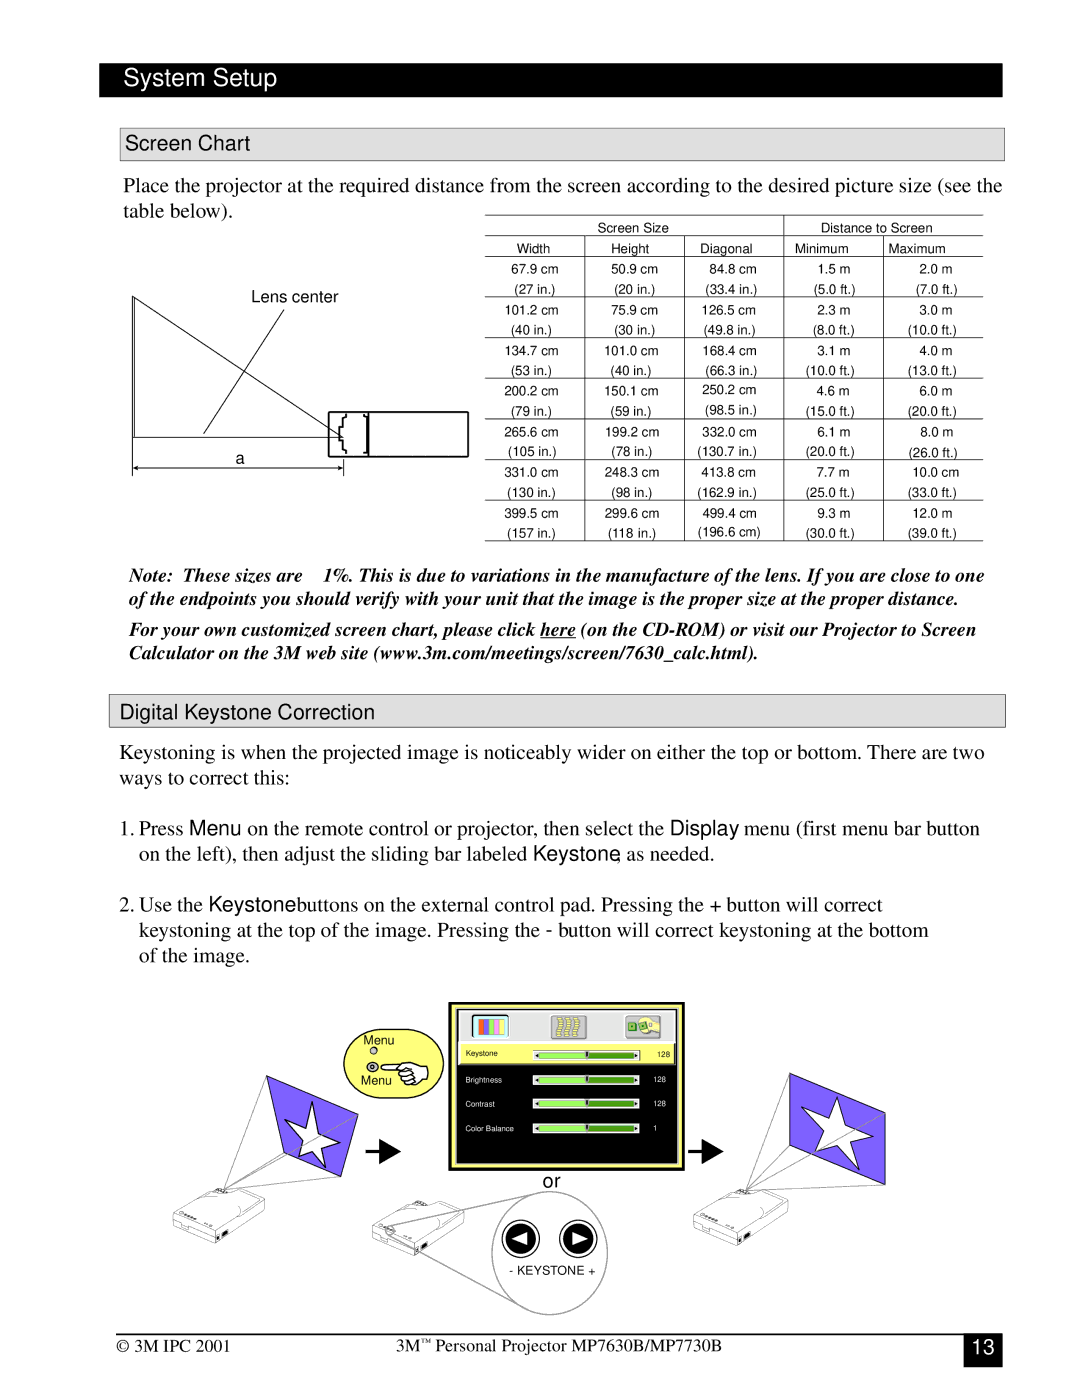
Screen Chart | Width | ScreenHeightSize | Diagonal | MinimumDistancetoScreenMaximum | |||
| 679(27in.) | 5020 | (33848.4in.) | (50ft15.) | (7ft2 .) | ||
| 01240 |
| 75(30in9.) | ..8in5cm.) | (823 |
|
|
Place the projector at the required distance from | e screen according to the desired picture size (see the | ||||||
table below). | 134537 | .) | 01040 | 126(49843.) | 31m | 134 | ft.) |
265(79in6 | 1992(59in.) | (985.0in.) | 1561m | (208. | |||
Lens center | 002 |
| 150.1cm | 2502 | 46m | 6 | m |
|
|
| 41394 |
|
| cm | |
| 399.5cm | 299.6cm | 93m | 12 | |||
| (157in.) | (118in.) | (1629.6cm) | (30.0ft.) | (39.0ft.) | ||
| (105in.) | 78 | 07 | 0 | (26ft.) | ||
a | 31030 |
| (98in483.) | .89cmin.) | 2577m | 0 |
|
|
|
|
|
|
|
| |
Note: These sizes are ± 1%. This is due to variations in the manufacture of the lens. If you are close to one of the endpoints you should verify with your unit that the image is the proper size at the proper distance.
For your own customized screen chart, please click here (on the
Digital Keystone Correction
Keystoning is when the projected image is noticeably wider on either the top or bottom. There are two ways to correct this:
1.Press Menu on the remote control or projector, then select the Display menu (first menu bar button on the left), then adjust the sliding bar labeled Keystone, as needed.
2.Use the Keystone buttons on the external control pad. Pressing the + button will correct keystoning at the top of the image. Pressing the - button will correct keystoning at the bottom of the image.
Menu
Menu ![]()
Keystone | 128 |
Brightness | 128 |
Contrast | 128 |
Color Balance | 1 |
or
- KEYSTONE +
© 3M IPC 2001 | 3M™ Personal Projector MP7630B/MP7730B |
13