TURNING ON THE POWER (continued)
Selecting an Input Signal
5
Using the remote control
If selecting RGB input
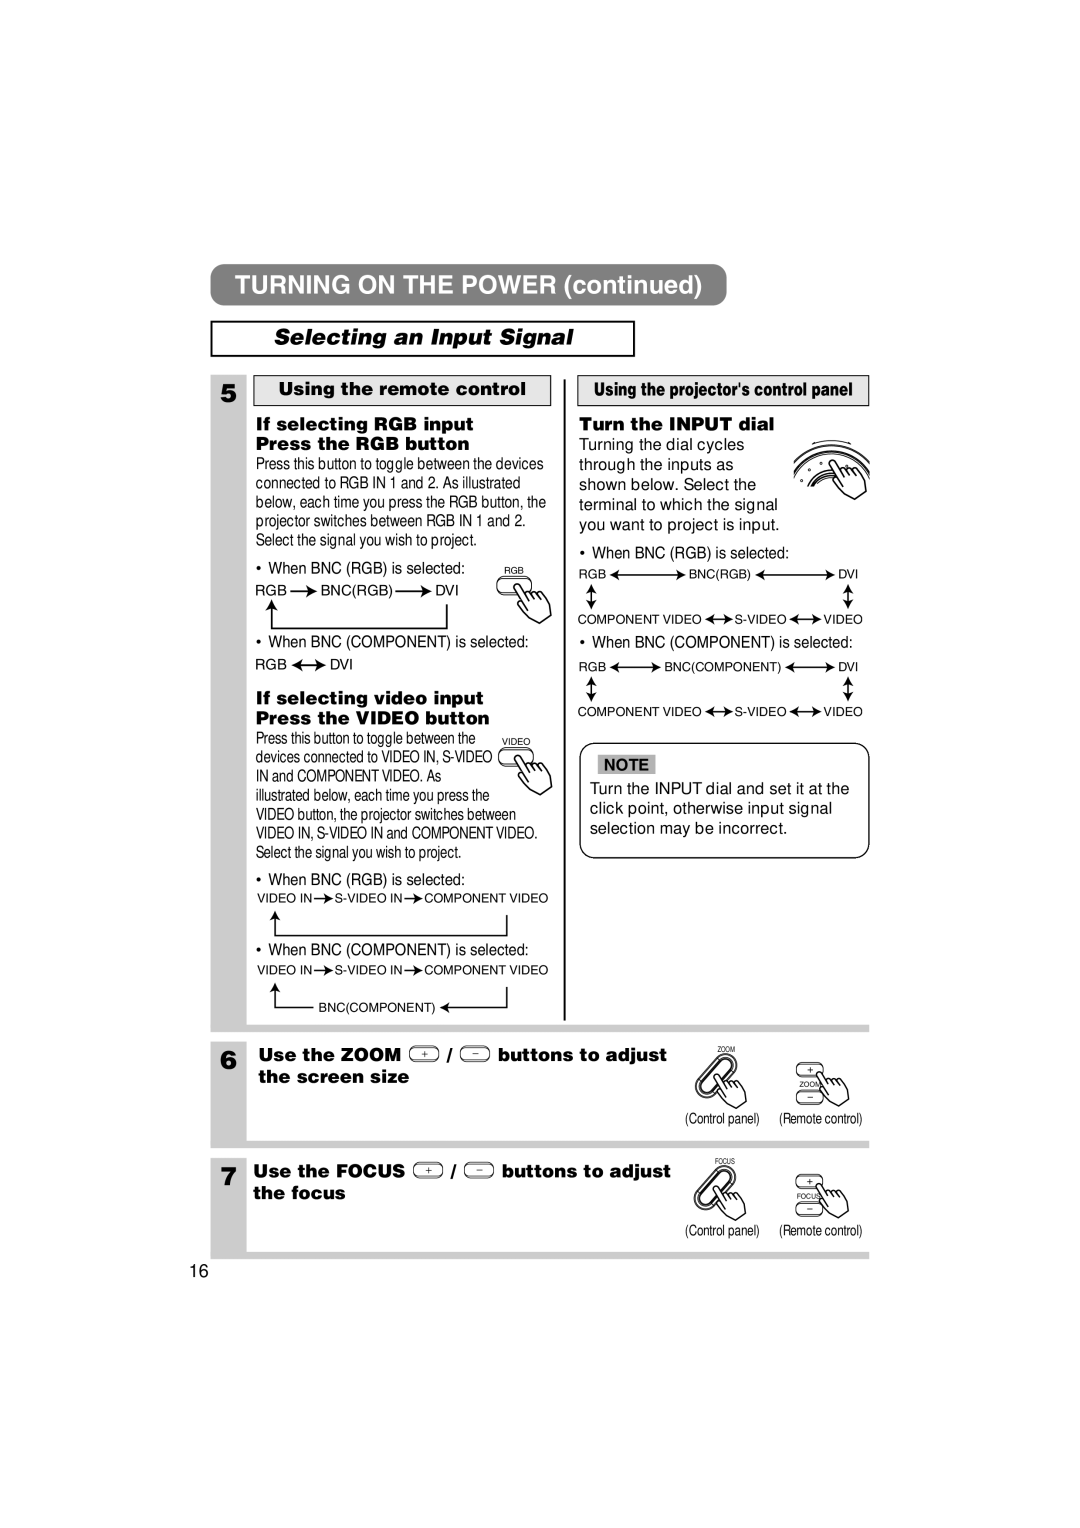
Press the RGB button
Press this button to toggle between the devices connected to RGB IN 1 and 2. As illustrated below, each time you press the RGB button, the projector switches between RGB IN 1 and 2. Select the signal you wish to project.
• When BNC (RGB) is selected: | RGB |
RGB ![]() BNC(RGB)
BNC(RGB) ![]() DVI
DVI
•When BNC (COMPONENT) is selected:
RGB ![]()
![]() DVI
DVI
If selecting video input Press the VIDEO button
Press this button to toggle between the | VIDEO |
devices connected to VIDEO IN, |
|
IN and COMPONENT VIDEO. As |
|
illustrated below, each time you press the |
|
VIDEO button, the projector switches between VIDEO IN,
•When BNC (RGB) is selected:
VIDEO IN ![]() S-VIDEO
S-VIDEO![]() COMPONENT VIDEO
COMPONENT VIDEO
•When BNC (COMPONENT) is selected:
VIDEO IN ![]() S-VIDEO
S-VIDEO![]() COMPONENT VIDEO
COMPONENT VIDEO
![]() BNC(COMPONENT)
BNC(COMPONENT) ![]()
![]()
Using the projector's control panel
Turn the INPUT dial
Turning the dial cycles through the inputs as shown below. Select the terminal to which the signal you want to project is input.
•When BNC (RGB) is selected:
RGB ![]()
![]() BNC(RGB)
BNC(RGB) ![]()
![]() DVI
DVI
COMPONENT VIDEO ![]()
![]() S-VIDEO
S-VIDEO![]()
![]() VIDEO
VIDEO
•When BNC (COMPONENT) is selected:
RGB ![]()
![]() BNC(COMPONENT)
BNC(COMPONENT) ![]()
![]() DVI
DVI
COMPONENT VIDEO ![]()
![]() S-VIDEO
S-VIDEO![]()
![]() VIDEO
VIDEO
NOTE
Turn the INPUT dial and set it at the click point, otherwise input signal selection may be incorrect.
6 | Use the ZOOM | / | buttons to adjust | ZOOM |
|
|
| ||||
| the screen size |
|
|
| ZOOM |
|
|
|
| (Control panel) | (Remote control) |
7 | Use the FOCUS | / | buttons to adjust | FOCUS |
|
|
| ||||
| the focus |
|
|
| FOCUS |
|
|
|
| (Control panel) | (Remote control) |
16