(English)
Installing and Removing XFP Module
The following is described how to install and remove
IMPORTANT:
・Attach the dust covers to all vacant LC connectors to protect them
from contamination, if you store or transport the Switch Module which the XFP modules are installed.
・ Optical power and sensitivity may be lower and cause malfunction by coming into contact with contamination.
・ Install the XFP module to the XFP module slot straight. Do not force
to install it to avoid damage the module. | XFP Module | |
| Dust cover | |
|
| |
|
|
|
![]() WARNING
WARNING
Avoid direct look into the laser beam.
The
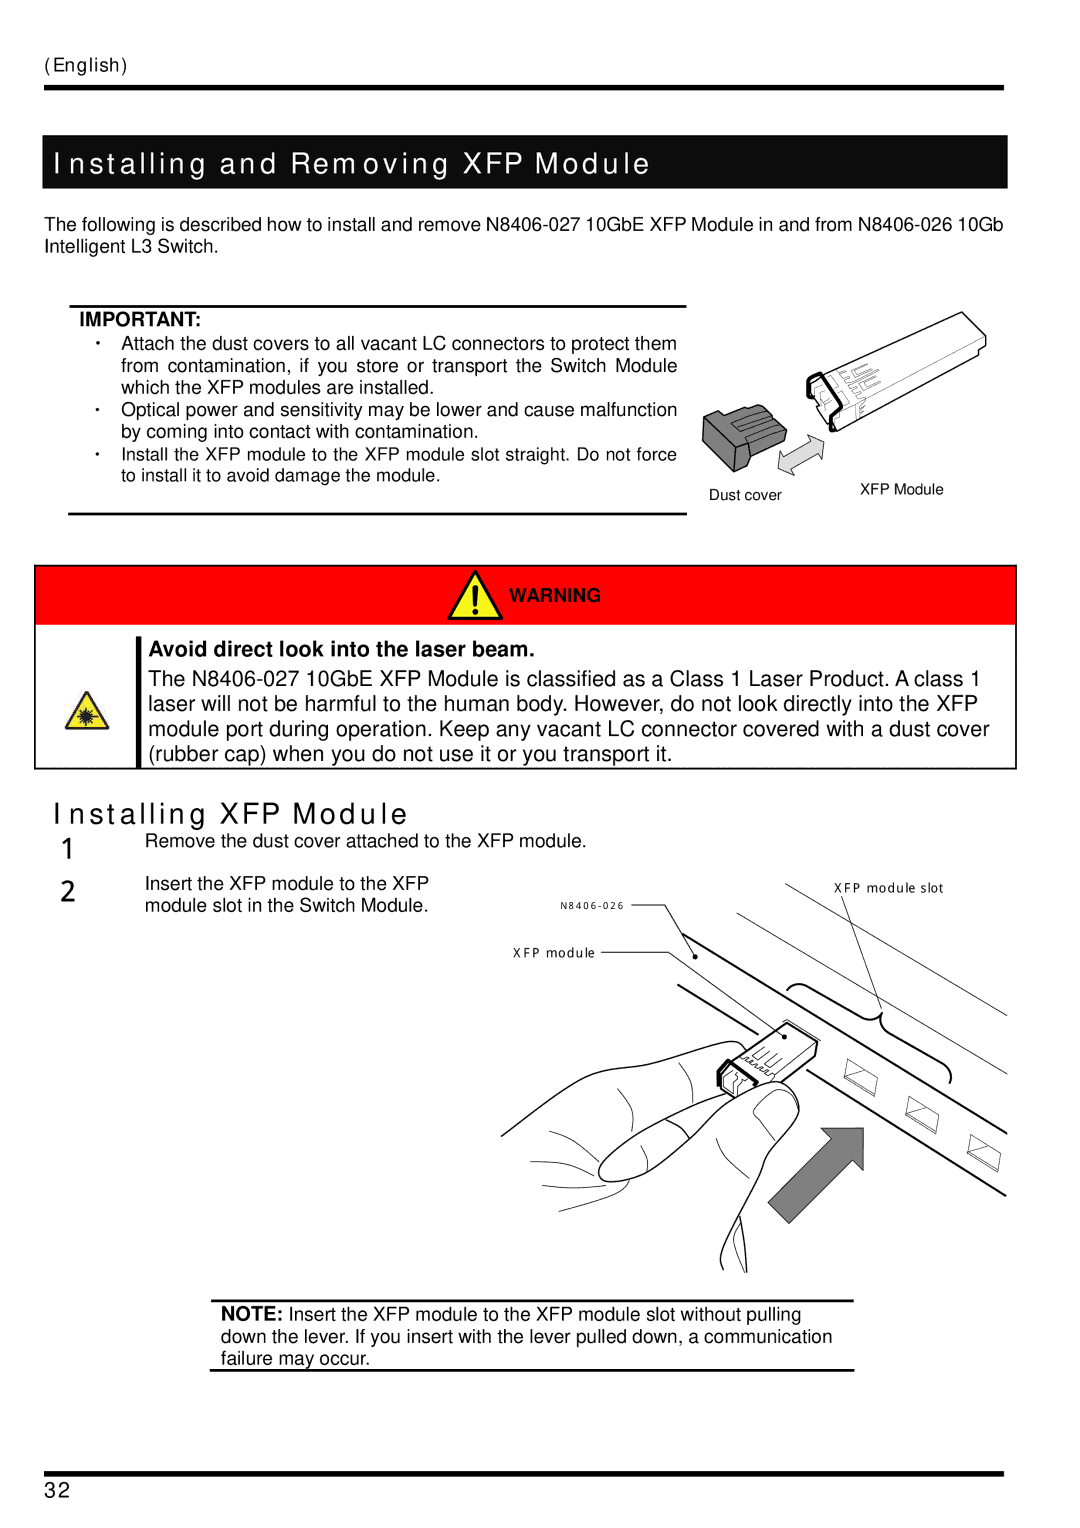
Installing XFP Module
1
2
Remove the dust cover attached to the XFP module.
Insert the XFP module to the XFP | XFPmoduleslot |
module slot in the Switch Module. |
XFPmodule
NOTE: Insert the XFP module to the XFP module slot without pulling down the lever. If you insert with the lever pulled down, a communication failure may occur.
32