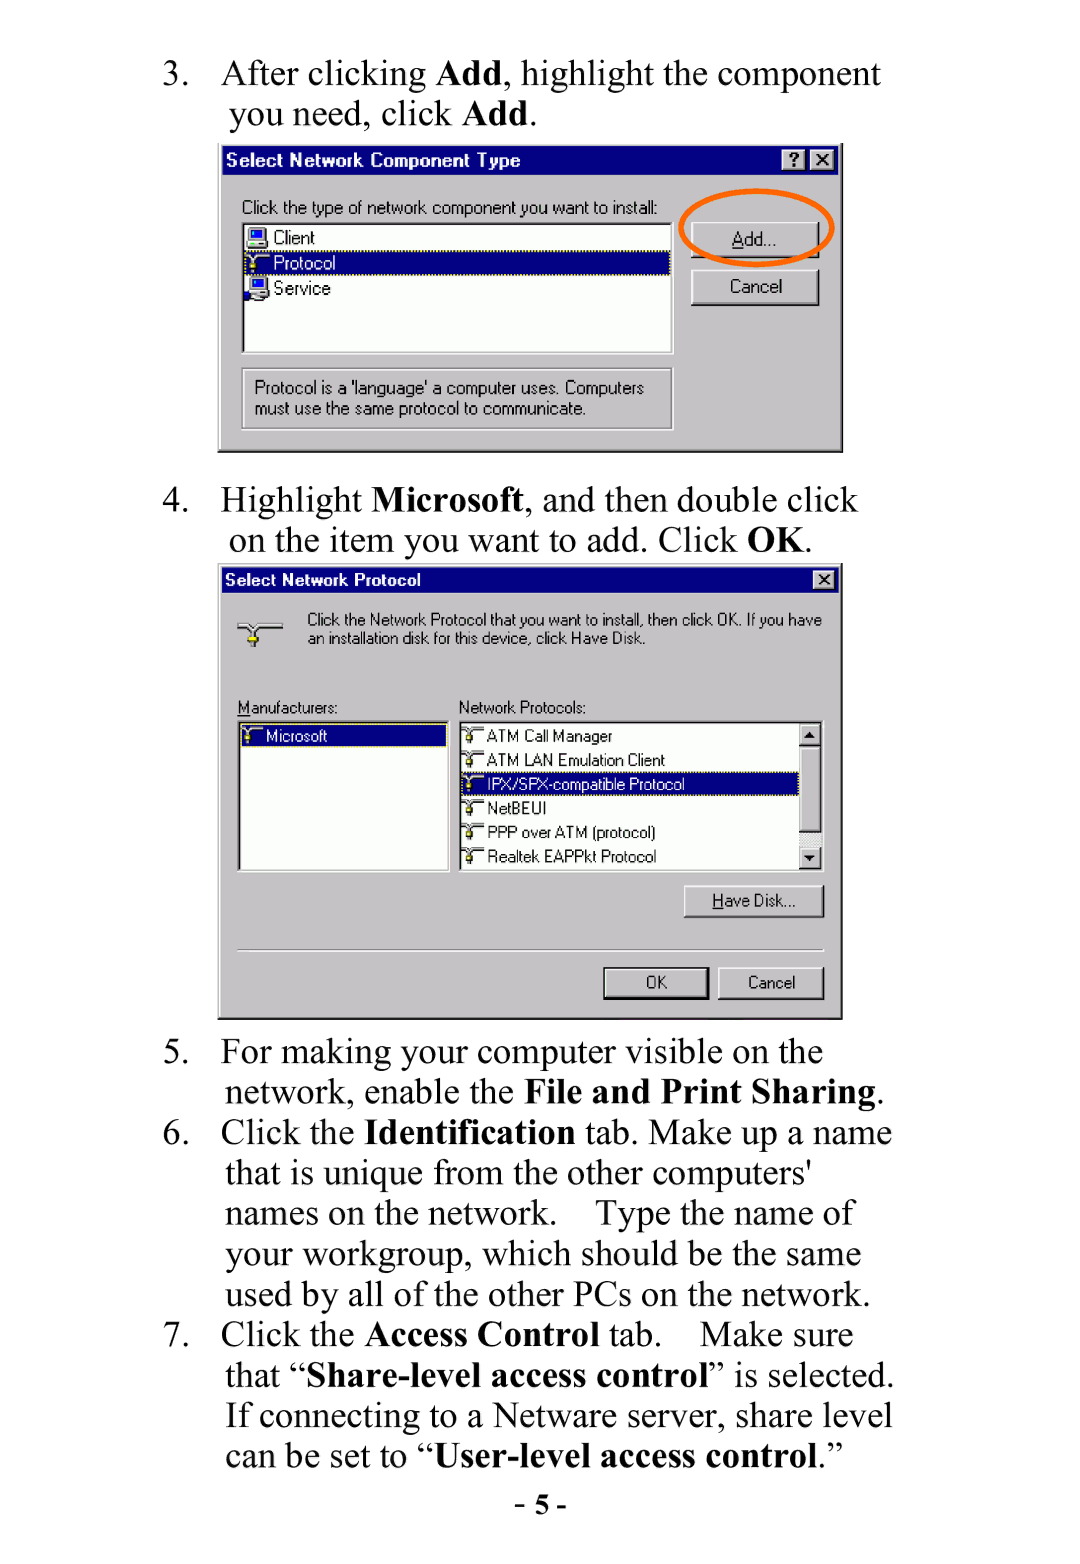
3.After clicking Add, highlight the component you need, click Add.
4.Highlight Microsoft, and then double click on the item you want to add. Click OK.
5.For making your computer visible on the network, enable the File and Print Sharing.
6.Click the Identification tab. Make up a name that is unique from the other computers' names on the network. Type the name of your workgroup, which should be the same used by all of the other PCs on the network.
7.Click the Access Control tab. Make sure that
-5 -