Acer |
| Acer |
|
|
| Assembly and Disassembly (continue) |
|
| |
|
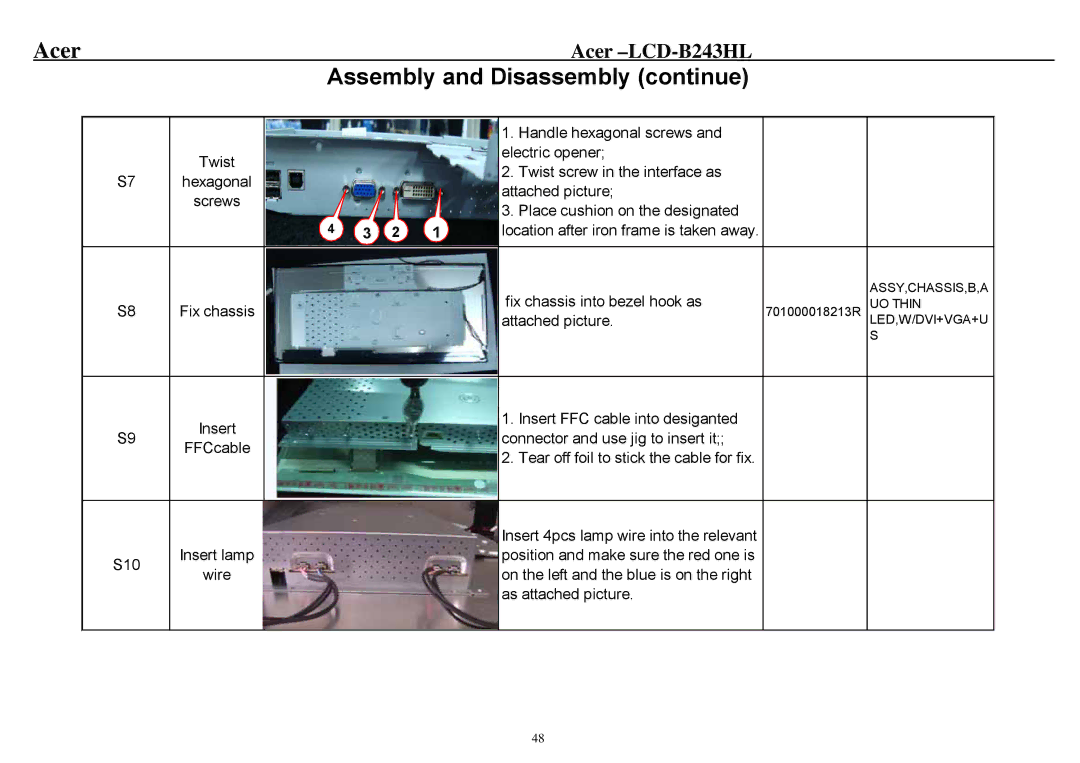
| 1. Handle hexagonal screws and |
|
|
| Twist | electric opener; |
|
|
| 2. Twist screw in the interface as |
|
| |
S7 | hexagonal |
|
| |
attached picture; |
|
| ||
| screws |
|
| |
| 3. Place cushion on the designated |
|
| |
|
|
|
| |
| 4 3 2 1 | location after iron frame is taken away. |
|
|
|
| fix chassis into bezel hook as |
| ASSY,CHASSIS,B,A |
S8 | Fix chassis | 701000018213R | UO THIN | |
|
| attached picture. |
| LED,W/DVI+VGA+U |
|
|
|
| S |
| Insert | 1. | Insert FFC cable into desiganted | |
S9 | connector and use jig to insert it;; | |||
FFCcable | ||||
| 2. | Tear off foil to stick the cable for fix. | ||
|
| |||
|
| Insert 4pcs lamp wire into the relevant | |
S10 | Insert lamp | position and make sure the red one is | |
wire | on the left and the blue is on the right | ||
| |||
|
| as attached picture. |
48
