Front Panel Operation and Functions
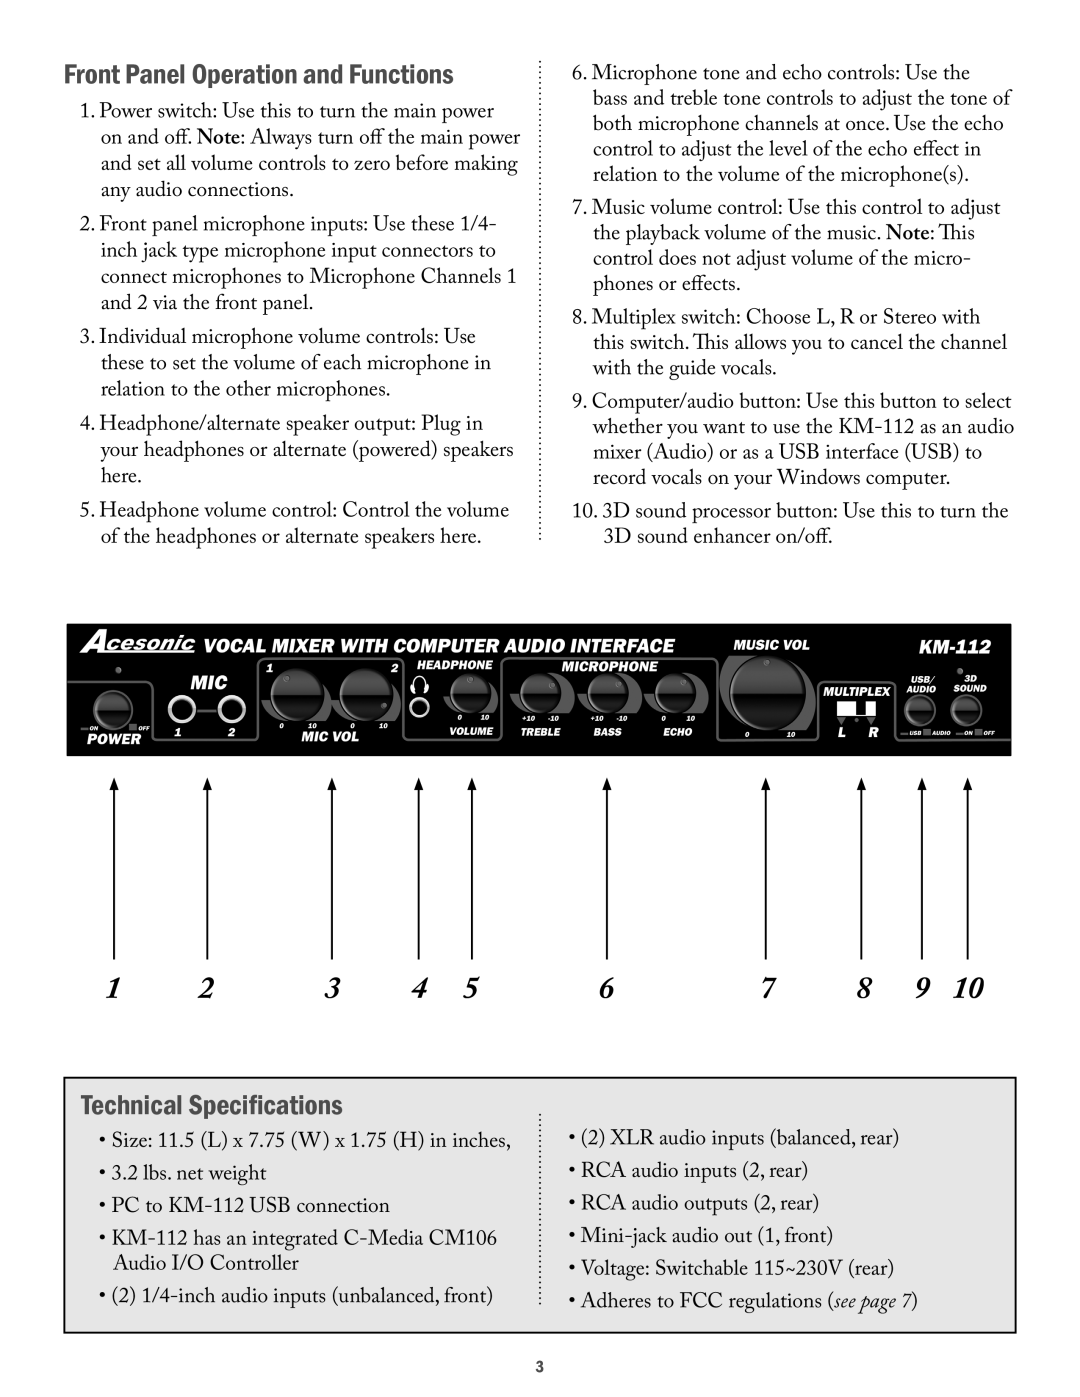
1. Power switch: Use this to turn the main power on and off. Note: Always turn off the main power and set all volume controls to zero before making any audio connections.
2.Front panel microphone inputs: Use these 1/4- inch jack type microphone input connectors to connect microphones to Microphone Channels 1 and 2 via the front panel.
3.Individual microphone volume controls: Use these to set the volume of each microphone in relation to the other microphones.
4.Headphone/alternate speaker output: Plug in your headphones or alternate (powered) speakers here.
5.Headphone volume control: Control the volume of the headphones or alternate speakers here.
6.Microphone tone and echo controls: Use the bass and treble tone controls to adjust the tone of both microphone channels at once. Use the echo control to adjust the level of the echo effect in relation to the volume of the microphone(s).
7.Music volume control: Use this control to adjust
the playback volume of the music. Note: This control does not adjust volume of the micro- phones or effects.
8.Multiplex switch: Choose L, R or Stereo with this switch. This allows you to cancel the channel with the guide vocals.
9.Computer/audio button: Use this button to select whether you want to use the
10.3D sound processor button: Use this to turn the
3D sound enhancer on/off.
1 | 2 | 3 | 4 | 5 | 6 | 7 | 8 | 9 | 10 |
Technical Specifications
•Size: 11.5 (L) x 7.75 (W) x 1.75 (H) in inches,
•3.2 lbs. net weight
•PC to
•
•(2)
•(2) XLR audio inputs (balanced, rear)
•RCA audio inputs (2, rear)
•RCA audio outputs (2, rear)
•
•Voltage: Switchable 115~230V (rear)
•Adheres to FCC regulations (see page 7)
3