ADJUSTING THE TRANSMITTER
|
|
|
|
|
|
|
|
|
|
|
|
|
|
|
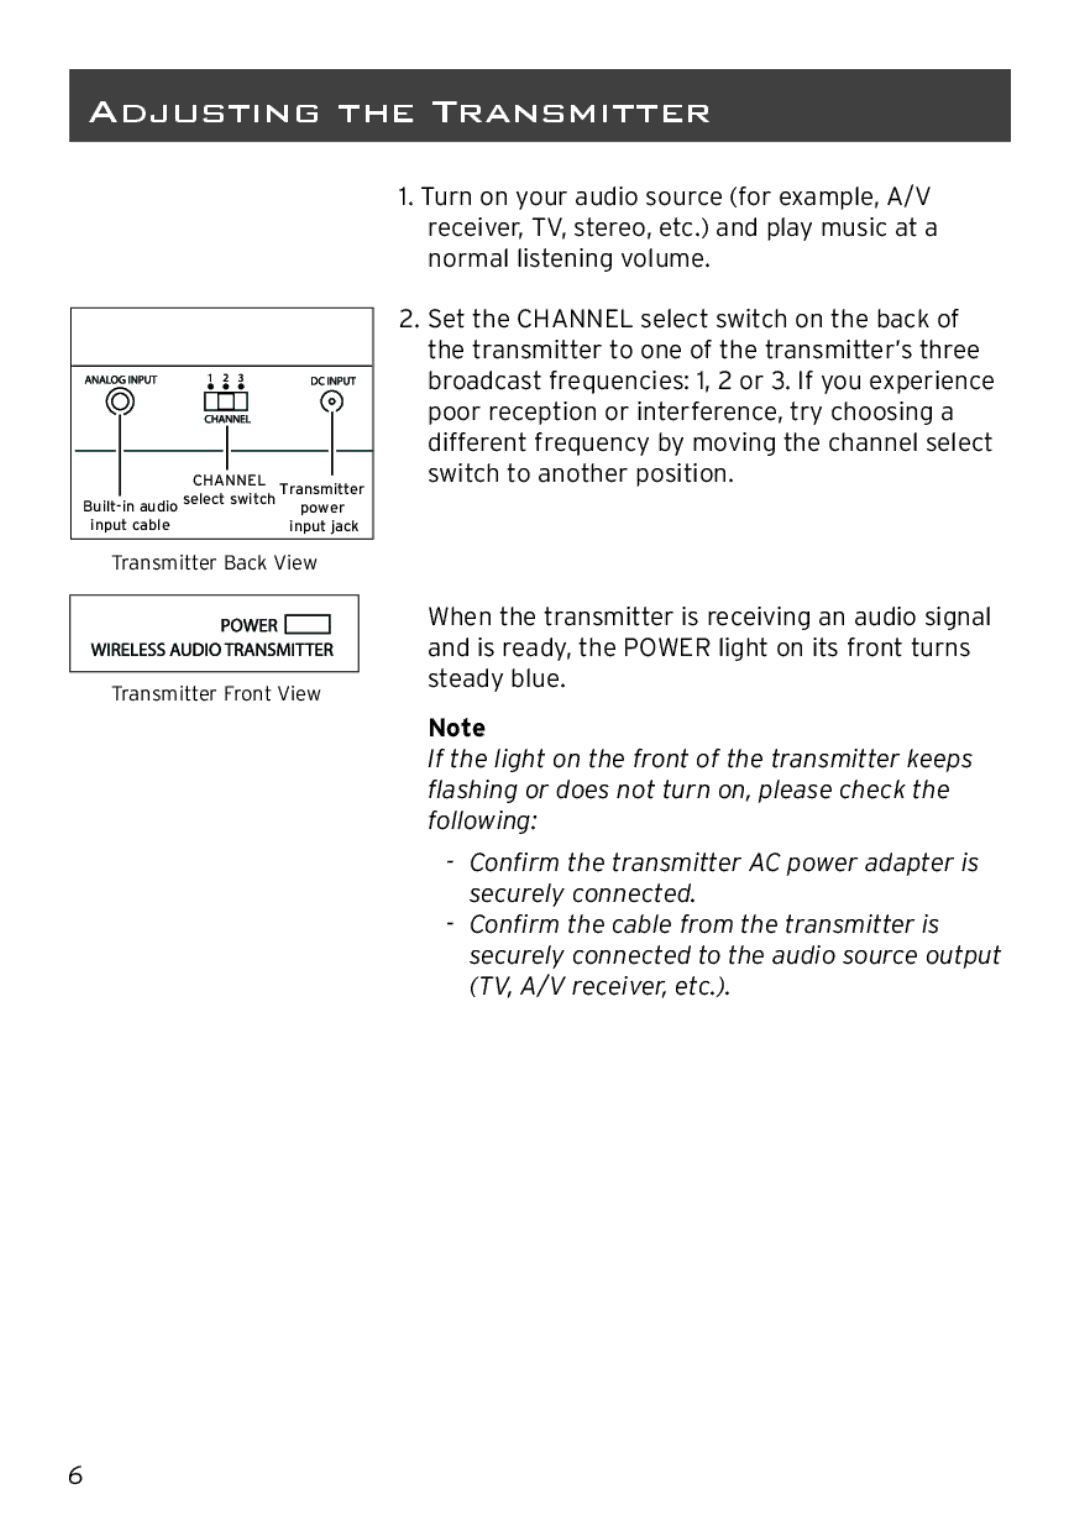
| CHANNEL | Transmitter | ||
Built- | in audio select switch | power | ||
input cable | input jack | |||
|
|
|
|
|
Transmitter Back View
Transmitter Front View
1.Turn on your audio source (for example, A/V receiver, TV, stereo, etc.) and play music at a normal listening volume.
2.Set the CHANNEL select switch on the back of the transmitter to one of the transmitter’s three broadcast frequencies: 1, 2 or 3. If you experience poor reception or interference, try choosing a different frequency by moving the channel select switch to another position.
When the transmitter is receiving an audio signal and is ready, the POWER light on its front turns steady blue.
Note
If the light on the front of the transmitter keeps flashing or does not turn on, please check the following:
-Confirm the transmitter AC power adapter is securely connected.
-Confirm the cable from the transmitter is securely connected to the audio source output (TV, A/V receiver, etc.).
6