3-in-1 Sensor Installation Guidelines
INSTALLATION HEIGHT Mount the sensor at least 5 feet (1.5 meters) off the ground (higher is better for wind measurement) in an open area. Secure to fence post, 2”x4” wood, 3/4” pole, etc. (not included)
LEVEL INSTALLATION Use a bubble level (not included) to ensure level installation for accurate wind measurement.
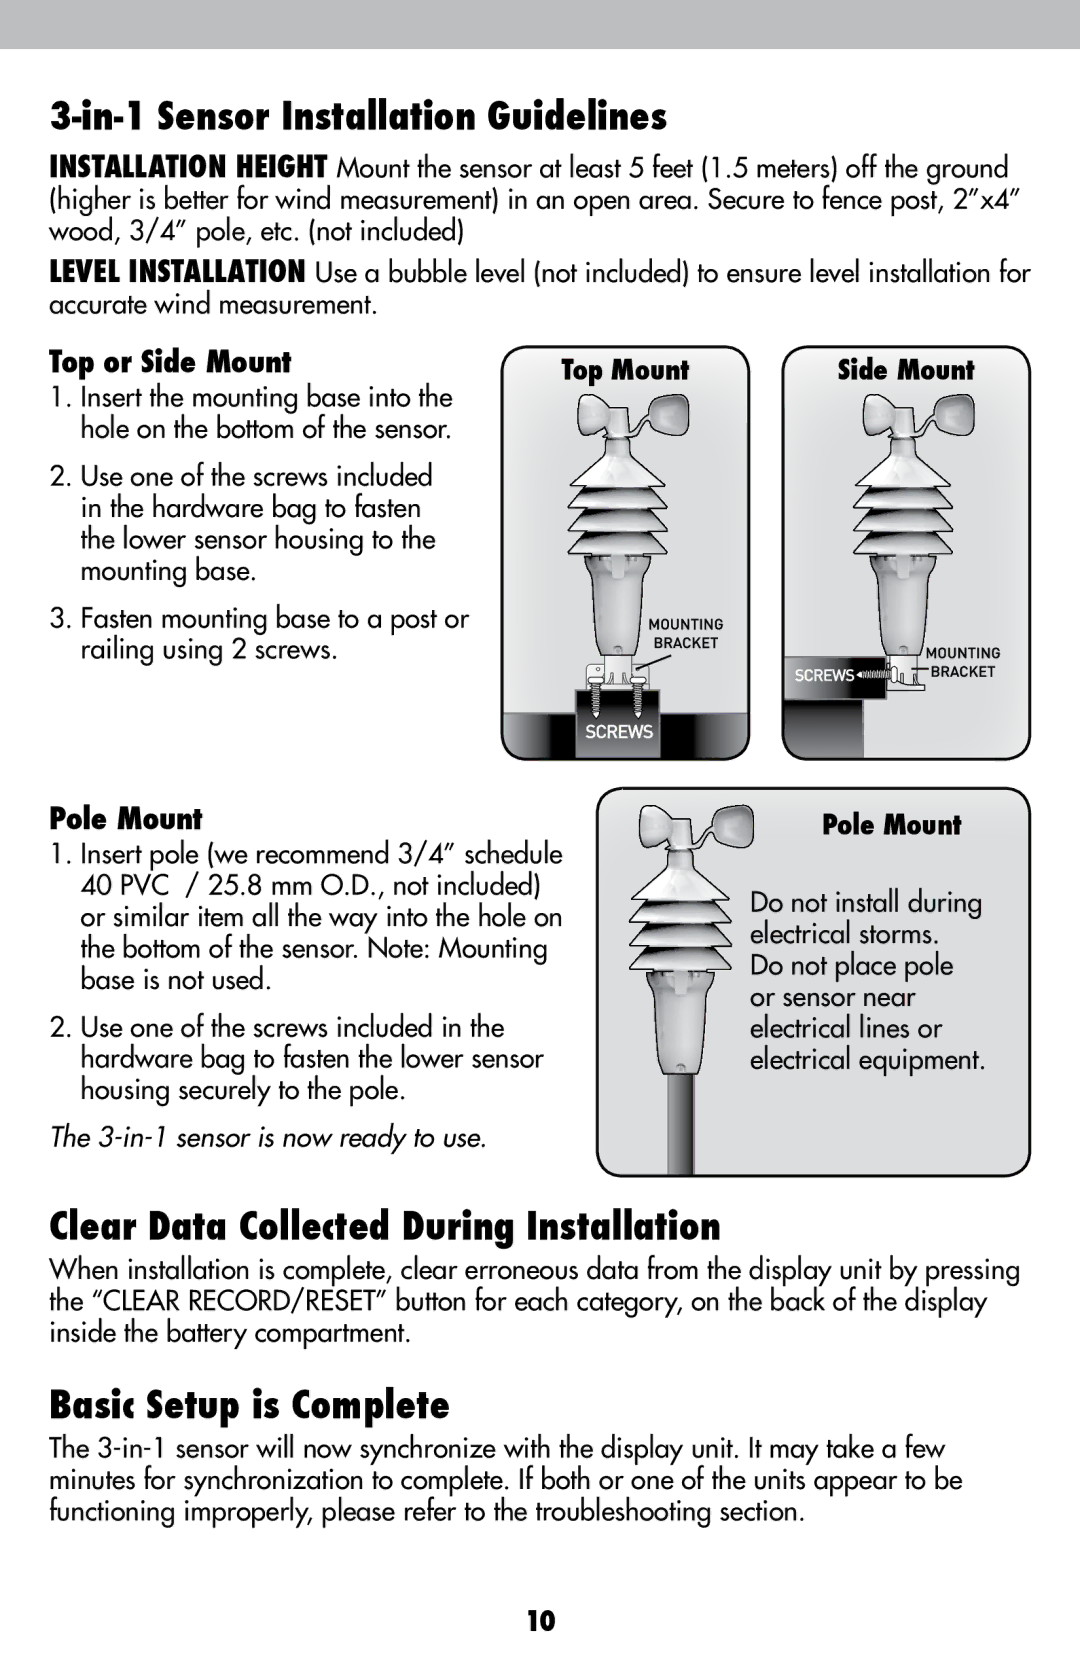
Top or Side Mount | Top Mount | Side Mount | |
1. | Insert the mounting base into the |
|
|
| hole on the bottom of the sensor. |
|
|
2. | Use one of the screws included |
|
|
| in the hardware bag to fasten |
|
|
| the lower sensor housing to the |
|
|
| mounting base. |
|
|
3. Fasten mounting base to a post or railing using 2 screws.
Pole Mount
1.Insert pole (we recommend 3/4” schedule 40 PVC / 25.8 mm O.D., not included) or similar item all the way into the hole on the bottom of the sensor. Note: Mounting base is not used.
2.Use one of the screws included in the hardware bag to fasten the lower sensor housing securely to the pole.
The
Pole Mount
Do not install during electrical storms. Do not place pole or sensor near electrical lines or electrical equipment.
Clear Data Collected During Installation
When installation is complete, clear erroneous data from the display unit by pressing the “CLEAR RECORD/RESET” button for each category, on the back of the display inside the battery compartment.
Basic Setup is Complete
The
10