.
2.02Powering Up the NT1 Type 400 Standalone
To
1.Plug the power cord into a grounded, 120 VAC, 60 Hz recepta- cle.
2.Verify that the ERROR indicators are illuminated. After about 15 seconds, the READY indicators should flash at a 1 Hz rate. Should any of these indicators fail to operate as stated, see Sec- tion 3.0 Troubleshooting on page 5.
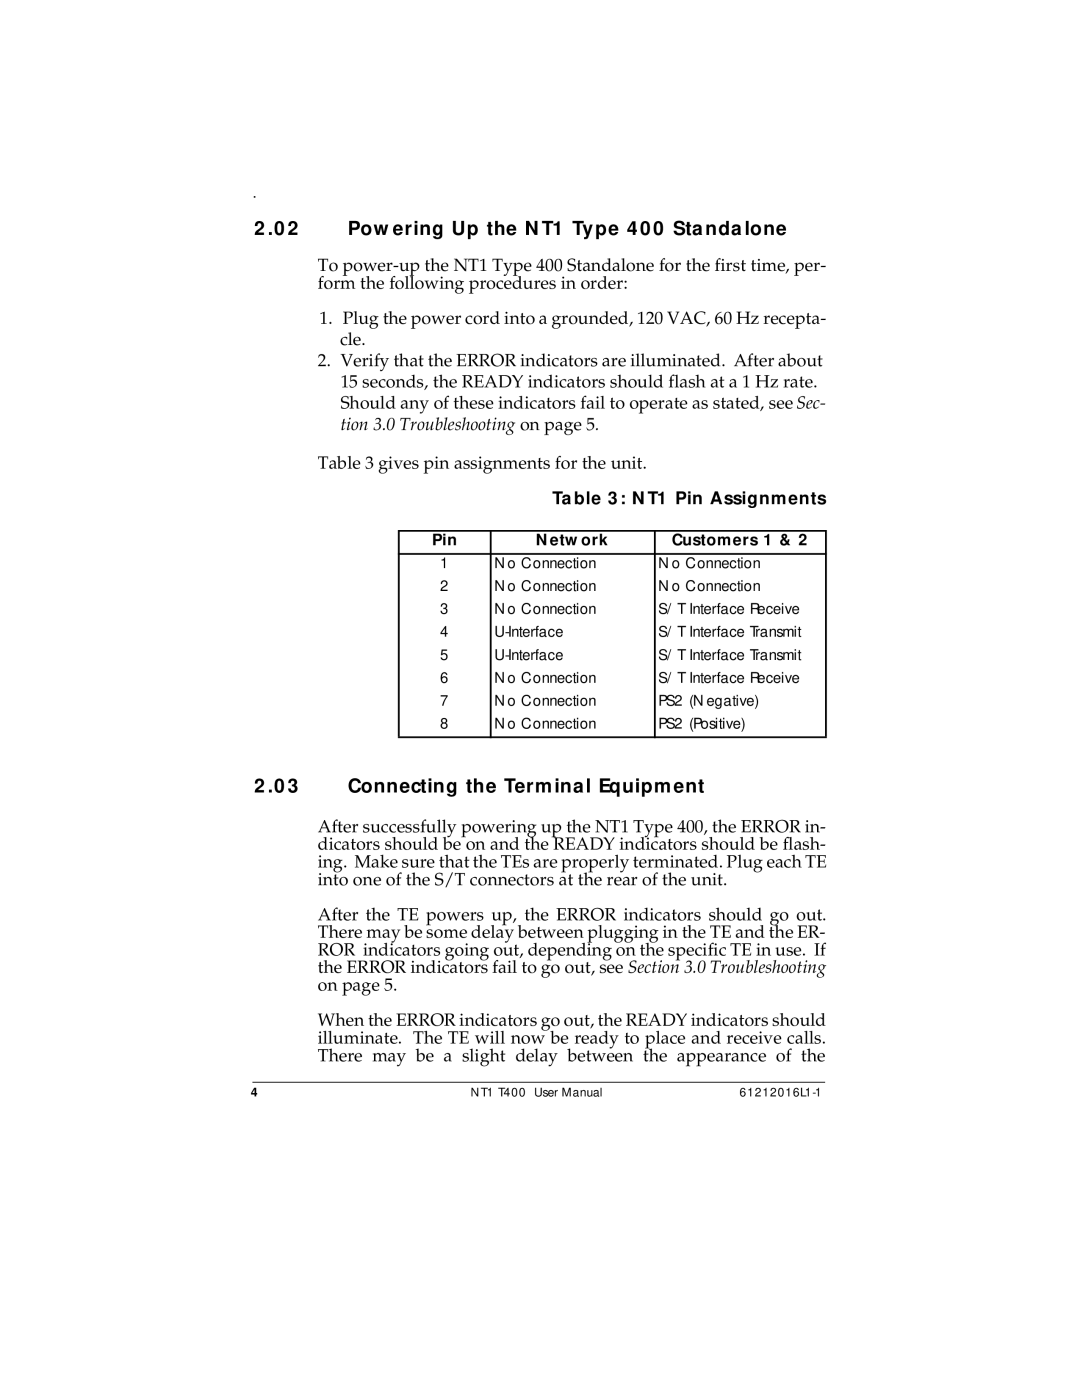
Table 3 gives pin assignments for the unit.
Table 3: NT1 Pin Assignments
Pin | Network | Customers 1 & 2 |
1 | No Connection | No Connection |
2 | No Connection | No Connection |
3 | No Connection | S/T Interface Receive |
4 | S/T Interface Transmit | |
5 | S/T Interface Transmit | |
6 | No Connection | S/T Interface Receive |
7 | No Connection | PS2 (Negative) |
8 | No Connection | PS2 (Positive) |
|
|
|
2.03Connecting the Terminal Equipment
After successfully powering up the NT1 Type 400, the ERROR in- dicators should be on and the READY indicators should be flash- ing. Make sure that the TEs are properly terminated. Plug each TE into one of the S/T connectors at the rear of the unit.
After the TE powers up, the ERROR indicators should go out. There may be some delay between plugging in the TE and the ER- ROR indicators going out, depending on the specific TE in use. If the ERROR indicators fail to go out, see Section 3.0 Troubleshooting on page 5.
When the ERROR indicators go out, the READY indicators should illuminate. The TE will now be ready to place and receive calls. There may be a slight delay between the appearance of the
4 | NT1 T400 User Manual |