TIMER OPERATIONS
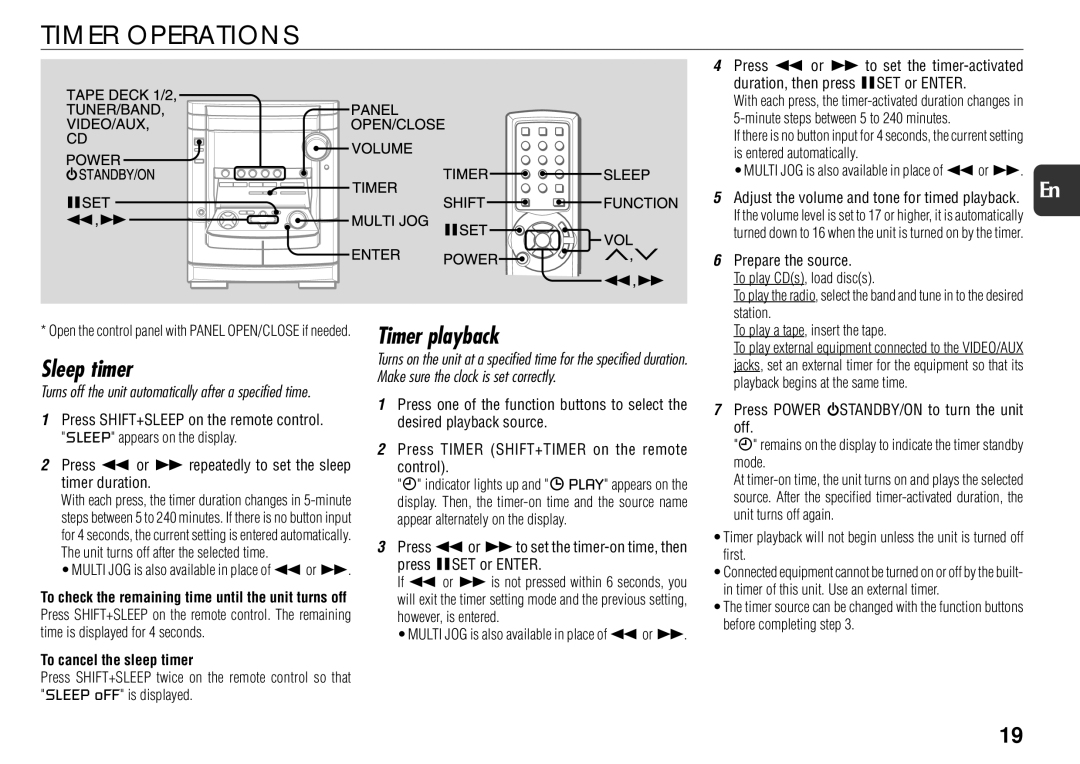
* Open the control panel with PANEL OPEN/CLOSE if needed.
Sleep timer
Turns off the unit automatically after a specified time.
1Press SHIFT+SLEEP on the remote control. "SLEEP" appears on the display.
2Press f or g repeatedly to set the sleep timer duration.
With each press, the timer duration changes in
• MULTI JOG is also available in place of for g.
To check the remaining time until the unit turns off Press SHIFT+SLEEP on the remote control. The remaining time is displayed for 4 seconds.
To cancel the sleep timer
Press SHIFT+SLEEP twice on the remote control so that "SLEEP oFF" is displayed.
Timer playback
Turns on the unit at a specified time for the specified duration. Make sure the clock is set correctly.
1Press one of the function buttons to select the desired playback source.
2Press TIMER (SHIFT+TIMER on the remote
control).
"5" indicator lights up and "![]() PLAY" appears on the display. Then, the
PLAY" appears on the display. Then, the
3Press for gto set the
If f or g is not pressed within 6 seconds, you will exit the timer setting mode and the previous setting, however, is entered.
• MULTI JOG is also available in place of for g.
4Press f or g to set the
With each press, the
If there is no button input for 4 seconds, the current setting is entered automatically.
• MULTI JOG is also available in place of for g.
5Adjust the volume and tone for timed playback. En
If the volume level is set to 17 or higher, it is automatically turned down to 16 when the unit is turned on by the timer.
6Prepare the source.
To play CD(s), load disc(s).
To play the radio, select the band and tune in to the desired station.
To play a tape, insert the tape.
To play external equipment connected to the VIDEO/AUX jacks, set an external timer for the equipment so that its playback begins at the same time.
7Press POWER 6STANDBY/ON to turn the unit off.
"5" remains on the display to indicate the timer standby mode.
At
•Timer playback will not begin unless the unit is turned off first.
•Connected equipment cannot be turned on or off by the built- in timer of this unit. Use an external timer.
•The timer source can be changed with the function buttons before completing step 3.
19
