XC-RW700 specifications
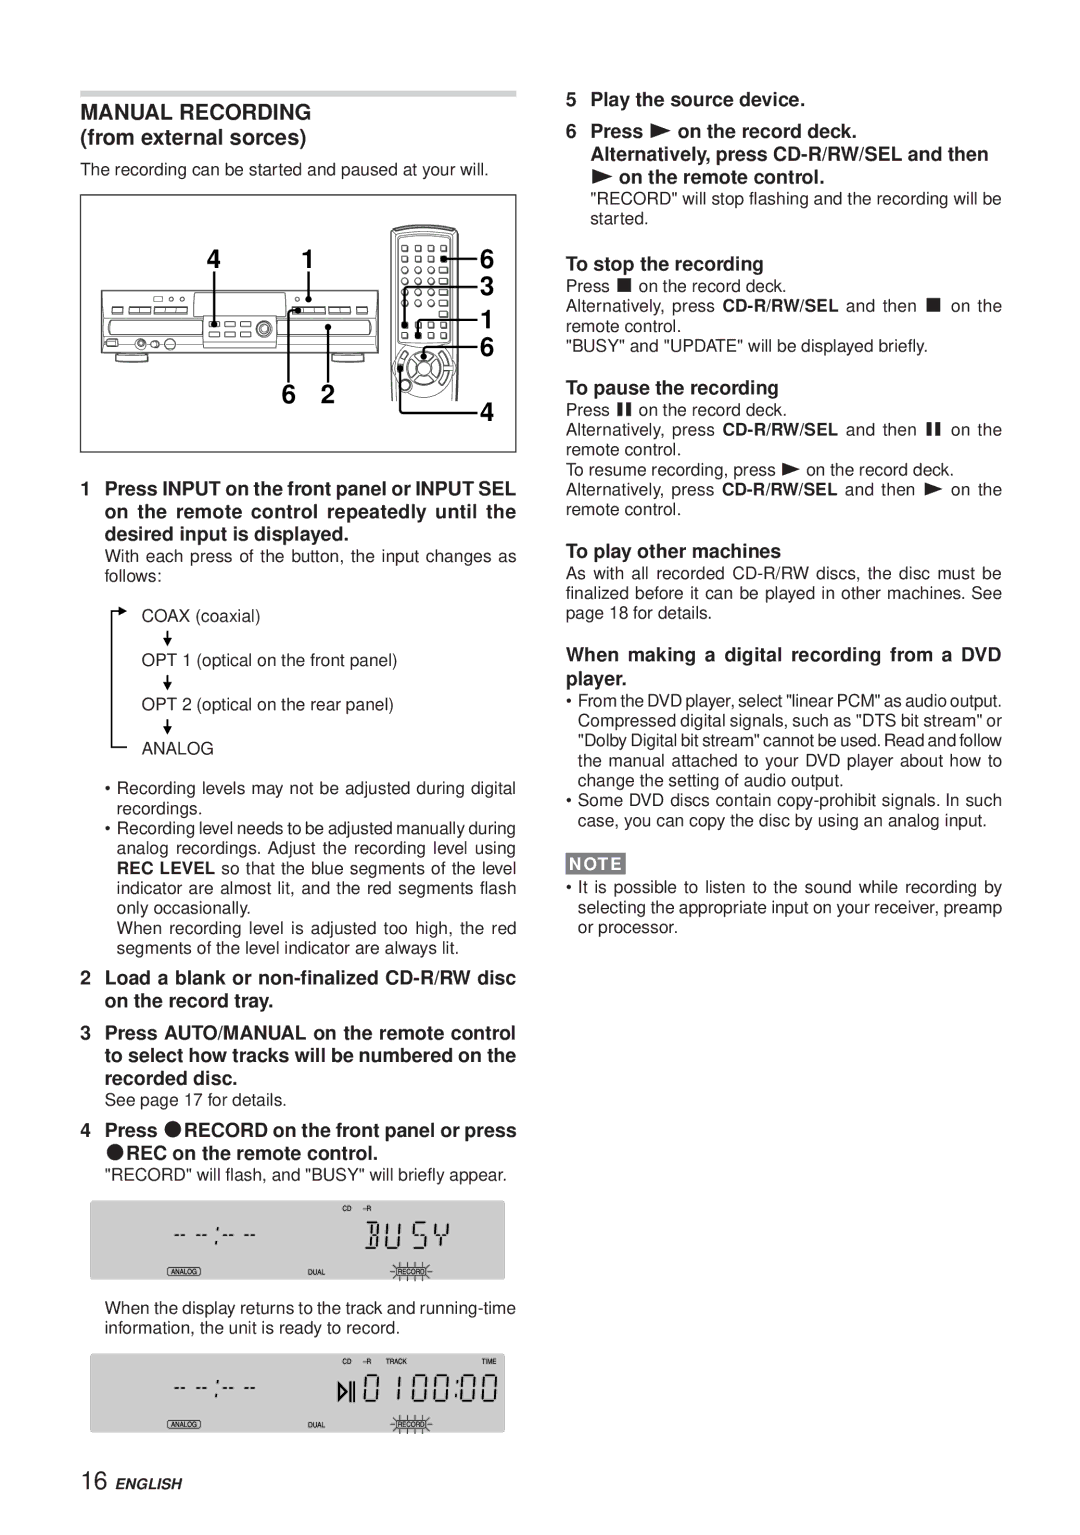
The Aiwa XC-RW700 is a compact disc recorder that embodies the blend of advanced technology and user-friendly features, making it a solid choice for audiophiles and casual listeners alike. Designed with a robust build quality and a sleek aesthetic, this device not only serves as a functional component in any audio setup but also adds an element of style.One of the standout features of the XC-RW700 is its dual recording capability. Users can easily record audio onto CD-R and CD-RW discs, allowing for flexibility when it comes to managing media. The device supports a wide variety of formats, including standard CDs, which ensures compatibility with most audio sources. The inclusion of a high-quality digital-to-analog converter delivers exceptional sound clarity, elevating the listening experience for users.
In terms of technology, the Aiwa XC-RW700 integrates a unique auto track function that automatically detects track changes during recording sessions. This feature simplifies the process of disc creation, leaving users with well-organized and easily navigable media. Furthermore, users can benefit from the built-in programming and editing functions, allowing for personalized playlists and seamless transitions between tracks.
Another important characteristic is the XC-RW700's integrated CD player, which not only plays audio CDs but also supports MP3 CD playback. This versatility is particularly appealing to users who have transitioned from traditional CDs to digital formats but still want to enjoy their favorite tracks on physical media. The front-loading tray design enhances user convenience, facilitating quick and easy disc insertion and removal.
The device also comes equipped with various connectivity options, such as optical and RCA outputs, ensuring compatibility with a broad range of audio equipment. The ability to connect to external sources like televisions or sound systems means that users can enhance their listening experience further by integrating the XC-RW700 into their larger audio setups.
With a user-friendly interface, including a clear LCD display and straightforward control buttons, the Aiwa XC-RW700 is designed to make the recording and playback process as effortless as possible. Whether you are a beginner exploring the world of CD recording or an experienced user looking for a reliable and efficient machine, the Aiwa XC-RW700 delivers on all fronts, making it a noteworthy addition to any audio collection.