IB-4ADT adat Digital Interface Board for Z4/Z8/MPC4000
Thank you for your purchase of the
This interface board is made exclusively for the Z4/Z8 Samplers/MPC4000 Music Production Center to handle the
Refer to the Z4/Z8, MPC4000 Operator’s Manual for the details of operation.
Note: The
✽Installing the IB-4ADT
The
<To Service Technicians>
Install the
!Components
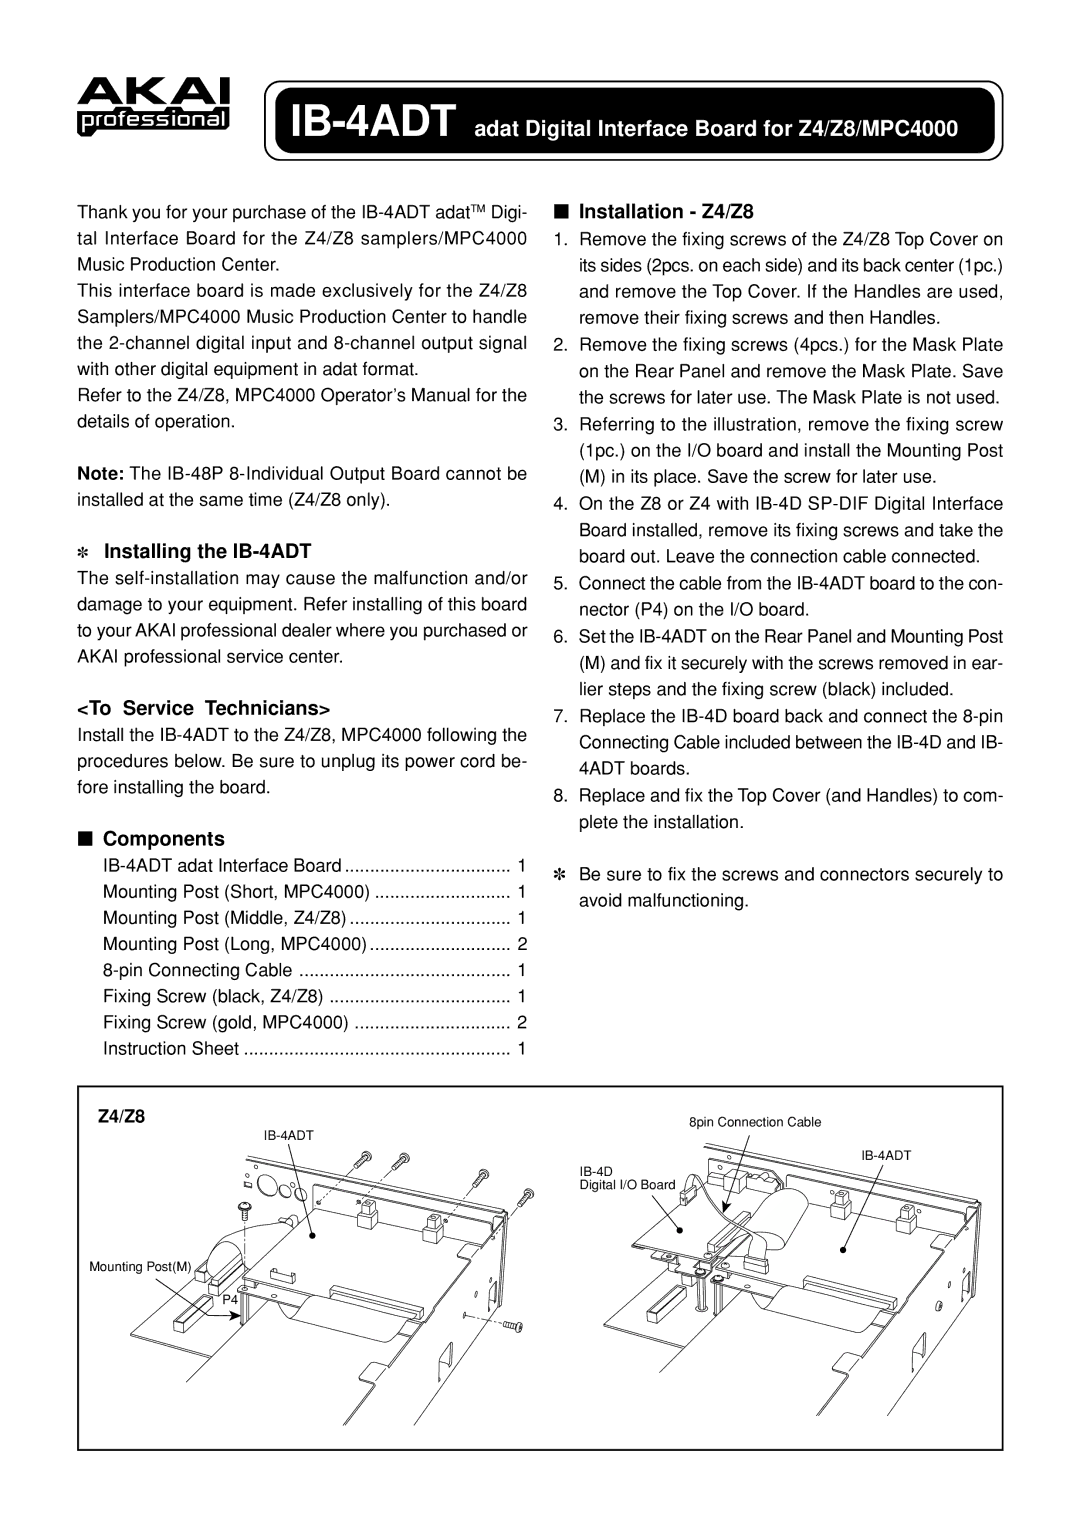
!Installation - Z4/Z8
1.Remove the fixing screws of the Z4/Z8 Top Cover on its sides (2pcs. on each side) and its back center (1pc.) and remove the Top Cover. If the Handles are used, remove their fixing screws and then Handles.
2.Remove the fixing screws (4pcs.) for the Mask Plate on the Rear Panel and remove the Mask Plate. Save the screws for later use. The Mask Plate is not used.
3.Referring to the illustration, remove the fixing screw (1pc.) on the I/O board and install the Mounting Post
(M)in its place. Save the screw for later use.
4.On the Z8 or Z4 with
5.Connect the cable from the
6.Set the
(M)and fix it securely with the screws removed in ear- lier steps and the fixing screw (black) included.
7.Replace the
8.Replace and fix the Top Cover (and Handles) to com- plete the installation.
1 | |
Mounting Post (Short, MPC4000) | 1 |
Mounting Post (Middle, Z4/Z8) | 1 |
Mounting Post (Long, MPC4000) | 2 |
1 | |
Fixing Screw (black, Z4/Z8) | 1 |
Fixing Screw (gold, MPC4000) | 2 |
Instruction Sheet | 1 |
✽Be sure to fix the screws and connectors securely to avoid malfunctioning.
Z4/Z8 | 8pin Connection Cable |
| |
| |
| |
| Digital I/O Board |
Mounting Post(M) |
|
| P4 |