ASSEMBLY
ASSEMBLY
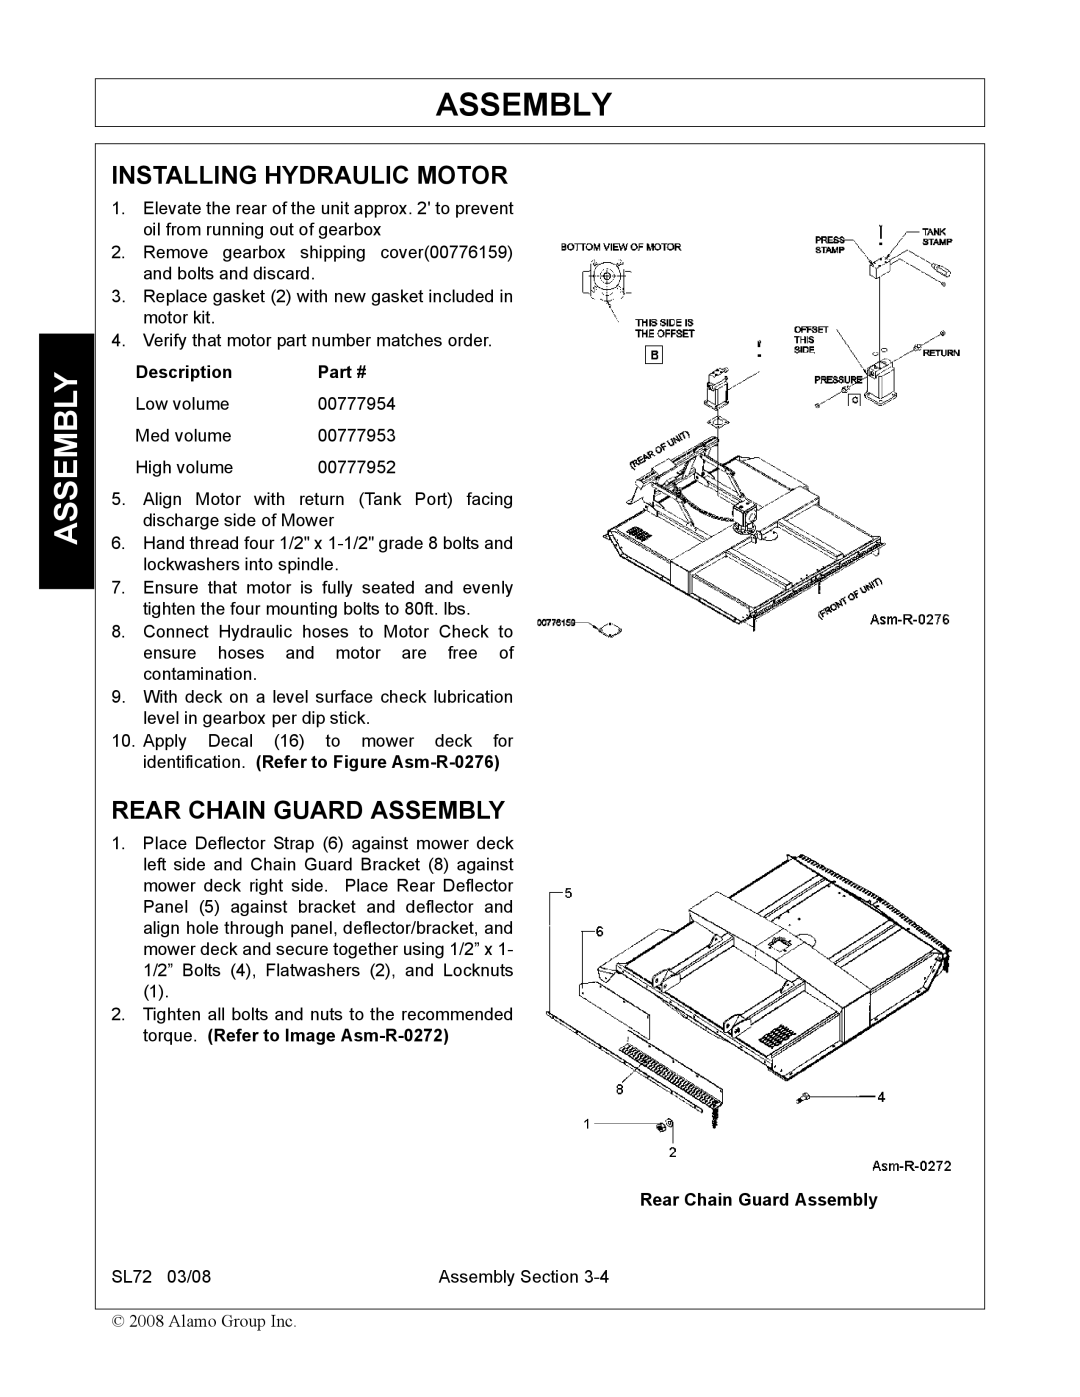
INSTALLING HYDRAULIC MOTOR
1.Elevate the rear of the unit approx. 2' to prevent oil from running out of gearbox
2.Remove gearbox shipping cover(00776159) and bolts and discard.
3.Replace gasket (2) with new gasket included in motor kit.
4.Verify that motor part number matches order.
Description | Part # |
Low volume | 00777954 |
Med volume | 00777953 |
High volume | 00777952 |
5.Align Motor with return (Tank Port) facing discharge side of Mower
6.Hand thread four 1/2" x
7.Ensure that motor is fully seated and evenly tighten the four mounting bolts to 80ft. lbs.
8.Connect Hydraulic hoses to Motor Check to ensure hoses and motor are free of contamination.
9.With deck on a level surface check lubrication level in gearbox per dip stick.
10.Apply Decal (16) to mower deck for identification. (Refer to Figure
REAR CHAIN GUARD ASSEMBLY
1.Place Deflector Strap (6) against mower deck left side and Chain Guard Bracket (8) against mower deck right side. Place Rear Deflector Panel (5) against bracket and deflector and align hole through panel, deflector/bracket, and mower deck and secure together using 1/2” x 1- 1/2” Bolts (4), Flatwashers (2), and Locknuts
(1).
2.Tighten all bolts and nuts to the recommended torque. (Refer to Image
Rear Chain Guard Assembly
SL72 03/08 | Assembly Section |
© 2008 Alamo Group Inc.