SPEAKER PLACEMENT
The placement of your speakers has a huge impact on how well they will perform in your studio.
Although nearfield studio monitors are designed to be more forgiving when it comes to placement, you should do your best to make sure they form an equilateral triangle relative to your head. In other words, make sure that each speaker is equally distant from both your head as well as the other speaker. Once each speaker has been placed, rotate the speakers slightly so that the drivers are pointing toward the engineer.
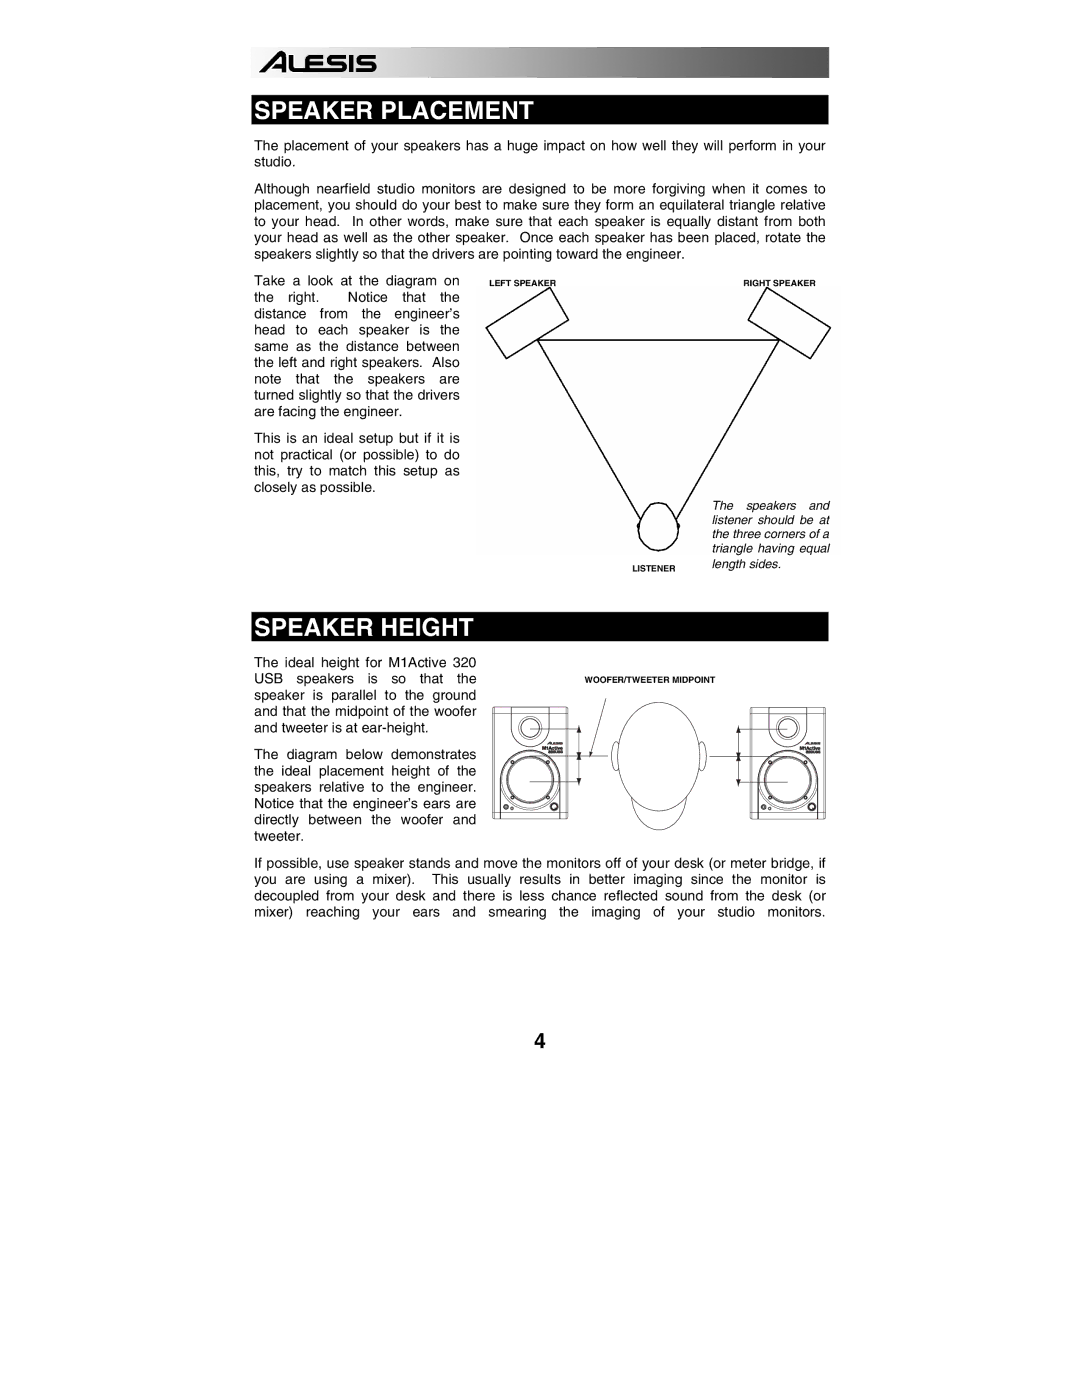
Take a look at the diagram on
the right. Notice that the distance from the engineer’s head to each speaker is the same as the distance between the left and right speakers. Also note that the speakers are turned slightly so that the drivers are facing the engineer.
This is an ideal setup but if it is not practical (or possible) to do this, try to match this setup as closely as possible.
LEFT SPEAKER | RIGHT SPEAKER |
| The speakers and |
| listener should be at |
| the three corners of a |
| triangle having equal |
LISTENER | length sides. |
SPEAKER HEIGHT
The ideal height for M1Active 320 USB speakers is so that the speaker is parallel to the ground and that the midpoint of the woofer and tweeter is at
The diagram below demonstrates the ideal placement height of the speakers relative to the engineer. Notice that the engineer’s ears are directly between the woofer and tweeter.
WOOFER/TWEETER MIDPOINT
If possible, use speaker stands and move the monitors off of your desk (or meter bridge, if you are using a mixer). This usually results in better imaging since the monitor is decoupled from your desk and there is less chance reflected sound from the desk (or mixer) reaching your ears and smearing the imaging of your studio monitors.
4