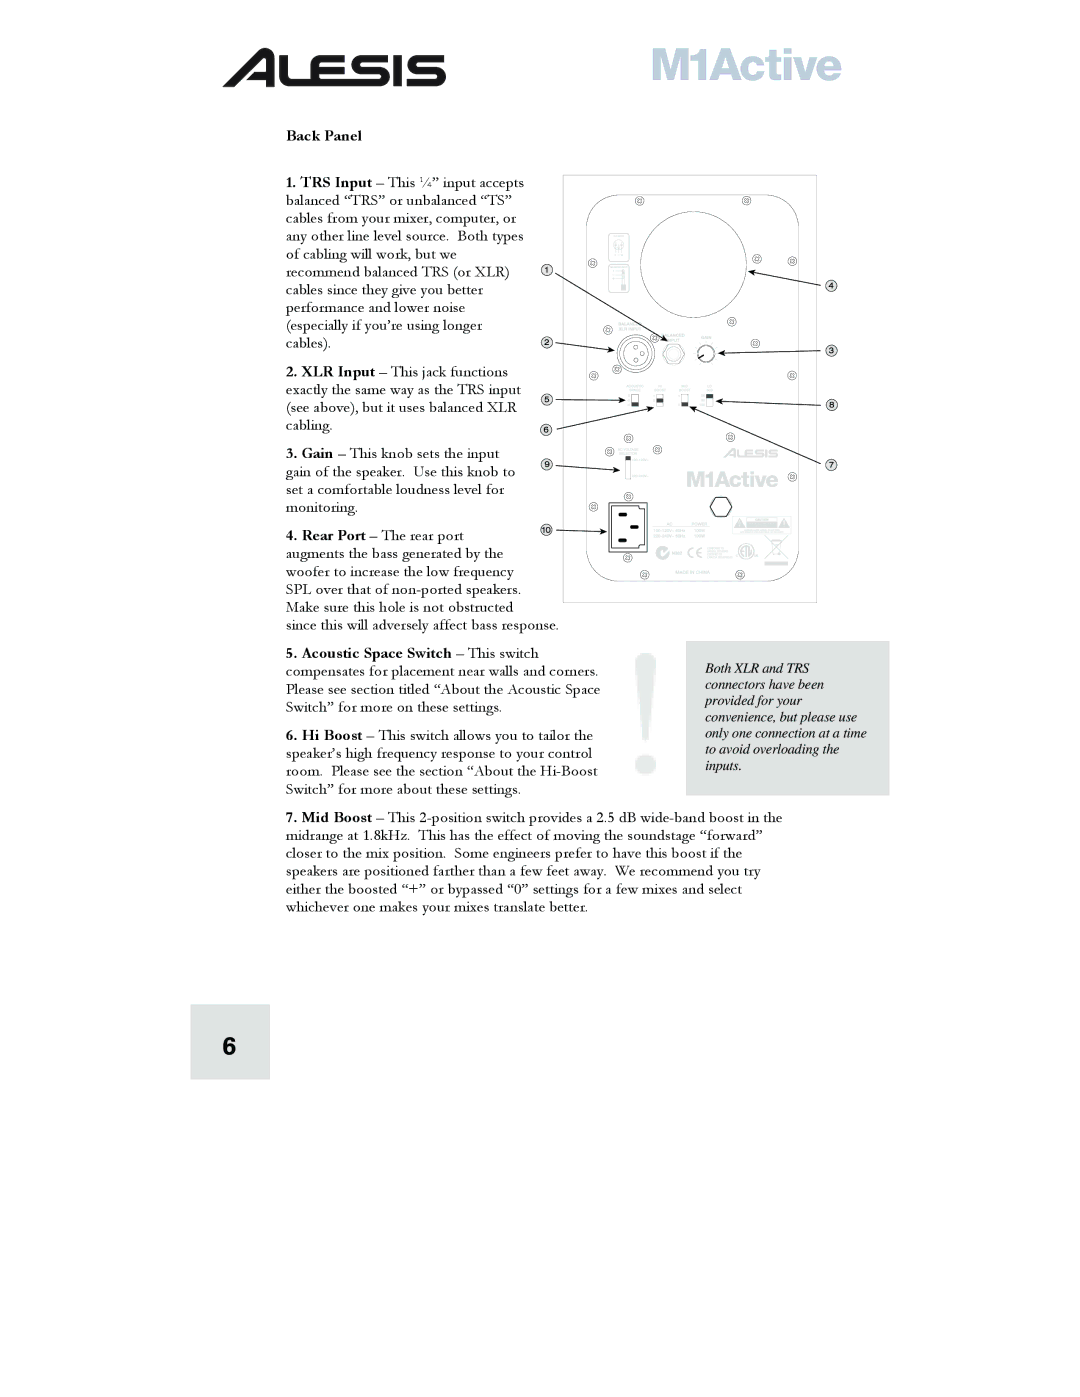
Back Panel
1.TRS Input – This ¼” input accepts
balanced “TRS” or unbalanced “TS” cables from your mixer, computer, or any other line level source. Both types of cabling will work, but we recommend balanced TRS (or XLR) cables since they give you better performance and lower noise (especially if you’re using longer cables).
2. XLR Input – This jack functions exactly the same way as the TRS input (see above), but it uses balanced XLR cabling.
3. Gain – This knob sets the input gain of the speaker. Use this knob to set a comfortable loudness level for monitoring.
4. Rear Port – The rear port augments the bass generated by the woofer to increase the low frequency SPL over that of
Make sure this hole is not obstructed
since this will adversely affect bass response.
5.Acoustic Space Switch – This switch compensates for placement near walls and corners. Please see section titled “About the Acoustic Space Switch” for more on these settings.
6.Hi Boost – This switch allows you to tailor the speaker’s high frequency response to your control room. Please see the section “About the
Both XLR and TRS connectors have been provided for your convenience, but please use only one connection at a time to avoid overloading the inputs.
7.Mid Boost – This
6