4. OPERATION MODE
DISPLAY PANEL:
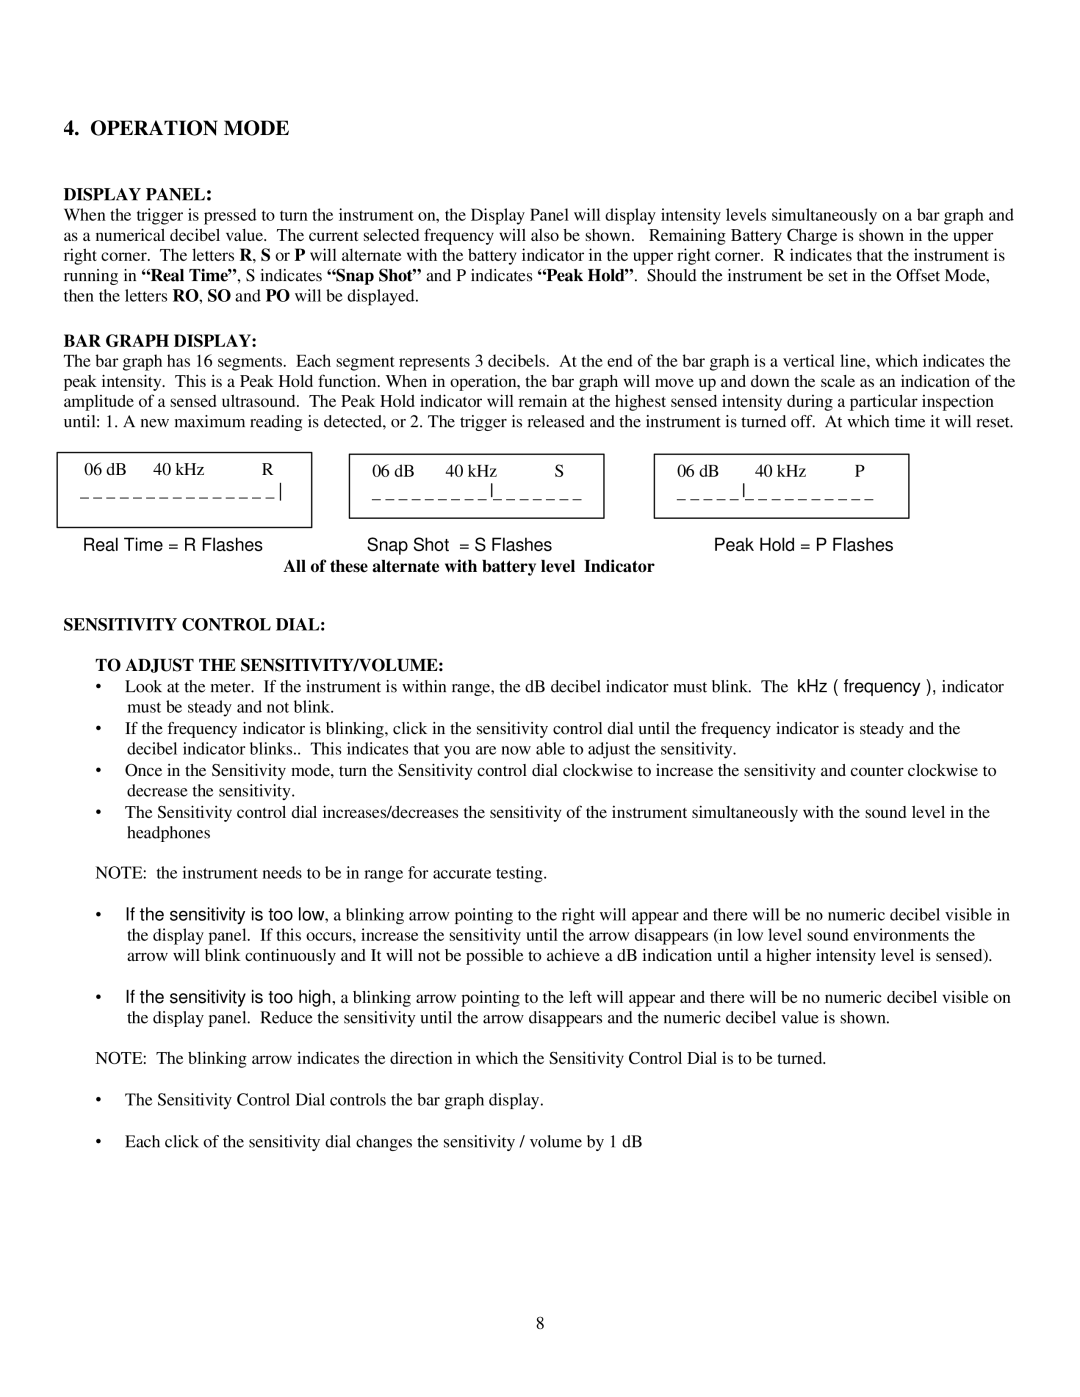
When the trigger is pressed to turn the instrument on, the Display Panel will display intensity levels simultaneously on a bar graph and as a numerical decibel value. The current selected frequency will also be shown. Remaining Battery Charge is shown in the upper right corner. The letters R, S or P will alternate with the battery indicator in the upper right corner. R indicates that the instrument is running in “Real Time”, S indicates “Snap Shot” and P indicates “Peak Hold”. Should the instrument be set in the Offset Mode, then the letters RO, SO and PO will be displayed.
BAR GRAPH DISPLAY:
The bar graph has 16 segments. Each segment represents 3 decibels. At the end of the bar graph is a vertical line, which indicates the peak intensity. This is a Peak Hold function. When in operation, the bar graph will move up and down the scale as an indication of the amplitude of a sensed ultrasound. The Peak Hold indicator will remain at the highest sensed intensity during a particular inspection until: 1. A new maximum reading is detected, or 2. The trigger is released and the instrument is turned off. At which time it will reset.
06 dB 40 kHz R
_ _ _ _ _ _ _ _ _ _ _ _ _ _ _
06 dB 40 kHz S
_ _ _ _ _ _ _ _ _ _ _ _ _ _ _ _
06 dB
_ _ _ _ _
40 kHz P
_ _ _ _ _ _ _ _ _ _
Real Time = R Flashes | Snap Shot = S Flashes | Peak Hold = P Flashes |
| All of these alternate with battery level | Indicator |
|
|
|
SENSITIVITY CONTROL DIAL:
TO ADJUST THE SENSITIVITY/VOLUME:
∙Look at the meter. If the instrument is within range, the dB decibel indicator must blink. The kHz ( frequency ), indicator must be steady and not blink.
∙If the frequency indicator is blinking, click in the sensitivity control dial until the frequency indicator is steady and the decibel indicator blinks.. This indicates that you are now able to adjust the sensitivity.
∙Once in the Sensitivity mode, turn the Sensitivity control dial clockwise to increase the sensitivity and counter clockwise to decrease the sensitivity.
∙The Sensitivity control dial increases/decreases the sensitivity of the instrument simultaneously with the sound level in the headphones
NOTE: the instrument needs to be in range for accurate testing.
∙If the sensitivity is too low, a blinking arrow pointing to the right will appear and there will be no numeric decibel visible in the display panel. If this occurs, increase the sensitivity until the arrow disappears (in low level sound environments the arrow will blink continuously and It will not be possible to achieve a dB indication until a higher intensity level is sensed).
∙If the sensitivity is too high, a blinking arrow pointing to the left will appear and there will be no numeric decibel visible on the display panel. Reduce the sensitivity until the arrow disappears and the numeric decibel value is shown.
NOTE: The blinking arrow indicates the direction in which the Sensitivity Control Dial is to be turned.
∙The Sensitivity Control Dial controls the bar graph display.
∙Each click of the sensitivity dial changes the sensitivity / volume by 1 dB
8
