7ZXR Motherboard
Selecting Array Type
1.Under the Definition section of this menu, highlight the Array # for which you want to assign a RAID level.
2.Use the [Space] key to cycle through two array types: Performance (RAID 0 Striping),
Security (RAID 1 Mirroring).
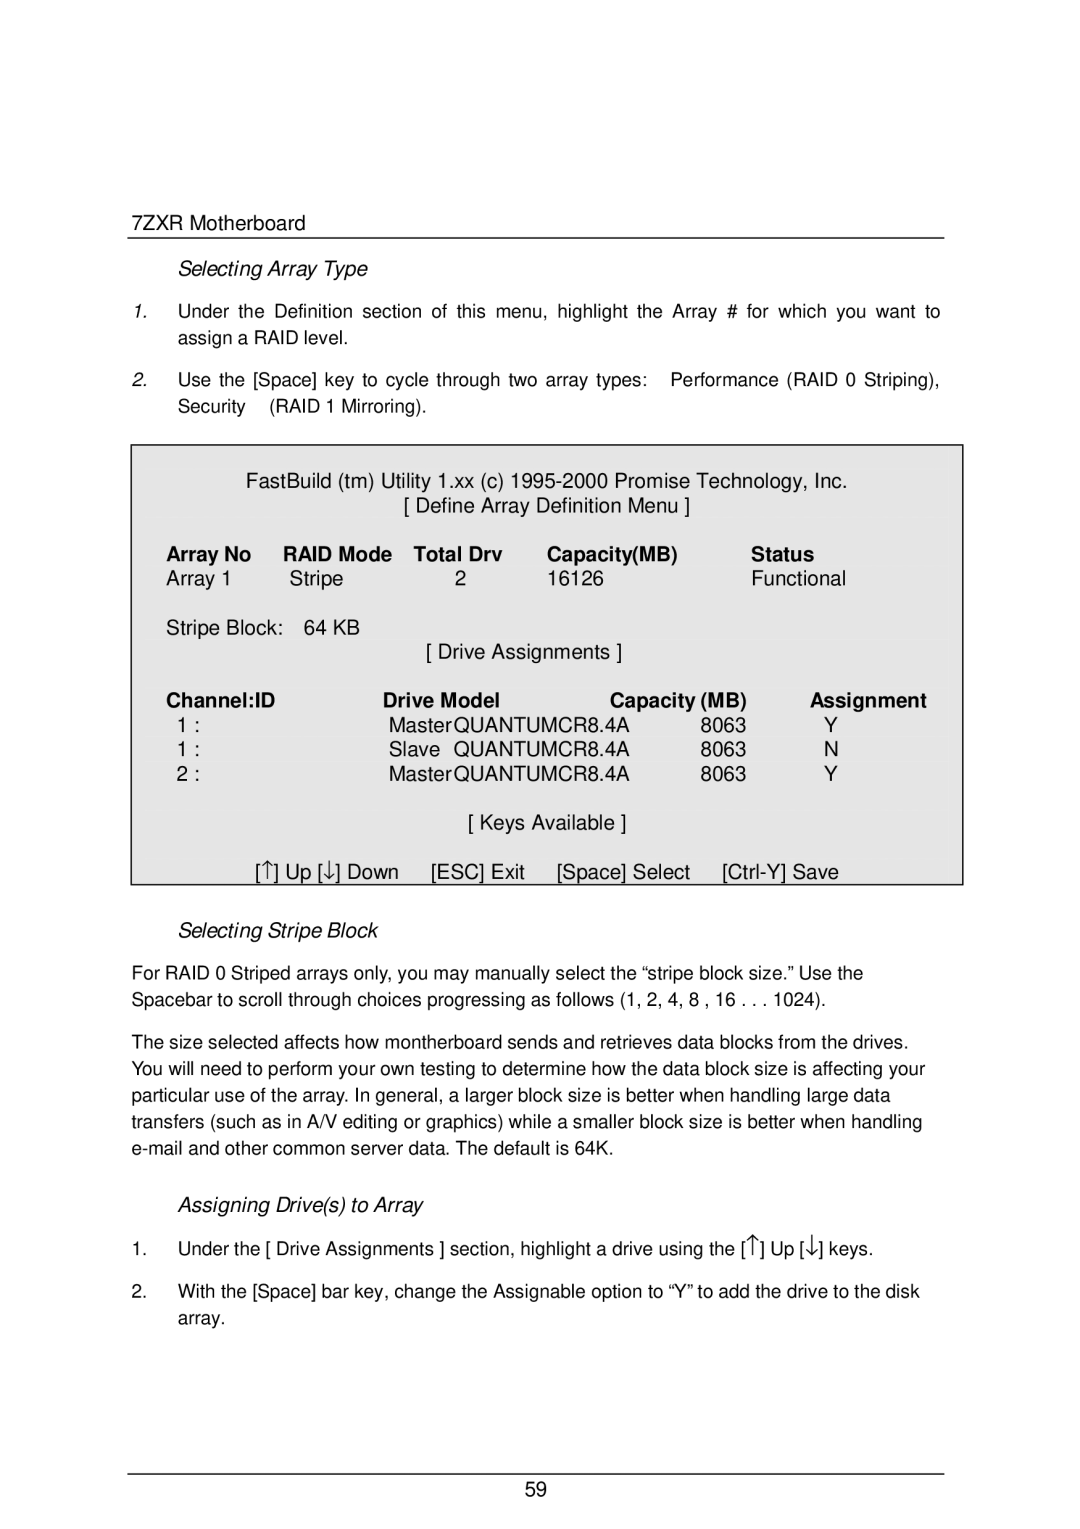
FastBuild (tm) Utility 1.xx (c)
[ Define Array Definition Menu ]
Array No | RAID Mode | Total Drv | Capacity(MB) |
| Status |
Array 1 | Stripe | 2 | 16126 |
| Functional |
Stripe Block: | 64 KB | [ Drive Assignments ] |
|
| |
|
|
|
| ||
Channel:ID | Drive Model | Capacity (MB) | Assignment | ||
1 : | MasterQUANTUMCR8.4A | 8063 | Y | ||
1 : | Slave QUANTUMCR8.4A | 8063 | N | ||
2 : | MasterQUANTUMCR8.4A | 8063 | Y | ||
|
| [ Keys Available ] |
|
| |
[↑ ] Up [↓ ] Down | [ESC] Exit | [Space] Select | |||
Selecting Stripe Block
For RAID 0 Striped arrays only, you may manually select the “stripe block size.” Use the Spacebar to scroll through choices progressing as follows (1, 2, 4, 8 , 16 . . . 1024).
The size selected affects how montherboard sends and retrieves data blocks from the drives. You will need to perform your own testing to determine how the data block size is affecting your particular use of the array. In general, a larger block size is better when handling large data transfers (such as in A/V editing or graphics) while a smaller block size is better when handling
Assigning Drive(s) to Array
1.Under the [ Drive Assignments ] section, highlight a drive using the [↑ ] Up [↓ ] keys.
2.With the [Space] bar key, change the Assignable option to “Y” to add the drive to the disk array.
59