Belt Installation
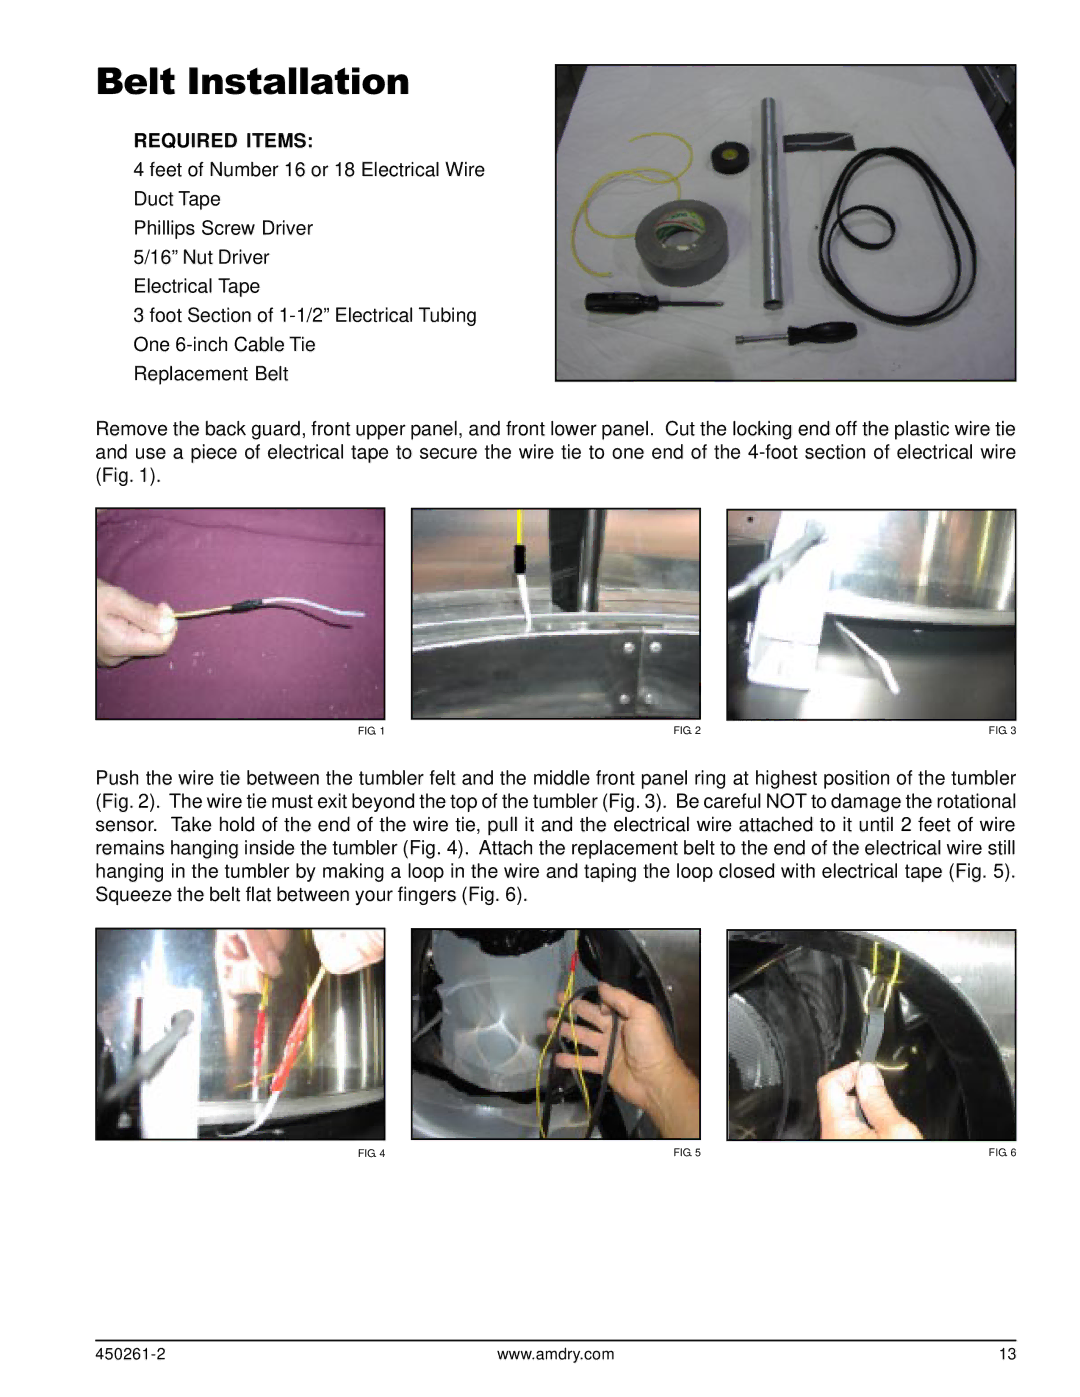
REQUIRED ITEMS:
4 feet of Number 16 or 18 Electrical Wire
Duct Tape
Phillips Screw Driver
5/16” Nut Driver
Electrical Tape
3foot Section of
Replacement Belt
Remove the back guard, front upper panel, and front lower panel. Cut the locking end off the plastic wire tie and use a piece of electrical tape to secure the wire tie to one end of the
FIG. 1 | FIG. 2 | FIG. 3 |
Push the wire tie between the tumbler felt and the middle front panel ring at highest position of the tumbler (Fig. 2). The wire tie must exit beyond the top of the tumbler (Fig. 3). Be careful NOT to damage the rotational sensor. Take hold of the end of the wire tie, pull it and the electrical wire attached to it until 2 feet of wire remains hanging inside the tumbler (Fig. 4). Attach the replacement belt to the end of the electrical wire still hanging in the tumbler by making a loop in the wire and taping the loop closed with electrical tape (Fig. 5). Squeeze the belt flat between your fingers (Fig. 6).
FIG. 4 | FIG. 5 | FIG. 6 |
www.amdry.com | 13 |