Troubleshooting

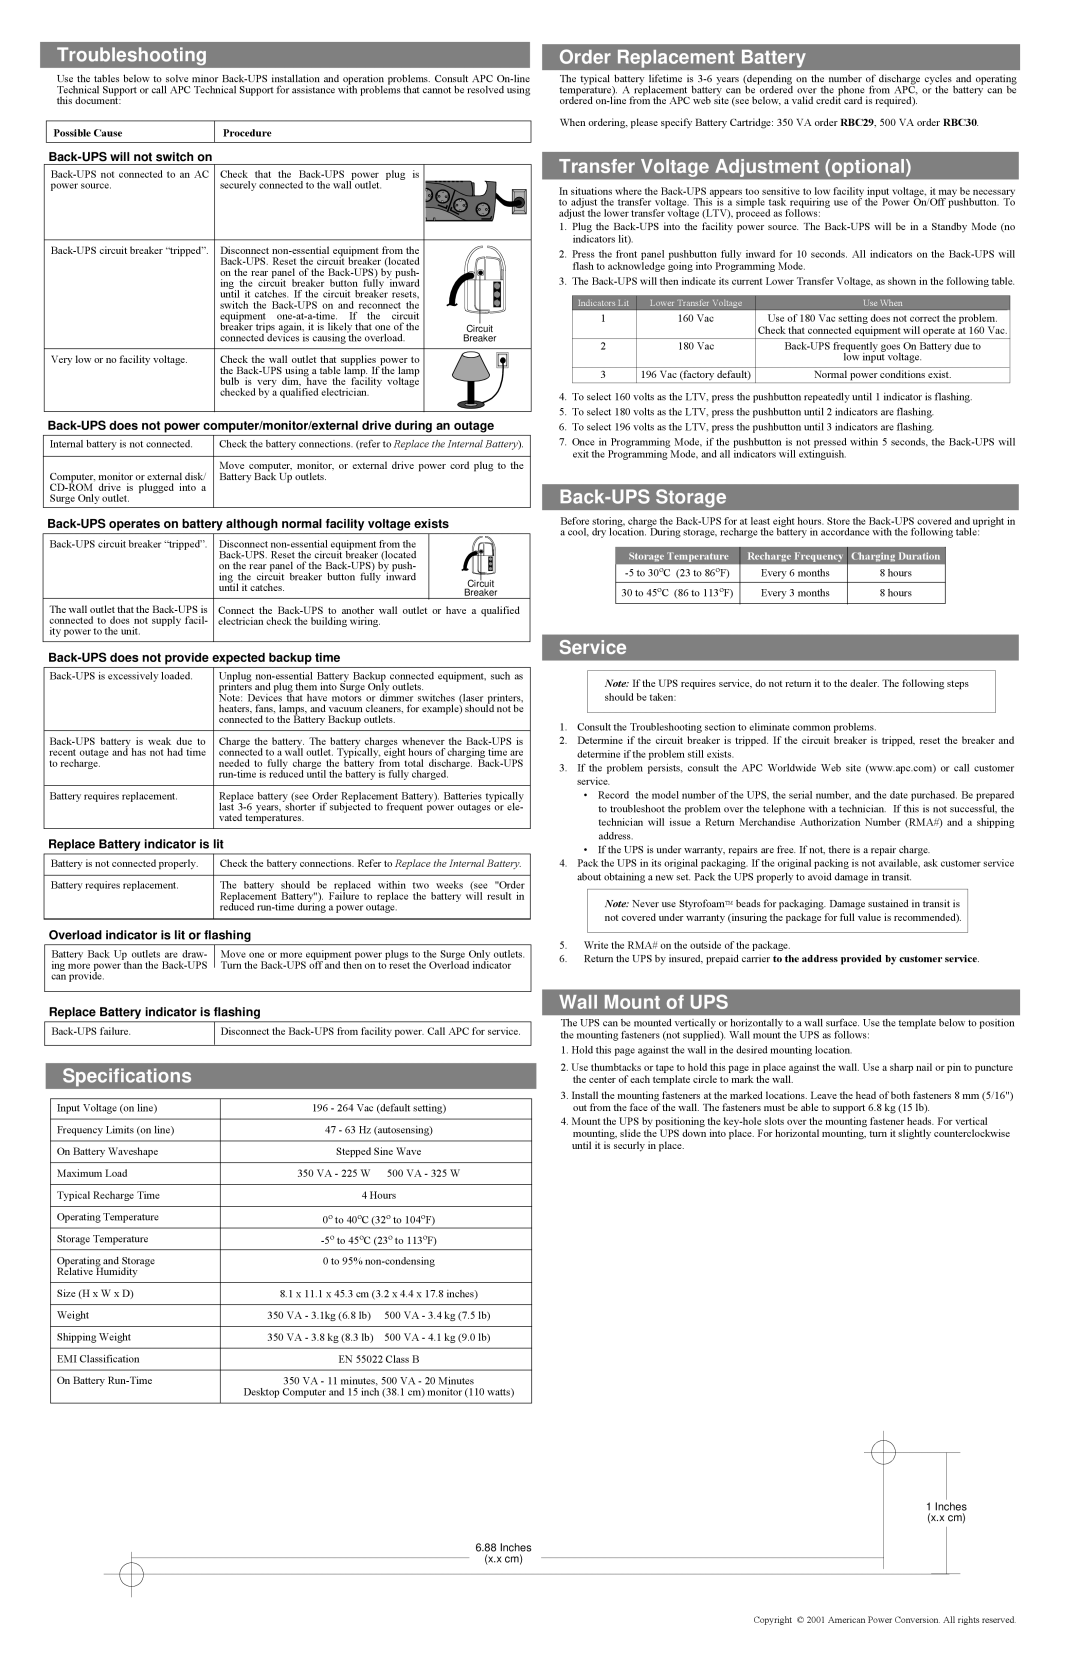
Use the tables below to solve minor Back-UPS installation and operation problems. Consult APC On-line Technical Support or call APC Technical Support for assistance with problems that cannot be resolved using this document:

Possible Cause

Procedure


Back-UPS will not switch on

Order Replacement Battery

The typical battery lifetime is 3-6 years (depending on the number of discharge cycles and operating temperature). A replacement battery can be ordered over the phone from APC, or the battery can be ordered on-line from the APC web site (see below, a valid credit card is required).

When ordering, please specify Battery Cartridge: 350 VA order RBC29, 500 VA order RBC30.

Transfer Voltage Adjustment (optional)

Back-UPS not connected to an AC power source.

Back-UPS circuit breaker “tripped”.

Very low or no facility voltage.

Check that the Back-UPS power plug is securely connected to the wall outlet.

Disconnect non-essential equipment from the Back-UPS. Reset the circuit breaker (located on the rear panel of the Back-UPS) by push- ing the circuit breaker button fully inward until it catches. If the circuit breaker resets, switch the Back-UPS on and reconnect the equipment one-at-a-time. If the circuit breaker trips again, it is likely that one of the connected devices is causing the overload.

Check the wall outlet that supplies power to the Back-UPS using a table lamp. If the lamp bulb is very dim, have the facility voltage checked by a qualified electrician.

Circuit

Breaker

In situations where the Back-UPS appears too sensitive to low facility input voltage, it may be necessary to adjust the transfer voltage. This is a simple task requiring use of the Power On/Off pushbutton. To adjust the lower transfer voltage (LTV), proceed as follows:

1.Plug the Back-UPS into the facility power source. The Back-UPS will be in a Standby Mode (no indicators lit).

2.Press the front panel pushbutton fully inward for 10 seconds. All indicators on the Back-UPS will flash to acknowledge going into Programming Mode.

3.The Back-UPS will then indicate its current Lower Transfer Voltage, as shown in the following table.

Indicators Lit

Lower Transfer Voltage

Use When

1

160 Vac

Use of 180 Vac setting does not correct the problem.


Check that connected equipment will operate at 160 Vac.

2

180 Vac

Back-UPS frequently goes On Battery due to


low input voltage.

3

196 Vac (factory default)

Normal power conditions exist.


4.

To select 160 volts as the LTV, press the pushbutton repeatedly until 1 indicator is flashing.

5.

To select 180 volts as the LTV, press the pushbutton until 2 indicators are flashing.

Back-UPS does not power computer/monitor/external drive during an outage

Internal battery is not connected.

Check the battery connections. (refer to Replace the Internal Battery).


Move computer, monitor, or external drive power cord plug to the

Computer, monitor or external disk/

Battery Back Up outlets.

CD-ROM drive is plugged into a


Surge Only outlet.


Back-UPS operates on battery although normal facility voltage exists

Back-UPS circuit breaker “tripped”.

Disconnect non-essential equipment from the


Back-UPS. Reset the circuit breaker (located


on the rear panel of the Back-UPS) by push-


ing the circuit breaker button fully inward


until it catches.

Circuit


Breaker


The wall outlet that the Back-UPS is

Connect the Back-UPS to another wall outlet or have a qualified

connected to does not supply facil-

electrician check the building wiring.


ity power to the unit.


Back-UPS does not provide expected backup time

Back-UPS is excessively loaded.

Unplug non-essential Battery Backup connected equipment, such as


printers and plug them into Surge Only outlets.


Note: Devices that have motors or dimmer switches (laser printers,


heaters, fans, lamps, and vacuum cleaners, for example) should not be


connected to the Battery Backup outlets.

Back-UPS battery is weak due to

Charge the battery. The battery charges whenever the Back-UPS is

recent outage and has not had time

connected to a wall outlet. Typically, eight hours of charging time are

to recharge.

needed to fully charge the battery from total discharge. Back-UPS


run-time is reduced until the battery is fully charged.

Battery requires replacement.

Replace battery (see Order Replacement Battery). Batteries typically


last 3-6 years, shorter if subjected to frequent power outages or ele-


vated temperatures.


Replace Battery indicator is lit

Battery is not connected properly.

Check the battery connections. Refer to Replace the Internal Battery.

Battery requires replacement.

The battery should be replaced within two weeks (see "Order


Replacement Battery"). Failure to replace the battery will result in


reduced run-time during a power outage.


Overload indicator is lit or flashing

Battery Back Up outlets are draw- Move one or more equipment power plugs to the Surge Only outlets. ing more power than the Back-UPS Turn the Back-UPS off and then on to reset the Overload indicator can provide.

Replace Battery indicator is flashing

Back-UPS failure.

Disconnect the Back-UPS from facility power. Call APC for service.


Specifications

6.

To select 196 volts as the LTV, press the pushbutton until 3 indicators are flashing.

7.

Once in Programming Mode, if the pushbutton is not pressed within 5 seconds, the Back-UPS will


exit the Programming Mode, and all indicators will extinguish.

Back-UPS Storage

Before storing, charge the Back-UPS for at least eight hours. Store the Back-UPS covered and upright in a cool, dry location. During storage, recharge the battery in accordance with the following table:

Storage Temperature

Recharge Frequency

Charging Duration

-5 to 30oC (23 to 86oF)

Every 6 months

8 hours

30 to 45oC (86 to 113oF)

Every 3 months

8 hours

Service

Note: If the UPS requires service, do not return it to the dealer. The following steps should be taken:

1.Consult the Troubleshooting section to eliminate common problems.

2.Determine if the circuit breaker is tripped. If the circuit breaker is tripped, reset the breaker and determine if the problem still exists.

3.If the problem persists, consult the APC Worldwide Web site (www.apc.com) or call customer service.

Record the model number of the UPS, the serial number, and the date purchased. Be prepared to troubleshoot the problem over the telephone with a technician. If this is not successful, the technician will issue a Return Merchandise Authorization Number (RMA#) and a shipping address.

If the UPS is under warranty, repairs are free. If not, there is a repair charge.

4.Pack the UPS in its original packaging. If the original packing is not available, ask customer service about obtaining a new set. Pack the UPS properly to avoid damage in transit.

Note: Never use StyrofoamTM beads for packaging. Damage sustained in transit is not covered under warranty (insuring the package for full value is recommended).

5.Write the RMA# on the outside of the package.

6.Return the UPS by insured, prepaid carrier to the address provided by customer service.

Wall Mount of UPS

The UPS can be mounted vertically or horizontally to a wall surface. Use the template below to position the mounting fasteners (not supplied). Wall mount the UPS as follows:

1.

Hold this page against the wall in the desired mounting location.

2.

Use thumbtacks or tape to hold this page in place against the wall. Use a sharp nail or pin to puncture


the center of each template circle to mark the wall.

3.

Install the mounting fasteners at the marked locations. Leave the head of both fasteners 8 mm (5/16")

Input Voltage (on line) Frequency Limits (on line) On Battery Waveshape Maximum Load Typical Recharge Time Operating Temperature Storage Temperature

Operating and Storage Relative Humidity

Size (H x W x D)

Weight

Shipping Weight

EMI Classification

On Battery Run-Time

196 - 264 Vac (default setting)

47 - 63 Hz (autosensing)

Stepped Sine Wave

350 VA - 225 W 500 VA - 325 W

4 Hours

0o to 40oC (32o to 104oF)

-5oto 45oC (23o to 113oF)

0to 95% non-condensing

8.1x 11.1 x 45.3 cm (3.2 x 4.4 x 17.8 inches)

350

VA - 3.1kg (6.8 lb)

500 VA - 3.4 kg (7.5 lb)

350

VA - 3.8 kg (8.3 lb)

500 VA - 4.1 kg (9.0 lb)

EN 55022 Class B

350 VA - 11 minutes, 500 VA - 20 Minutes

Desktop Computer and 15 inch (38.1 cm) monitor (110 watts)

out from the face of the wall. The fasteners must be able to support 6.8 kg (15 lb).

4. Mount the UPS by positioning the key-hole slots over the mounting fastener heads. For vertical

mounting, slide the UPS down into place. For horizontal mounting, turn it slightly counterclockwise

until it is securly in place.

1 Inches (x.x cm)

6.88Inches

(x.x cm)

Copyright © 2001 American Power Conversion. All rights reserved.

Page 2
Image 2
American Power Conversion 350/500 Troubleshooting, Order Replacement Battery, Transfer Voltage Adjustment optional

350/500 specifications

American Power Conversion (APC) has long been a trusted name in the field of power protection and management solutions. Among their impressive range of offerings, the APC 350/500 series stands out, reflecting the company’s commitment to delivering high-quality uninterruptible power supplies (UPS) designed for various applications.

The APC 350/500 is engineered to provide reliable power protection for critical electronic equipment, including servers, networking devices, and sensitive electronics. This series is particularly favored for small to medium-sized businesses due to its efficiency and robustness. One of the primary features of the APC 350/500 is its ability to provide battery backup and surge protection, ensuring that equipment remains operational during power outages or fluctuations.

The UPS units in this series are equipped with advanced technologies that enhance performance and usability. For instance, the APC 350/500 incorporates Line-Interactive technology, which allows for voltage regulation without switching to battery power. This feature not only preserves battery life but also ensures a more seamless power supply, reducing the risk of downtime. Additionally, these units typically come with multiple outlets, allowing users to connect various devices directly to the UPS for comprehensive protection.

Another significant aspect of the APC 350/500 is its user-friendly interface. The series often includes an LCD display that provides real-time information on power status, battery level, and estimated runtime. This accessibility allows users to monitor their power supply easily, making informed decisions about device usage and management.

APC places a strong emphasis on safety and reliability in its designs. The 350/500 series often features built-in safety mechanisms, such as over- and under-voltage protection, thermal protection, and an intelligent battery management system. These measures not only safeguard connected equipment but also extend the lifespan of the UPS itself, ensuring long-term performance.

The compact design of the APC 350/500 makes it an ideal choice for environments with space constraints. Its versatility allows it to be deployed in various settings, from home offices to server rooms. Overall, the APC 350/500 series exemplifies how American Power Conversion continues to innovate in the field of power solutions, delivering essential tools to protect vital equipment and maintain uninterrupted operations. Whether it’s for personal use or for a small business, the APC 350/500 offers a reliable and efficient power management solution.