Step 4: Establish Extron Connection Settings
1.Click on Extron, RMS Device - 41001 to open the Extron Connection Settings window.
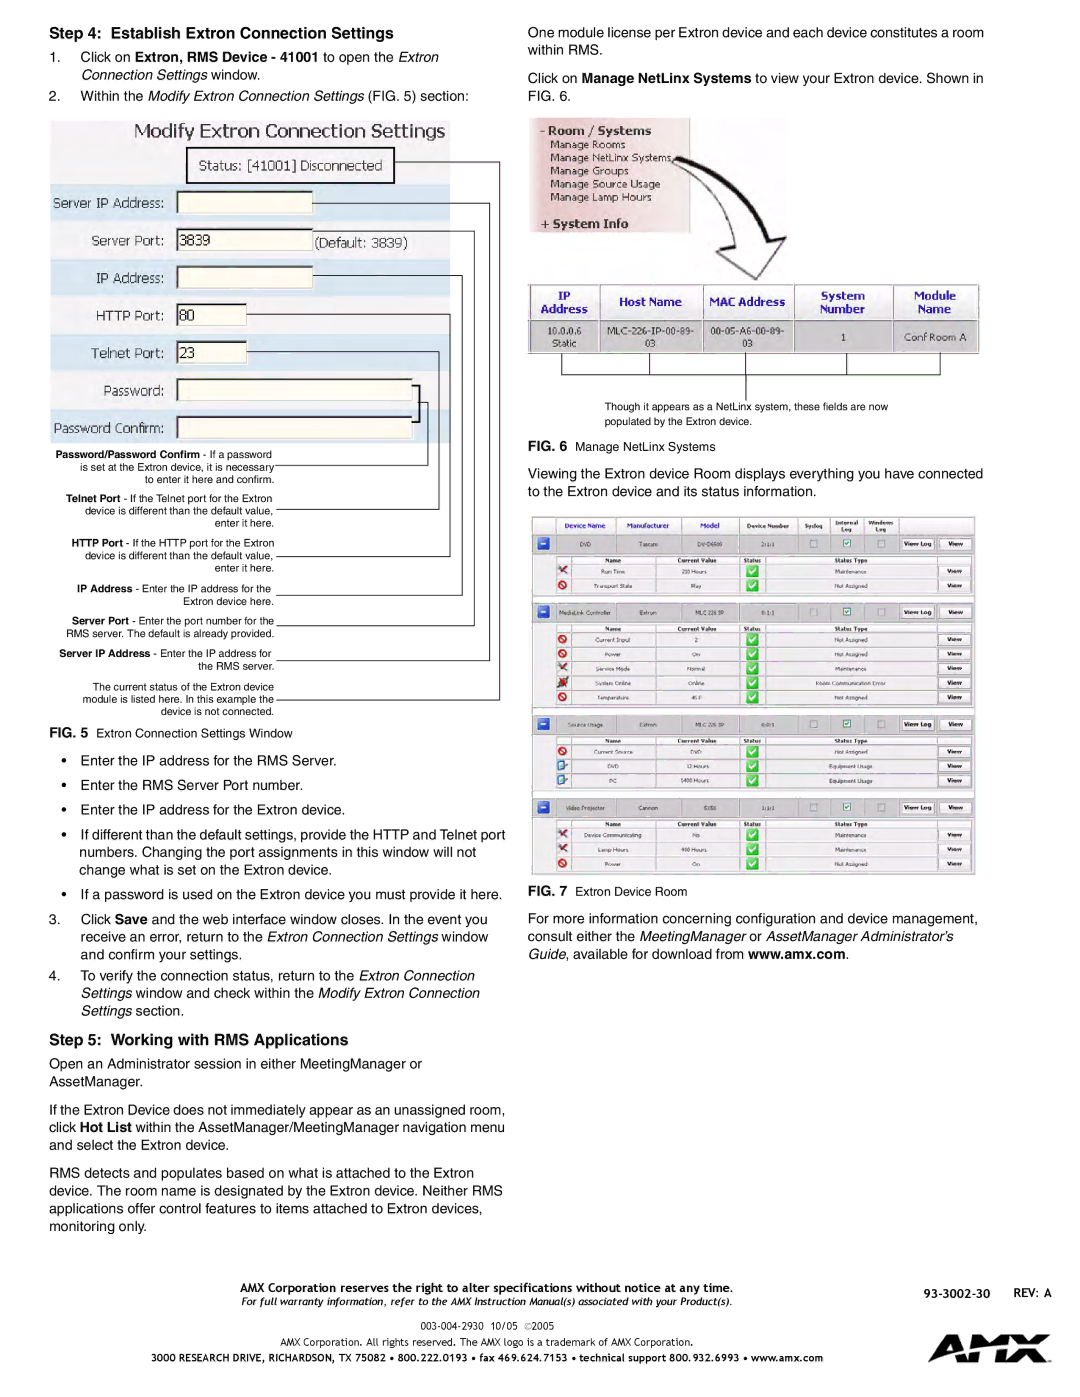
2.Within the Modify Extron Connection Settings (FIG. 5) section:
One module license per Extron device and each device constitutes a room within RMS.
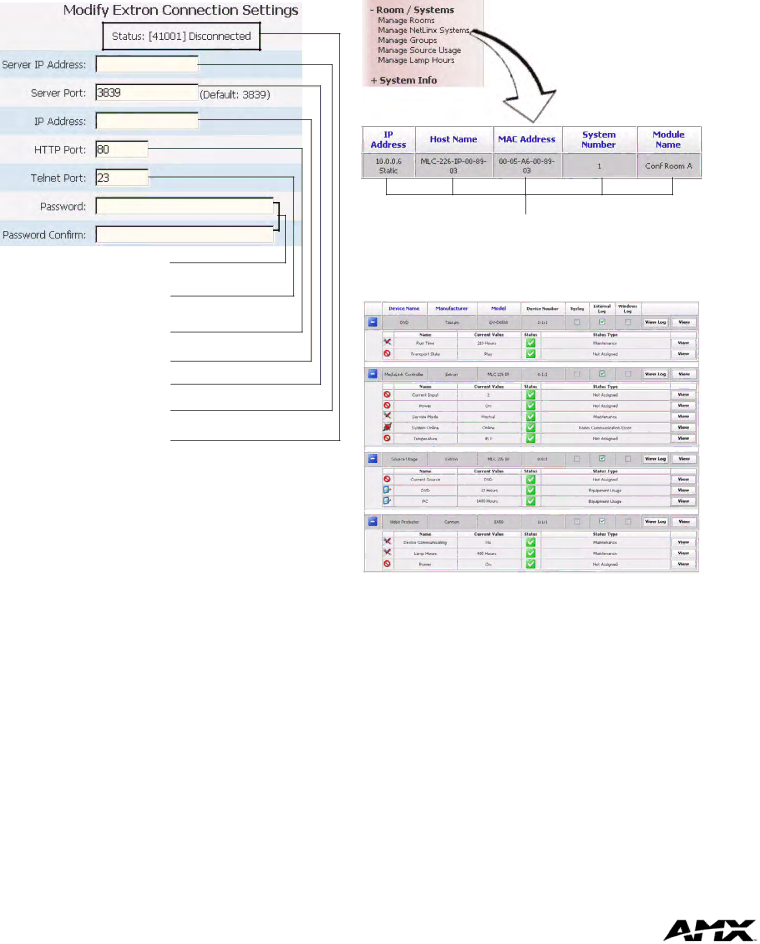
Click on Manage NetLinx Systems to view your Extron device. Shown in FIG. 6.
Password/Password Confirm - If a password is set at the Extron device, it is necessary to enter it here and confirm.
Telnet Port - If the Telnet port for the Extron device is different than the default value, enter it here.
HTTP Port - If the HTTP port for the Extron device is different than the default value, enter it here.
IP Address - Enter the IP address for the
Extron device here.
Server Port - Enter the port number for the
RMS server. The default is already provided.
Server IP Address - Enter the IP address for the RMS server.
The current status of the Extron device module is listed here. In this example the device is not connected.
FIG. 5 Extron Connection Settings Window
•Enter the IP address for the RMS Server.
•Enter the RMS Server Port number.
•Enter the IP address for the Extron device.
•If different than the default settings, provide the HTTP and Telnet port numbers. Changing the port assignments in this window will not change what is set on the Extron device.
•If a password is used on the Extron device you must provide it here.
3.Click Save and the web interface window closes. In the event you receive an error, return to the Extron Connection Settings window and confirm your settings.
4.To verify the connection status, return to the Extron Connection Settings window and check within the Modify Extron Connection Settings section.
Step 5: Working with RMS Applications
Open an Administrator session in either MeetingManager or AssetManager.
If the Extron Device does not immediately appear as an unassigned room, click Hot List within the AssetManager/MeetingManager navigation menu and select the Extron device.
RMS detects and populates based on what is attached to the Extron device. The room name is designated by the Extron device. Neither RMS applications offer control features to items attached to Extron devices, monitoring only.
Though it appears as a NetLinx system, these fields are now populated by the Extron device.
FIG. 6 Manage NetLinx Systems
Viewing the Extron device Room displays everything you have connected to the Extron device and its status information.
FIG. 7 Extron Device Room
For more information concerning configuration and device management, consult either the MeetingManager or AssetManager Administrator’s Guide, available for download from www.amx.com.
AMX Corporation reserves the right to alter specifications without notice at any time. | REV:REV:XXA | ||
For full warranty information, refer to the AMX Instruction Manual(s) associated with your Product(s). | |||
|
| ||
|
| ||
AMX Corporation. All rights reserved. The AMX logo is a trademark of AMX Corporation. |
|
|
3000 RESEARCH DRIVE, RICHARDSON, TX 75082 • 800.222.0193 • fax 469.624.7153 • technical support 800.932.6993 • www.amx.com