FRYER OPERATING INSTRUCTIONS (Continued)
Normal operation of an ANETS Fryer requires that the kettle is filled with liquid shortening above the lower indent level, marked on the rear of the kettle, before lighting the fryer’s pilot and turning on the main burner.
!
CAUTION: Shortening MUST be in liquid form to avoid scorching or discoloration and possible damage to the kettle. Damage caused by melting solid shortening will NOT be covered by the warranty.
LIGHTING PROCEDURE
NOTE: The gas line of a new fryer installation | Load the fryer basket with the food product while | ||
may contain a considerable amount of air that will | the basket is not in the hot liquid shortening. DO | ||
hinder immediate lighting. You may have to press | NOT overload the fryer basket. Load only a | ||
in the gas safety valve control knob as long as | premeasured quantity of food product (1lb, | ||
several minutes before the pilot flame burns | typically; less, if smaller portions are desired). | ||
steadily. | Place the loaded fryer basket into the hot liquid | ||
1. | Ensure that the fryer’s thermostat knob is set | shortening carefully to avoid splashing. | |
| |||
| to OFF. | When the basket of food product has reached the | |
2. | Open the gas supply line inlet valve to the | desired point of “doneness”, lift the basket from | |
| fryer by aligning the gas valve handle with the | the hot shortening and hang the basket on the | |
| gas line piping. | basket hanger to let it drain for approximately 15 | |
3. | Open the front door and move the right pilot | - 30 seconds before serving. | |
| |||
| viewing/lighting port cover aside. | NEVER increase the thermostat setting above the | |
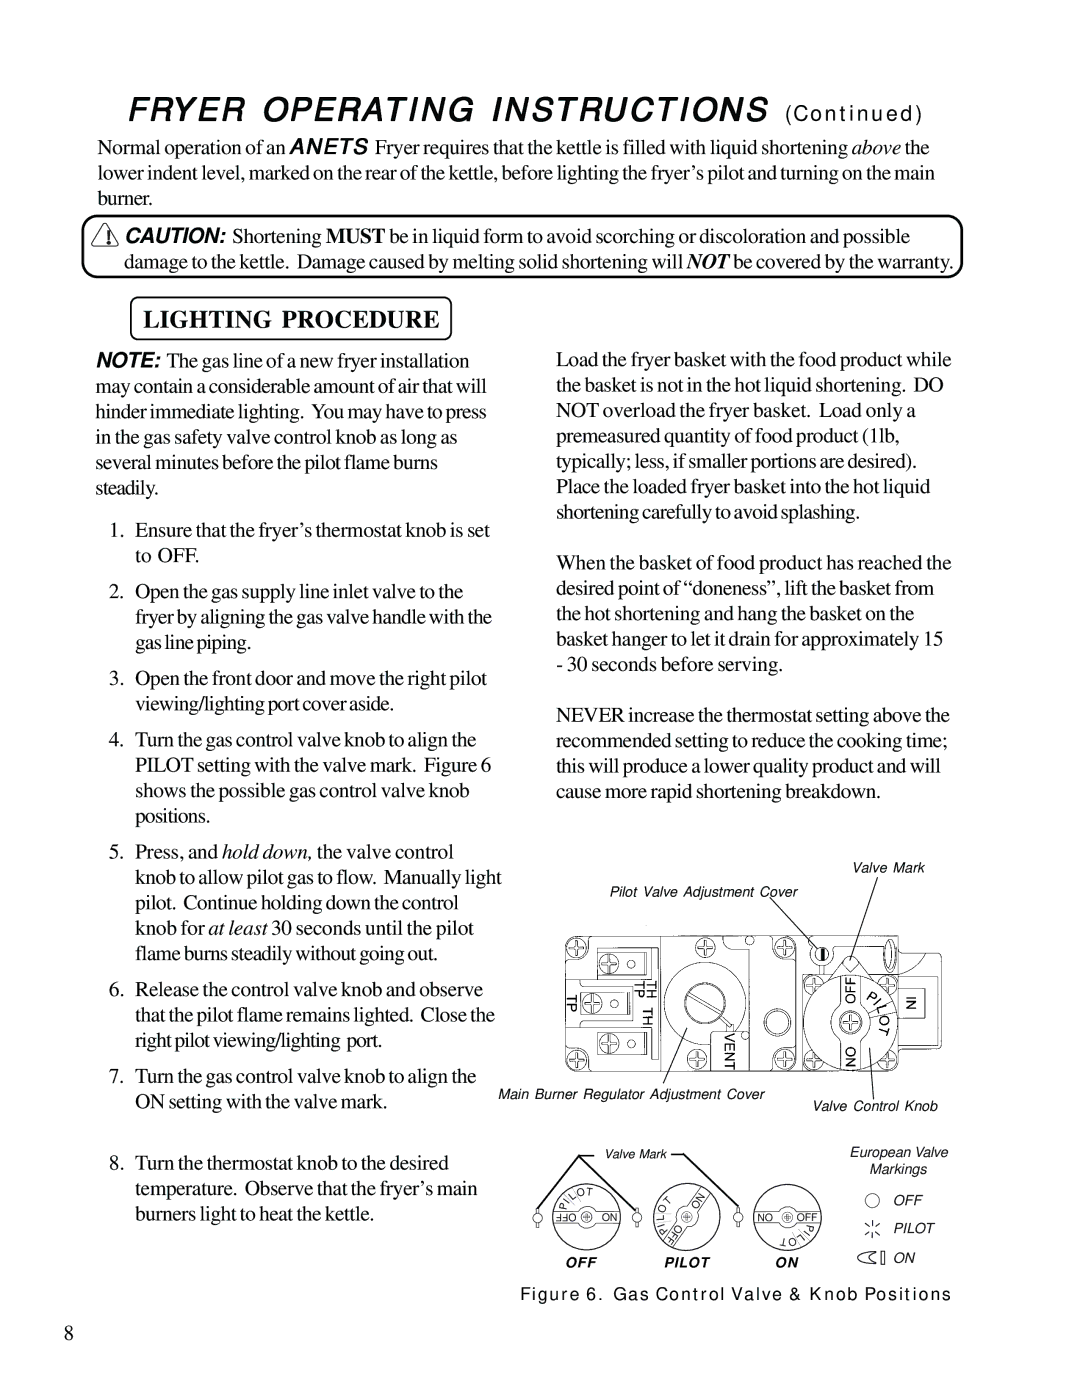
4. | Turn the gas control valve knob to align the | ||
recommended setting to reduce the cooking time; | |||
| PILOT setting with the valve mark. Figure 6 | this will produce a lower quality product and will | |
| shows the possible gas control valve knob | cause more rapid shortening breakdown. | |
positions.
5. Press, and hold down, the valve control
knob to allow pilot gas to flow. Manually light |
| Valve Mark | |
Pilot Valve Adjustment Cover | |||
pilot. Continue holding down the control | |||
|
| ||
knob for at least 30 seconds until the pilot |
|
| |
flame burns steadily without going out. |
|
| |
|
| ||
6.Release the control valve knob and observe that the pilot flame remains lighted. Close the right pilot viewing/lighting port.
7.Turn the gas control valve knob to align the
ON setting with the valve mark. | Main Burner Regulator Adjustment Cover |
Valve Control Knob |
8.Turn the thermostat knob to the desired temperature. Observe that the fryer’s main burners light to heat the kettle.
|
|
| Valve Mark |
|
|
|
|
|
|
| European Valve | ||
|
|
|
|
|
|
|
|
|
|
|
|
| Markings |
I | L | OT |
|
| T | ON |
|
|
|
|
| OFF | |
|
|
|
|
|
|
|
| ||||||
P |
|
| O |
|
|
|
|
|
|
|
| ||
OFF | ON |
|
|
| ON |
| OFF |
| |||||
L |
|
|
| PILOT | |||||||||
|
|
|
| P |
|
|
| O |
| I | |||
|
|
|
| I | OFF |
|
|
|
| P |
| ||
|
|
|
|
|
|
|
|
|
|
|
| ||
|
|
|
|
|
|
|
|
| T |
| L |
|
|
|
|
|
|
|
|
|
|
|
|
|
| ON | |
OFF |
|
| PILOT |
| ON |
|
| ||||||
Figure 6. Gas Control Valve & Knob Positions
8