Arcam AVR280 manual Using the tuner, Tuning to a station, Storing a preset, Deleting a preset

Models: AVR280

1 38
Download 38 pages 21.79 Kb
Page 24
Image 24

Using the tuner

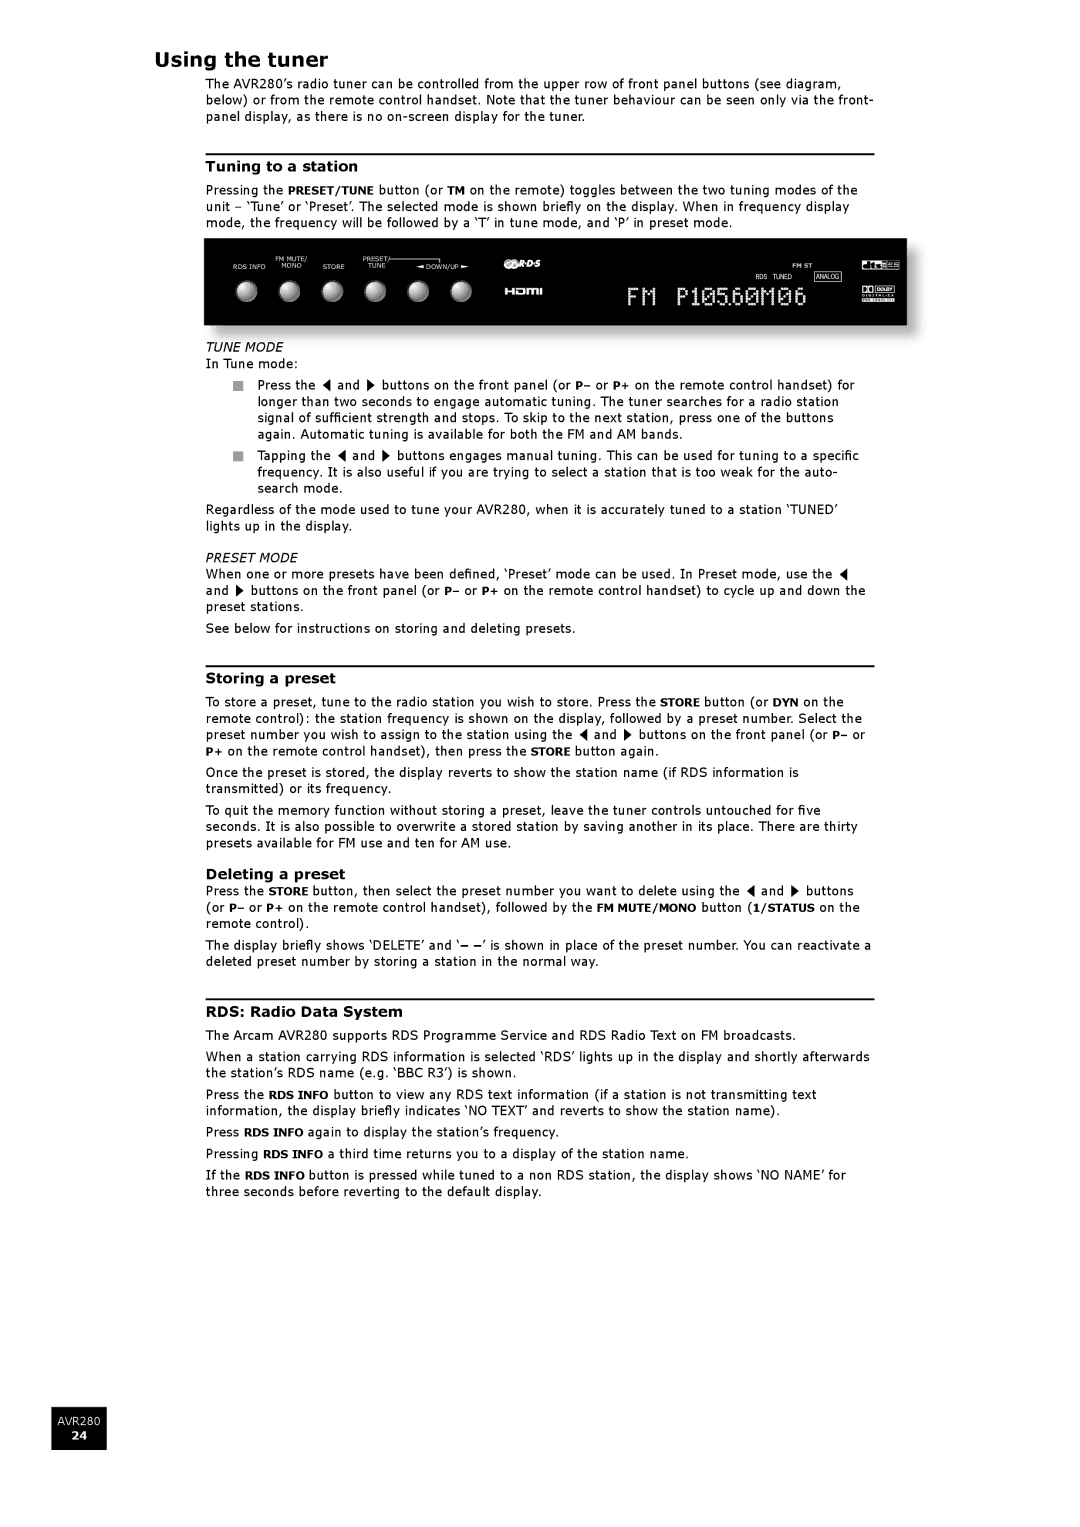
The AVR280’s radio tuner can be controlled from the upper row of front panel buttons (see diagram, below) or from the remote control handset. Note that the tuner behaviour can be seen only via the front- panel display, as there is no on-screen display for the tuner.

Tuning to a station

Pressing the PRESET/TUNE button (or TM on the remote) toggles between the two tuning modes of the unit – ‘Tune’ or ‘Preset’. The selected mode is shown briefly on the display. When in frequency display mode, the frequency will be followed by a ‘T’ in tune mode, and ‘P’ in preset mode.

��������


�������


�������� ����

�����

����

�������

�����

� � � � � � � � �

� � � � � � � � � � � � �

Tune mode

In Tune mode:

<Press the 3 and 4 buttons on the front panel (or P– or P+ on the remote control handset) for longer than two seconds to engage automatic tuning. The tuner searches for a radio station signal of sufficient strength and stops. To skip to the next station, press one of the buttons again. Automatic tuning is available for both the FM and AM bands.

<Tapping the 3 and 4 buttons engages manual tuning. This can be used for tuning to a specific frequency. It is also useful if you are trying to select a station that is too weak for the auto- search mode.

Regardless of the mode used to tune your AVR280, when it is accurately tuned to a station ‘TUNED’ lights up in the display.

Preset mode

When one or more presets have been defined, ‘Preset’ mode can be used. In Preset mode, use the 3 and 4 buttons on the front panel (or P– or P+ on the remote control handset) to cycle up and down the preset stations.

See below for instructions on storing and deleting presets.

Storing a preset

To store a preset, tune to the radio station you wish to store. Press the STORE button (or DYN on the remote control): the station frequency is shown on the display, followed by a preset number. Select the preset number you wish to assign to the station using the 3 and 4 buttons on the front panel (or P– or P+ on the remote control handset), then press the STORE button again.

Once the preset is stored, the display reverts to show the station name (if RDS information is transmitted) or its frequency.

To quit the memory function without storing a preset, leave the tuner controls untouched for five seconds. It is also possible to overwrite a stored station by saving another in its place. There are thirty presets available for FM use and ten for AM use.

Deleting a preset

Press the STORE button, then select the preset number you want to delete using the 3 and 4 buttons (or P– or P+ on the remote control handset), followed by the FM MUTE/MONO button (1/Status on the remote control).

The display briefly shows ‘DELETE’ and ‘ is shown in place of the preset number. You can reactivate a deleted preset number by storing a station in the normal way.

RDS: Radio Data System

The Arcam AVR280 supports RDS Programme Service and RDS Radio Text on FM broadcasts.

When a station carrying RDS information is selected ‘RDS’ lights up in the display and shortly afterwards the station’s RDS name (e.g. ‘BBC R3’) is shown.

Press the RDS INFO button to view any RDS text information (if a station is not transmitting text information, the display briefly indicates ‘NO TEXT’ and reverts to show the station name).

Press RDS INFO again to display the station’s frequency.

Pressing RDS INFO a third time returns you to a display of the station name.

If the RDS INFO button is pressed while tuned to a non RDS station, the display shows ‘NO NAME’ for three seconds before reverting to the default display.

AVR280

24

Page 24
Image 24
Arcam AVR280 manual Using the tuner, Tuning to a station, Storing a preset, Deleting a preset, RDS Radio Data System

AVR280 specifications

The Arcam AVR280 is a high-performance AV receiver designed to deliver an immersive home theater experience. Known for its robust build quality and advanced technological features, it caters to both audiophiles and casual users seeking top-notch sound and video quality.

One of the standout features of the AVR280 is its power output. The receiver is equipped with an impressive 7-channel amplification system, providing 80 watts per channel into 8 ohms. This ample power ensures clear and dynamic audio reproduction, making it ideal for driving demanding speaker systems and creating a rich soundstage. The AVR280 also supports Dolby TrueHD and DTS-HD Master Audio, ensuring superior sound quality for high-definition movie formats.

In terms of connectivity, the AVR280 is well-equipped with multiple HDMI inputs, enabling seamless integration with various devices such as Blu-ray players, gaming consoles, and streaming devices. It supports 4K video pass-through and upscaling, allowing users to enjoy high-definition content with stunning clarity. The receiver also features ARC (Audio Return Channel) functionality, simplifying sound output from compatible TVs.

The AVR280 utilizes Arcam's proprietary Class G amplification technology, which strikes a balance between efficiency and audio fidelity. This innovative design minimizes distortion, ensuring a clean and detailed sound reproduction across all frequencies. Additionally, the room correction technology integrated into the AVR280 automatically calibrates the audio output based on the acoustics of the room, optimizing performance for different setups.

An intuitive user interface and easy setup process enhance the overall user experience. With a sleek design, the AVR280 seamlessly fits into various home entertainment environments while offering a range of customizable options to suit individual preferences.

For those who prioritize streaming capabilities, the AVR280 is compatible with various streaming services, allowing users to enjoy their favorite music with ease. Overall, the Arcam AVR280 stands out as a versatile and powerful AV receiver, making it an excellent choice for anyone looking to elevate their home theater experience with premium sound and video quality.