2. Ports Connections and Buttons
Red LED: Unit is on |
3. Playing MP3 music
There are a couple of mp3 sample songs and a Playlist that were installed into your Jukebox in the factory. Use the UP and DOWN arrows to locate a folder or song. Pressing PLAY at a folder will bring you into that folder. Press LEFT to go back out of the folder up one level. Pressing PLAY at a Playlist,
F1, F2, F3 Buttons
Function buttons whose functions are indicated above each key on the screen
Left !!
Go back one directory level/Fast review/decrease recording level
ON
Turn on the Jukebox / Long press to change to external video
OFF/Escape
Turn off Jukebox or escape from current operation
Expansion Port*
Up"
Scroll upward/increase volume
Play/Pause/Resume#
Play or Pause the current song or video. Validate a selected option.
Right##
Enter a directory/Fast forward/increase recording level
Down$
Scroll Downward/decrease volume
will start playing the songs in the Playlist. Pressing Play at a song will play that song. If you hear nothing at first, make sure you have adjusted the volume control on the headphone cord.
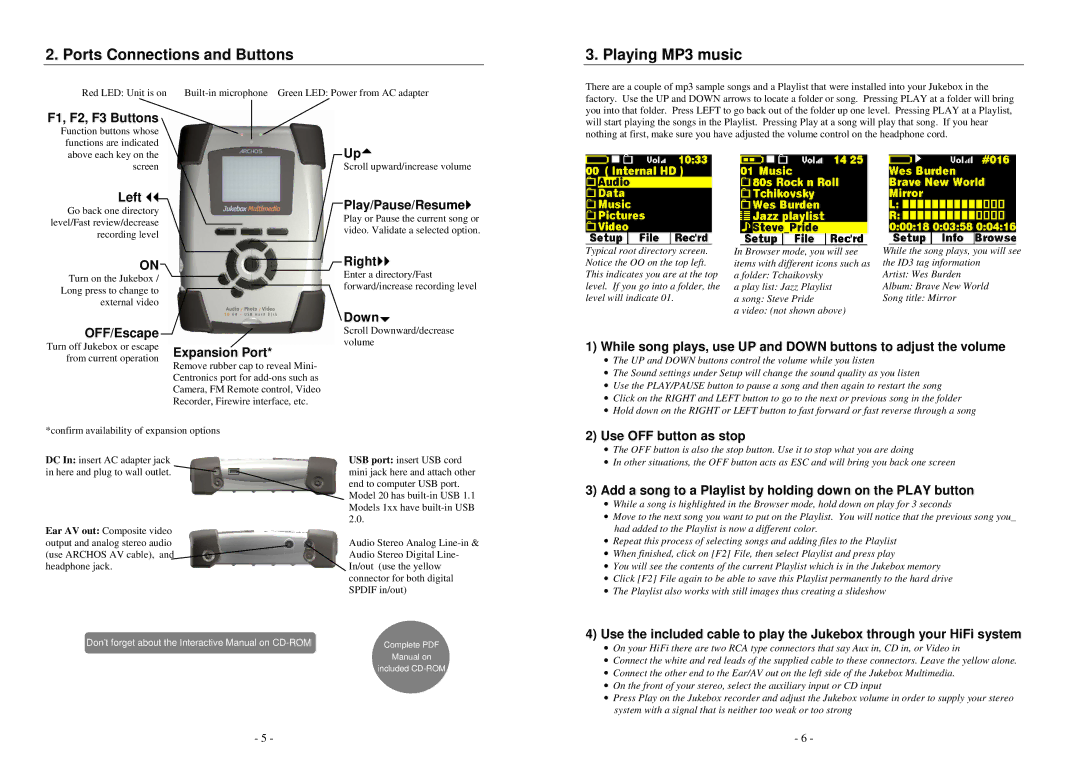
Typical root directory screen. |
|
|
| While the song plays, you will see |
In Browser mode, you will see |
| |||
Notice the OO on the top left. | items with different icons such as | the ID3 tag information | ||
This indicates you are at the top | a folder: Tchaikovsky | Artist: Wes Burden | ||
level. If you go into a folder, the | a play list: Jazz Playlist | Album: Brave New World | ||
level will indicate 01. | a song: Steve Pride | Song title: Mirror | ||
| a video: (not shown above) |
| ||
1) While song plays, use UP and DOWN buttons to adjust the volume |
• The UP and DOWN buttons control the volume while you listen |
Remove rubber cap to reveal Mini- Centronics port for
• The Sound settings under Setup will change the sound quality as you listen | |
• Use the PLAY/PAUSE button to pause a song and then again to restart the song | |
• | Click on the RIGHT and LEFT button to go to the next or previous song in the folder |
• | Hold down on the RIGHT or LEFT button to fast forward or fast reverse through a song |
*confirm availability of expansion options
DC In: insert AC adapter jack in here and plug to wall outlet.
Ear AV out: Composite video output and analog stereo audio (use ARCHOS AV cable), and headphone jack.
USB port: insert USB cord mini jack here and attach other end to computer USB port. Model 20 has
Audio Stereo Analog
2) Use OFF button as stop |
• The OFF button is also the stop button. Use it to stop what you are doing |
• In other situations, the OFF button acts as ESC and will bring you back one screen |
3) Add a song to a Playlist by holding down on the PLAY button |
• While a song is highlighted in the Browser mode, hold down on play for 3 seconds |
• Move to the next song you want to put on the Playlist. You will notice that the previous song you_ |
had added to the Playlist is now a different color. |
• Repeat this process of selecting songs and adding files to the Playlist |
• When finished, click on [F2] File, then select Playlist and press play |
• You will see the contents of the current Playlist which is in the Jukebox memory |
• Click [F2] File again to be able to save this Playlist permanently to the hard drive |
• The Playlist also works with still images thus creating a slideshow |
4) Use the included cable to play the Jukebox through your HiFi system |
Don’t forget about the Interactive Manual on | Complete PDF |
| Manual on |
| included |
- 5 -
• On your HiFi there are two RCA type connectors that say Aux in, CD in, or Video in |
• Connect the white and red leads of the supplied cable to these connectors. Leave the yellow alone. |
• Connect the other end to the Ear/AV out on the left side of the Jukebox Multimedia. |
• On the front of your stereo, select the auxiliary input or CD input |
• Press Play on the Jukebox recorder and adjust the Jukebox volume in order to supply your stereo |
system with a signal that is neither too weak or too strong |
- 6 - |