Installation
CONVERSION FOR USE ON LPG
AUS
Each hob burner requires the injector to be replaced and each burner gas tap to have the
1.Lift off the burner cap and the burner body and place it to one side.
2.Remove the injector from the burner base with a suitable box spanner and discard.
3.Replace the injector with the appropriate replacement (see Table on the previous page).
4.Repeat for each burner.
5.Replace the burner bodies and caps, taking care that they are positioned correctly.
6.Remove the tap knob from the left hand hotplate tap. Insert a narrow flat screwdriver centre of the tap spindle and turn fully clockwise. Replace the tap knob. Repeat this procedure with the other six hotplate taps.
7.Position and fix the
SPACE FOR FIXING
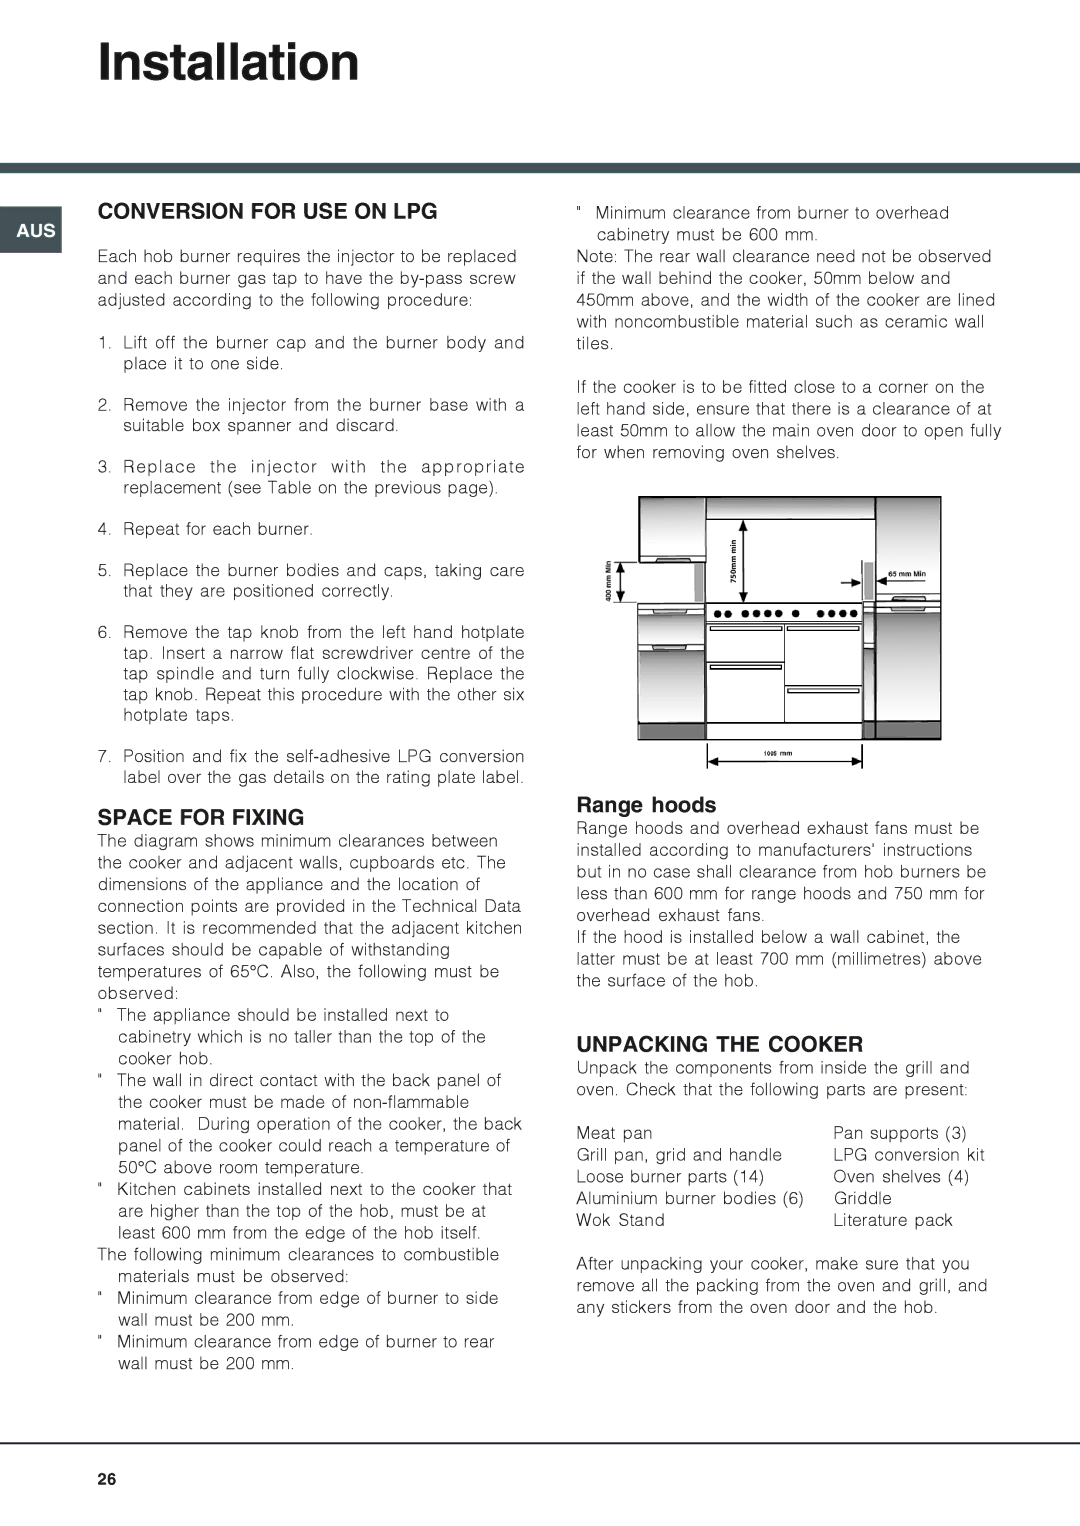
The diagram shows minimum clearances between the cooker and adjacent walls, cupboards etc. The dimensions of the appliance and the location of connection points are provided in the Technical Data section. It is recommended that the adjacent kitchen surfaces should be capable of withstanding temperatures of 65°C. Also, the following must be observed:
"The appliance should be installed next to cabinetry which is no taller than the top of the cooker hob.
"The wall in direct contact with the back panel of the cooker must be made of
"Kitchen cabinets installed next to the cooker that
are higher than the top of the hob, must be at least 600 mm from the edge of the hob itself.
The following minimum clearances to combustible materials must be observed:
"Minimum clearance from edge of burner to side wall must be 200 mm.
"Minimum clearance from edge of burner to rear wall must be 200 mm.
" Minimum clearance from burner to overhead cabinetry must be 600 mm.
Note: The rear wall clearance need not be observed if the wall behind the cooker, 50mm below and 450mm above, and the width of the cooker are lined with noncombustible material such as ceramic wall tiles.
If the cooker is to be fitted close to a corner on the left hand side, ensure that there is a clearance of at least 50mm to allow the main oven door to open fully for when removing oven shelves.
750mm min
Range hoods
Range hoods and overhead exhaust fans must be installed according to manufacturers' instructions but in no case shall clearance from hob burners be less than 600 mm for range hoods and 750 mm for overhead exhaust fans.
If the hood is installed below a wall cabinet, the latter must be at least 700 mm (millimetres) above the surface of the hob.
UNPACKING THE COOKER
Unpack the components from inside the grill and oven. Check that the following parts are present:
Meat pan | Pan supports (3) |
Grill pan, grid and handle | LPG conversion kit |
Loose burner parts (14) | Oven shelves (4) |
Aluminium burner bodies (6) | Griddle |
Wok Stand | Literature pack |
After unpacking your cooker, make sure that you remove all the packing from the oven and grill, and any stickers from the oven door and the hob.
26