Installation
Transit packing
After removing the packing, check the appliance for damage. If you have any doubts do not use the washer and call a quali- fied technician. Keep the packaging components (plastic bags, polyester foam, nails etc.) out of the reach of children since they could be dangerous.The interior of the washer, has an oscillating unit which is fixed on the back by 3 screws during transport (fig. 3). Before starting up the washer, release the unit, by unscrewing the 3 screws. Seal the screw holes with the plastic plugs supplied with the appliance.
Fig. 3 | Fig. 4 |
Levelling
The washer must be perfectly levelled.To level the appliance, only the front feet need to be adjusted (see fig. 4); remember that the inclination of the working surface must not be more than 2 degrees. If the washer is installed on a carpeted floor, check that there is sufficient ventilation space between the floor and the bottom of the washer.
Water supply
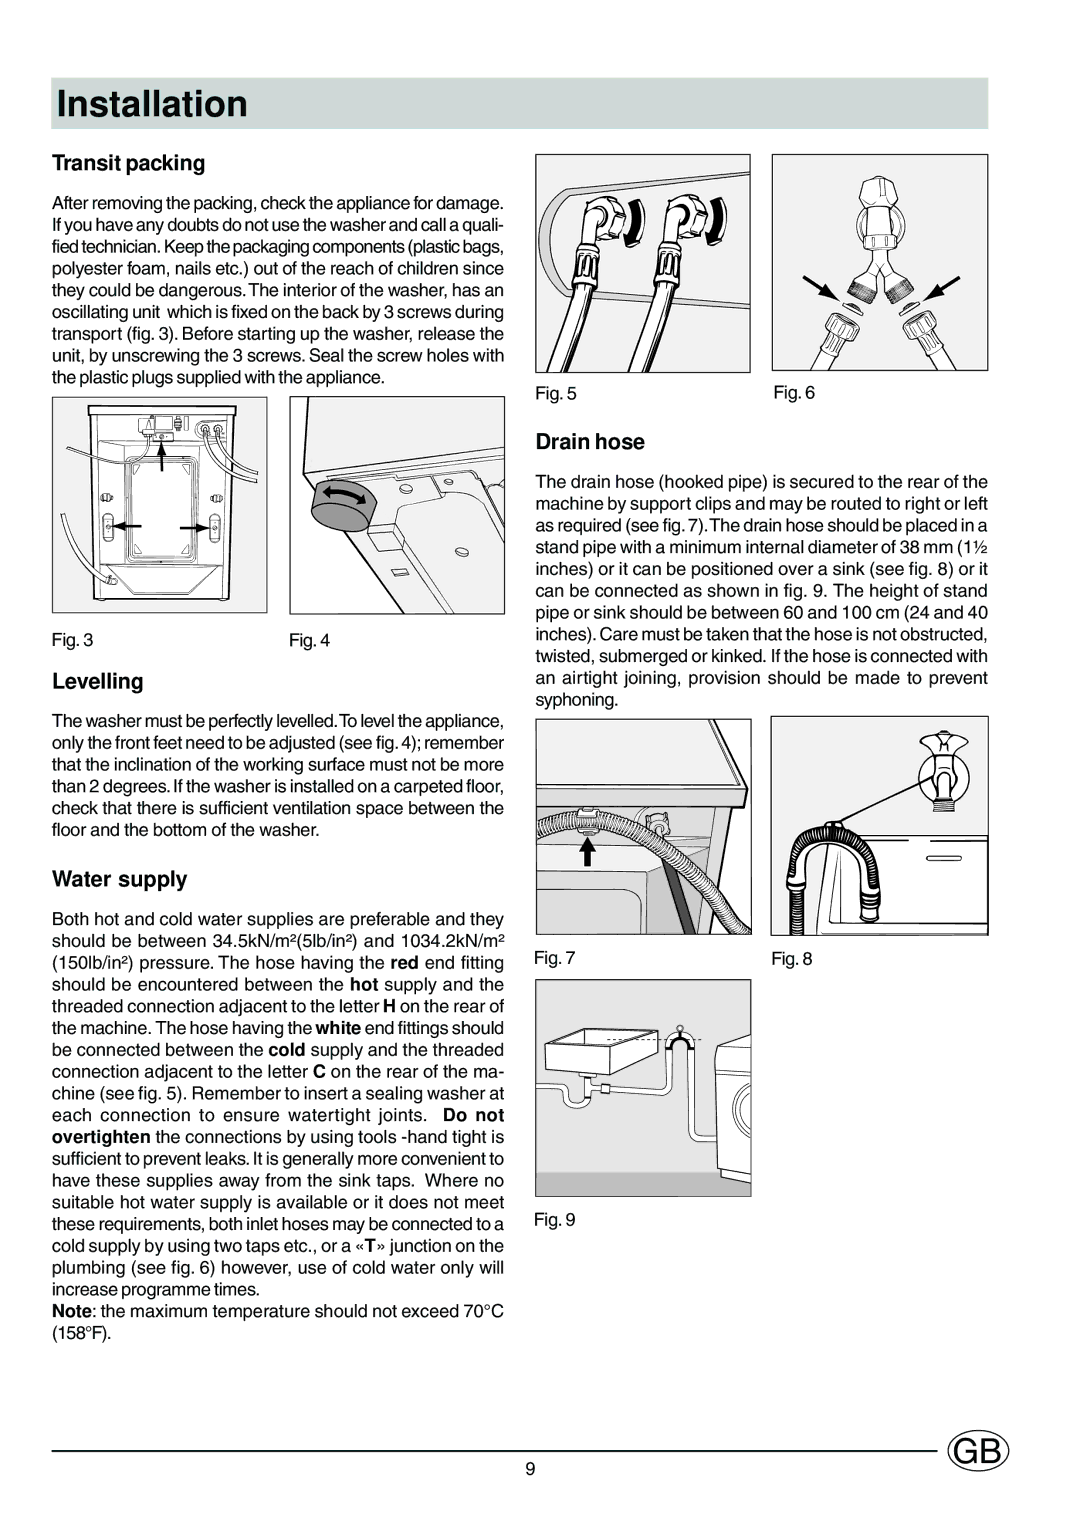
Both hot and cold water supplies are preferable and they should be between 34.5kN/m²(5lb/in²) and 1034.2kN/m² (150lb/in²) pressure. The hose having the red end fitting should be encountered between the hot supply and the threaded connection adjacent to the letter H on the rear of the machine. The hose having the white end fittings should be connected between the cold supply and the threaded connection adjacent to the letter C on the rear of the ma- chine (see fig. 5). Remember to insert a sealing washer at each connection to ensure watertight joints. Do not overtighten the connections by using tools
Note: the maximum temperature should not exceed 70°C (158°F).
Fig. 5 | Fig. 6 |
Drain hose
The drain hose (hooked pipe) is secured to the rear of the machine by support clips and may be routed to right or left as required (see fig. 7).The drain hose should be placed in a stand pipe with a minimum internal diameter of 38 mm (1½ inches) or it can be positioned over a sink (see fig. 8) or it can be connected as shown in fig. 9. The height of stand pipe or sink should be between 60 and 100 cm (24 and 40 inches). Care must be taken that the hose is not obstructed, twisted, submerged or kinked. If the hose is connected with an airtight joining, provision should be made to prevent syphoning.
Fig. 7 | Fig. 8 |
Fig. 9
9
GB