Step 3. Insert the 1155-Pin CPU:
Step 3-1. Hold the CPU by the edge where is marked with black line.
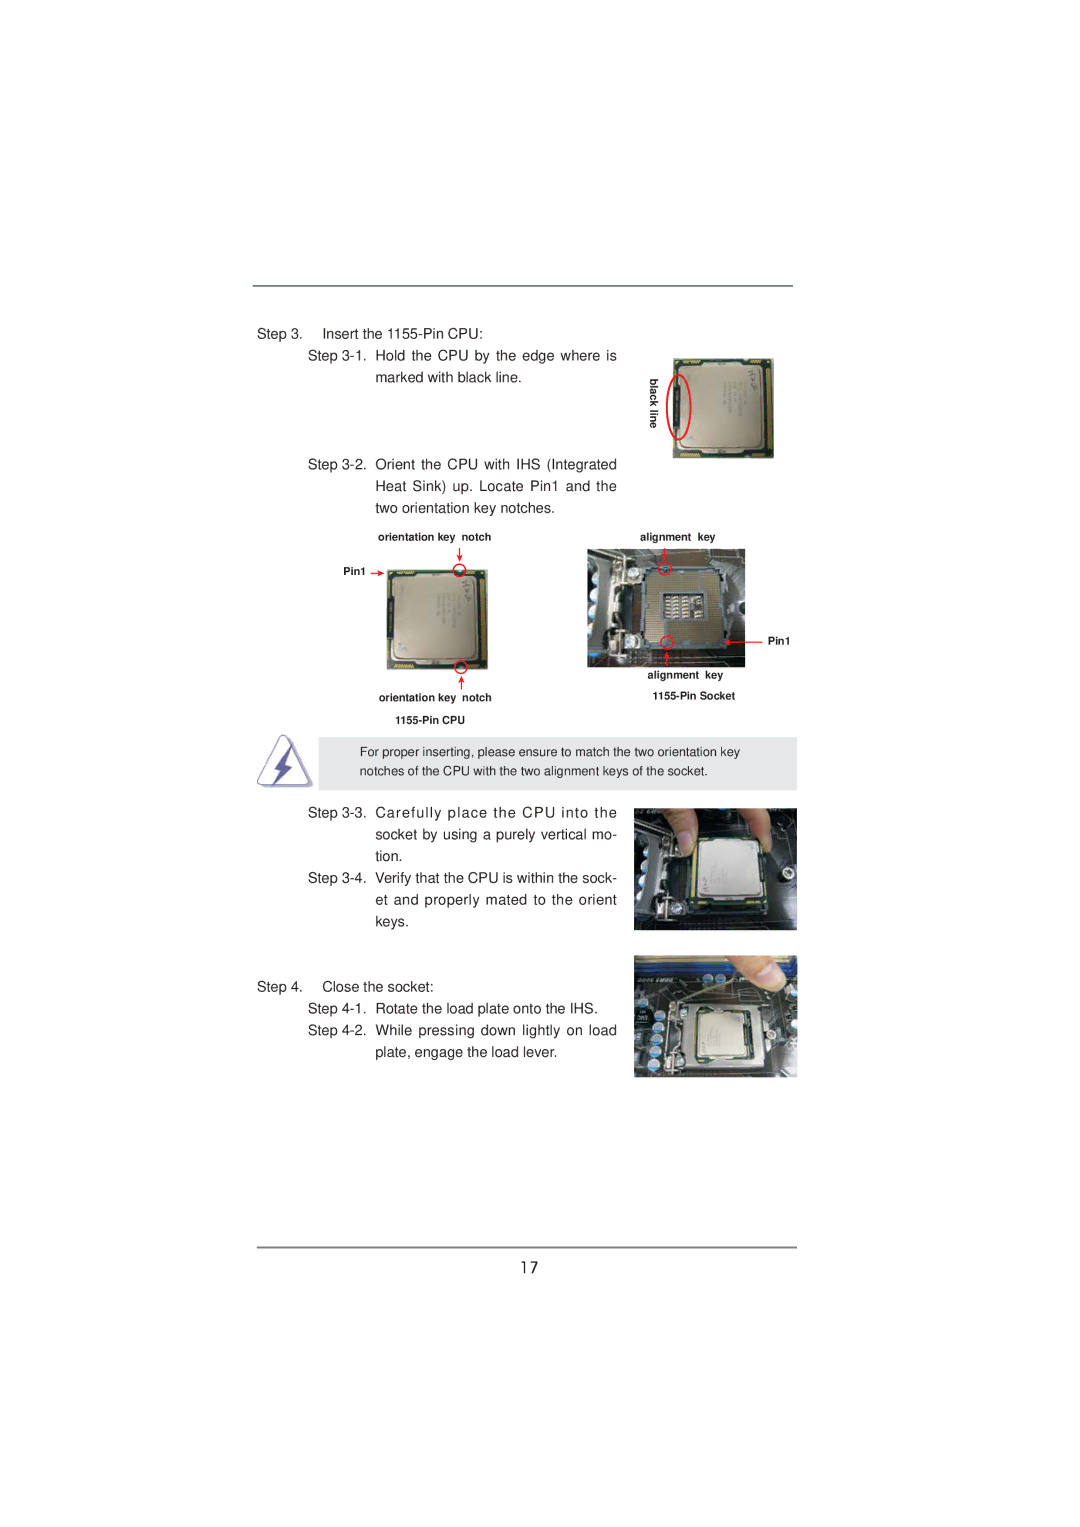
Step 3-2. Orient the CPU with IHS (Integrated Heat Sink) up. Locate Pin1 and the two orientation key notches.
orientation key notch
Pin1 
orientation key notch 1155-Pin CPU
black line
alignment key
Pin1
alignment key
1155-Pin Socket
For proper inserting, please ensure to match the two orientation key notches of the CPU with the two alignment keys of the socket.
Step 3-3. Carefully place the CPU into the socket by using a purely vertical mo- tion.
Step 3-4. Verify that the CPU is within the sock- et and properly mated to the orient keys.
Step 4. Close the socket:
Step 4-1. Rotate the load plate onto the IHS. Step 4-2. While pressing down lightly on load
plate, engage the load lever.