2.9 ASRock Smart Remote Installation Guide
ASRock Smart Remote is only used for ASRock motherboards with a CIR header. Please refer to the procedures below for the quick installation and usage of ASRock Smart Remote.
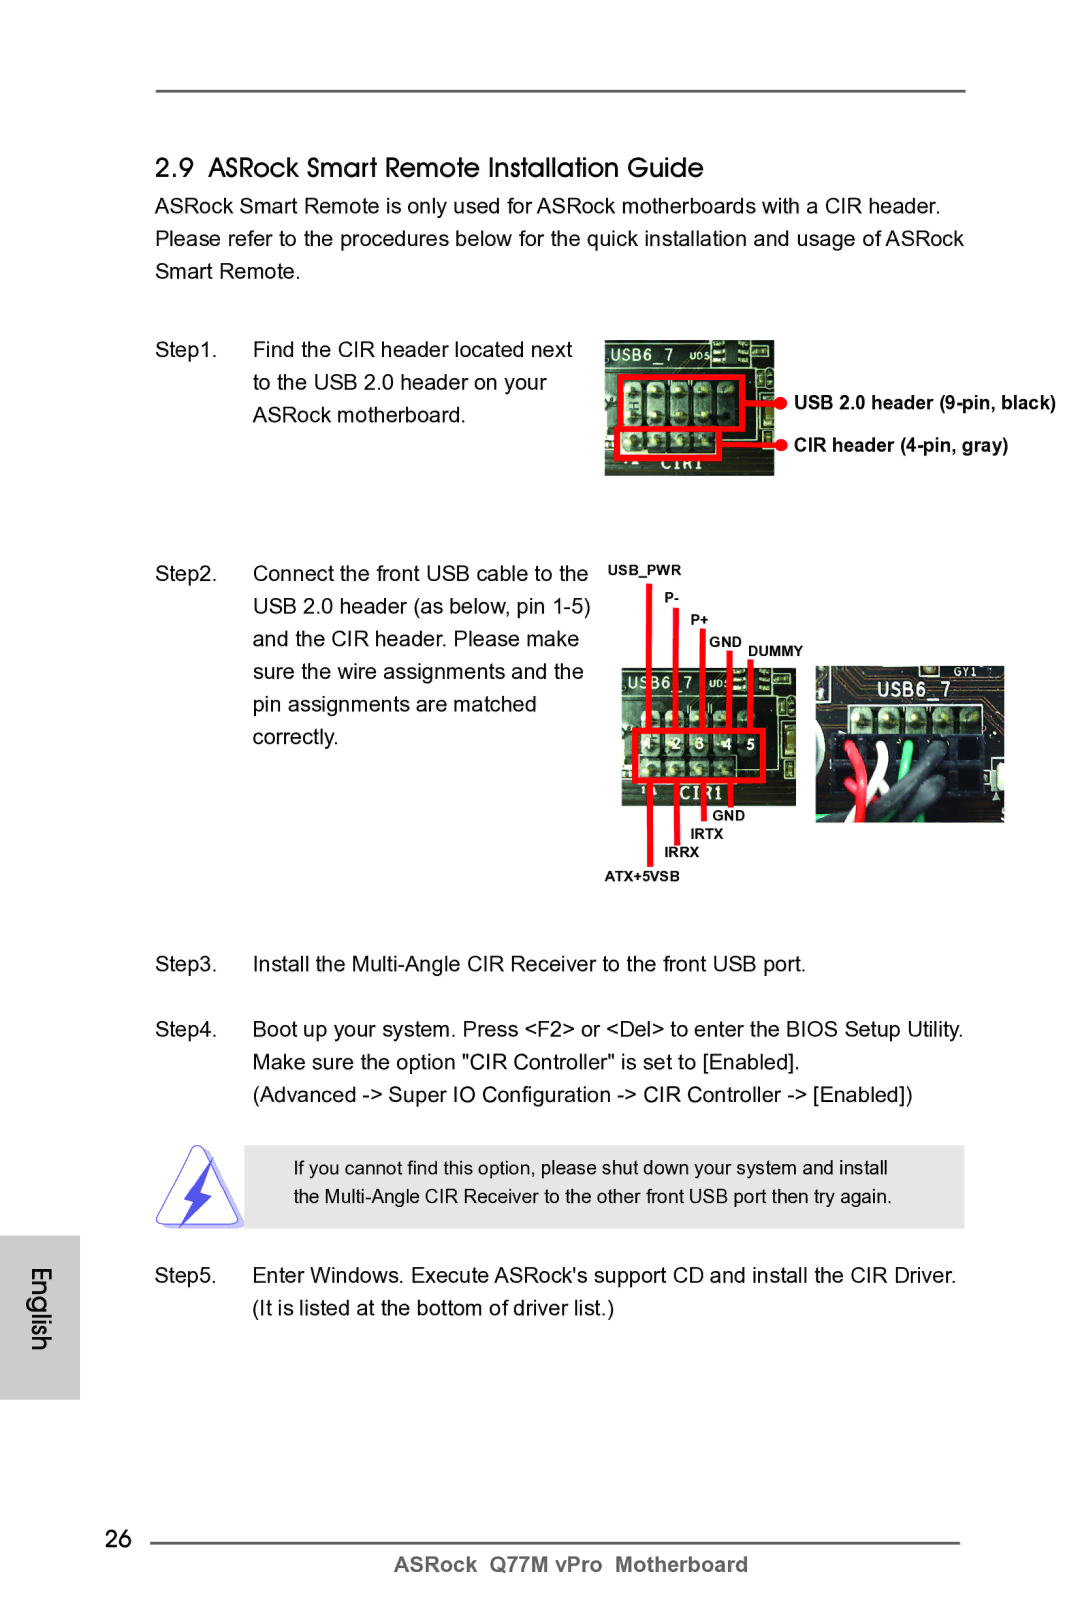
Step1. Find the CIR header located next to the USB 2.0 header on your ASRock motherboard.
Step2. Connect the front USB cable to the USB 2.0 header (as below, pin
USB 2.0 header
CIR header
USB_PWR
P-
P+
GND DUMMY
English
| GND |
| IRTX |
| IRRX |
| ATX+5VSB |
Step3. | Install the |
Step4. | Boot up your system. Press <F2> or <Del> to enter the BIOS Setup Utility. |
| Make sure the option "CIR Controller" is set to [Enabled]. |
| (Advanced |
|
|
| If you cannot find this option, please shut down your system and install |
| the |
|
|
Step5. | Enter Windows. Execute ASRock's support CD and install the CIR Driver. |
| (It is listed at the bottom of driver list.) |
26
ASRock Q77M vPro Motherboard