Network Connection
Configuring a wireless network connection
1.Click the wireless network icon with an orange star![]() in the Windows® taskbar.
in the Windows® taskbar.
If the wireless connection icon does not show in the Notification
area. Activate the wireless LAN function by pressing ![]() +
+ ![]() (<Fn> + <F2>) before configuring a wireless network connection.
(<Fn> + <F2>) before configuring a wireless network connection.
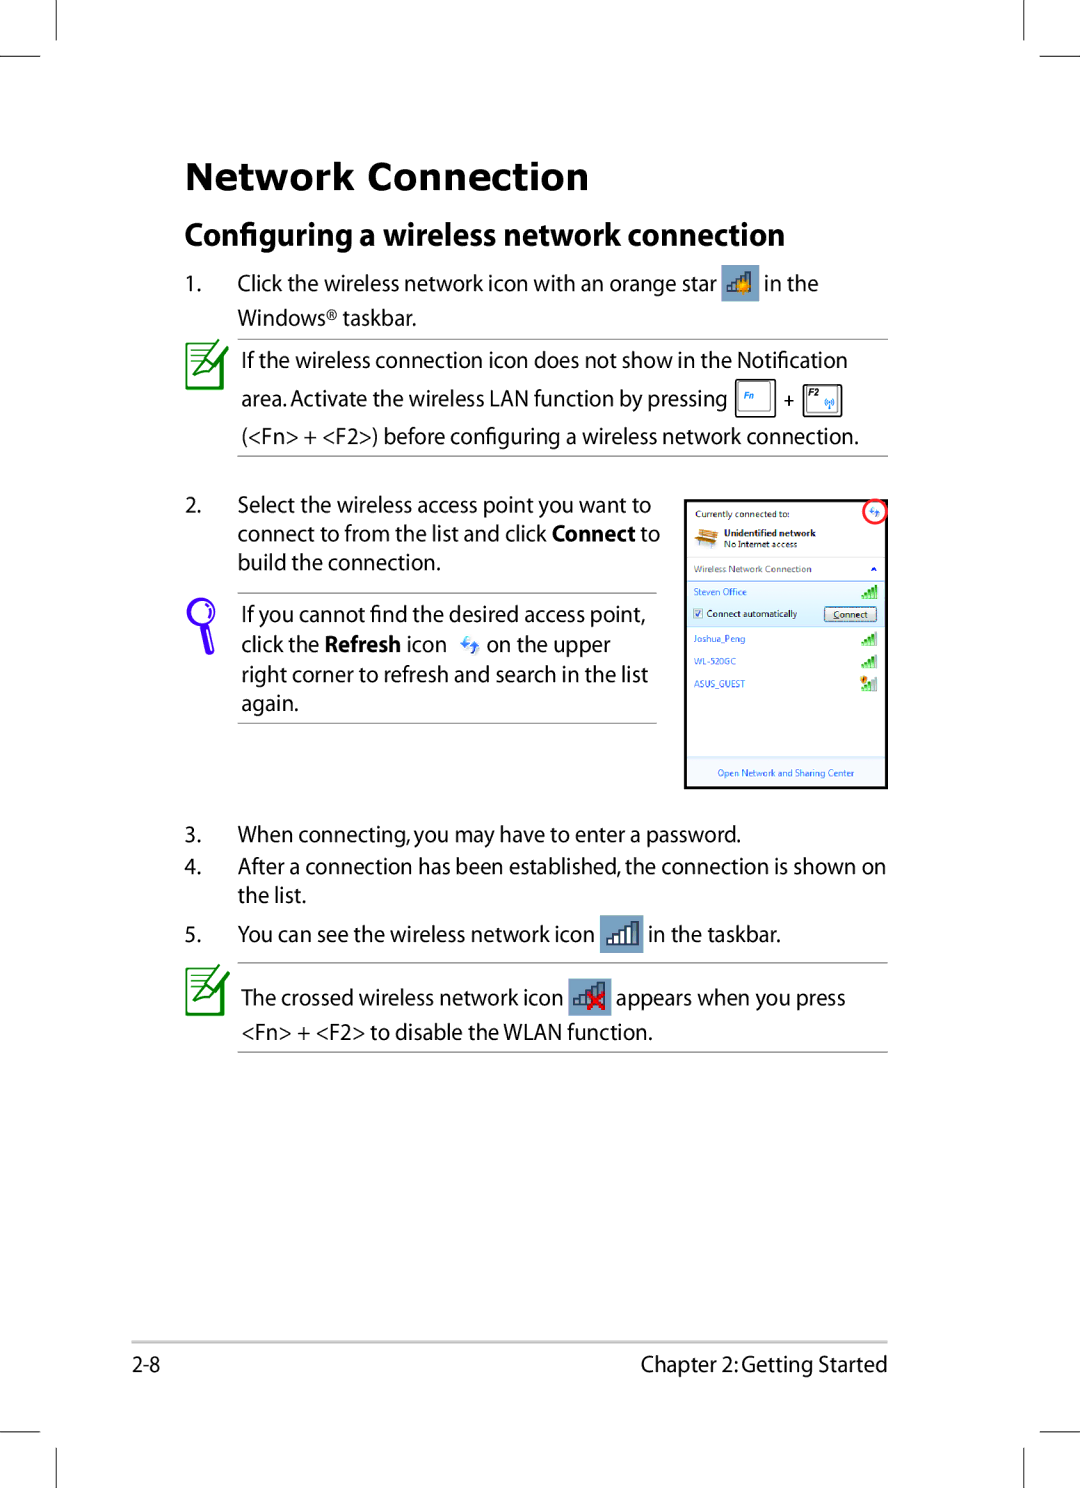
2.Select the wireless access point you want to connect to from the list and click Connect to build the connection.
If you cannot find the desired access point, click the Refresh icon ![]() on the upper right corner to refresh and search in the list again.
on the upper right corner to refresh and search in the list again.
3.When connecting, you may have to enter a password.
4.After a connection has been established, the connection is shown on the list.
5.You can see the wireless network icon![]() in the taskbar.
in the taskbar.
The crossed wireless network icon![]() appears when you press <Fn> + <F2> to disable the WLAN function.
appears when you press <Fn> + <F2> to disable the WLAN function.
Chapter 2: Getting Started |