4Recording Selector button
Click this button to select the path/source you are going to record. Please note that the recording function on Windows is a
5Recording Volume Slider
Drag this slider down to decrease the recording volume; drag up to increase the recording volume. The
6 Left/Right Balance
This horizontal slider controls the volume between the left and right channels.
| 7 |
| Reset |
| Reset all volume controls to the default settings |
| |
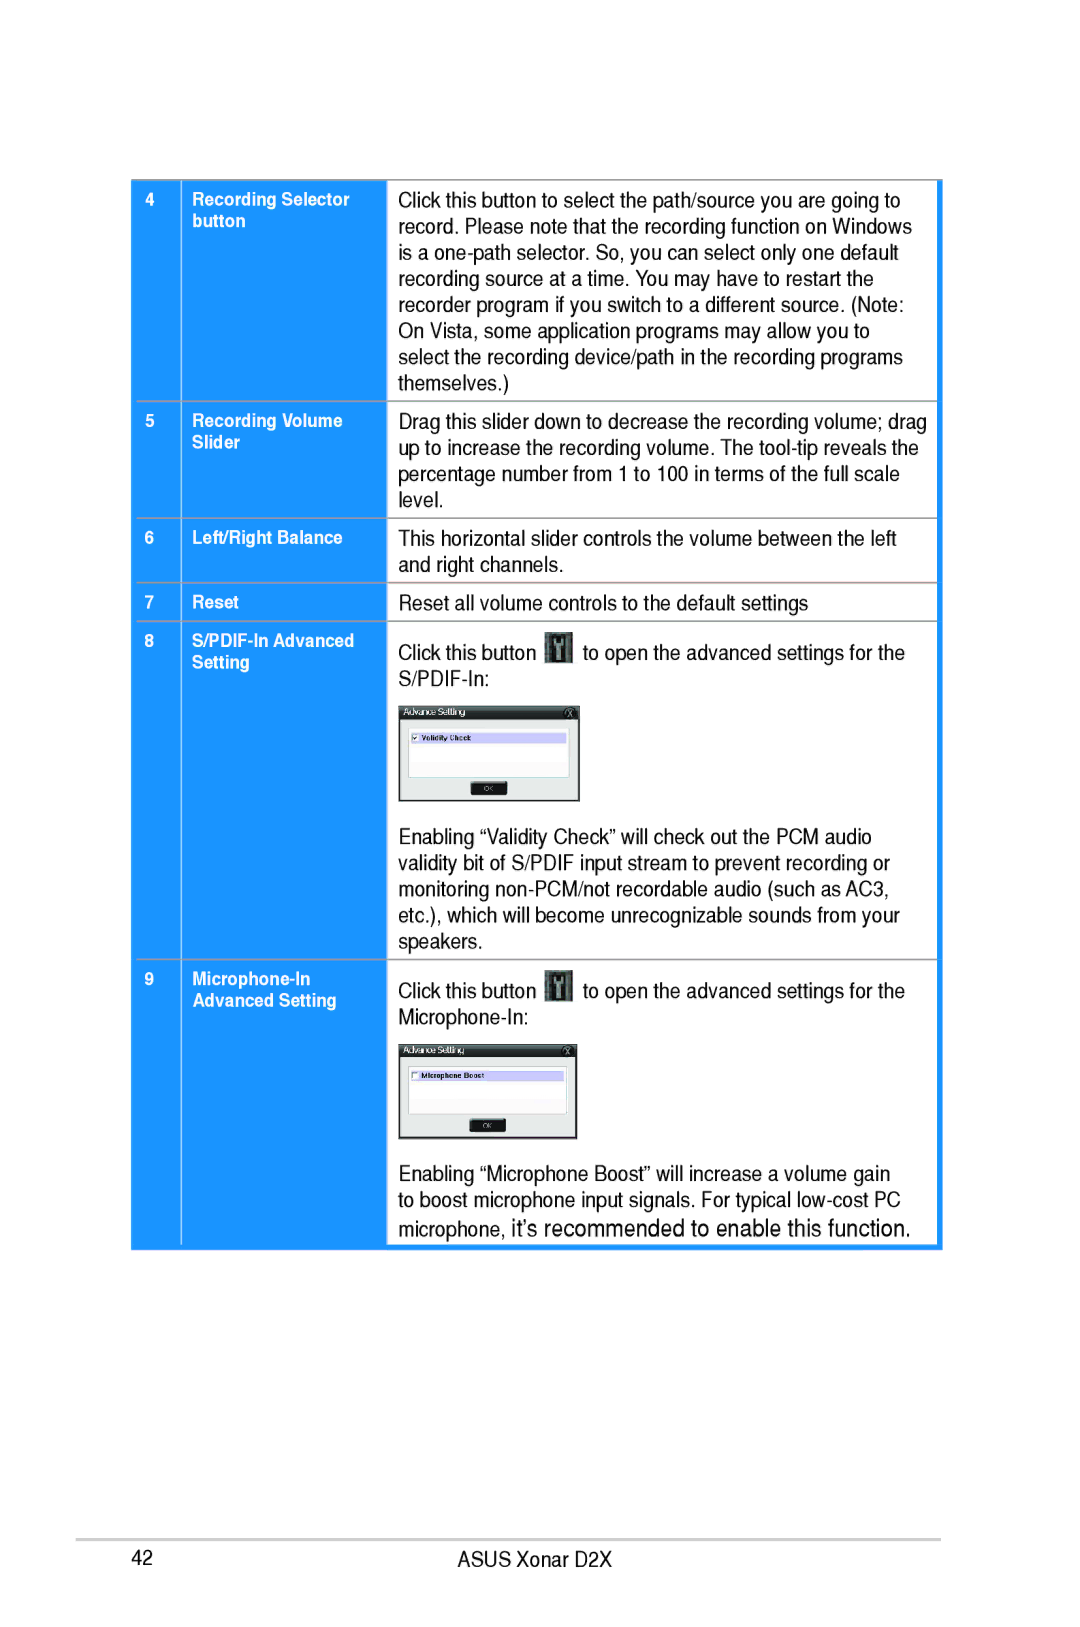
| 8 |
|
| Click this button | to open the advanced settings for the |
| |
|
|
|
| ||||
|
|
| Setting |
|
| ||
|
|
|
|
| |||
|
|
|
|
|
|
|
|
Enabling “Validity Check” will check out the PCM audio validity bit of S/PDIF input stream to prevent recording or monitoring
9
Click this button ![]() to open the advanced settings for the
to open the advanced settings for the
Enabling “Microphone Boost” will increase a volume gain to boost microphone input signals. For typical
microphone, it’s recommended to enable this function.
42 | ASUS Xonar D2X |