972_00_1ATT BOOK 12/4/01 1:37 PM Page 6
INSTALLATION
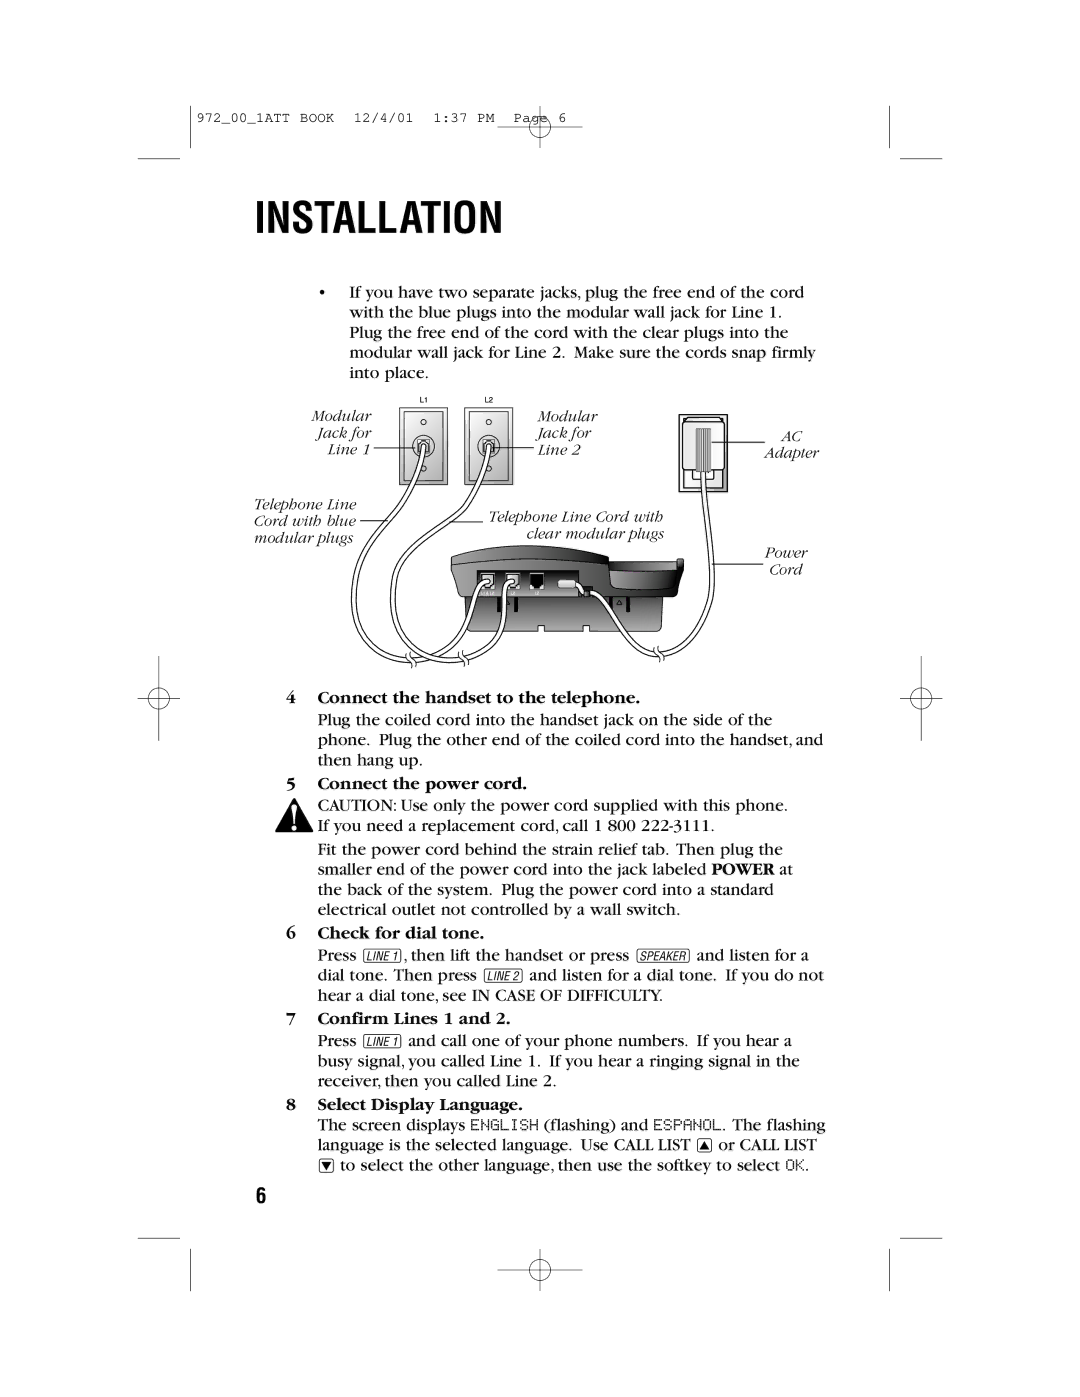
•If you have two separate jacks, plug the free end of the cord with the blue plugs into the modular wall jack for Line 1. Plug the free end of the cord with the clear plugs into the modular wall jack for Line 2. Make sure the cords snap firmly into place.
Modular |
Jack for |
Line 1 |
Telephone Line Cord with blue modular plugs
Modular |
Jack for |
Line 2 |
Telephone Line Cord with clear modular plugs
AC
Adapter
Power Cord
4Connect the handset to the telephone.
Plug the coiled cord into the handset jack on the side of the phone. Plug the other end of the coiled cord into the handset, and then hang up.
5Connect the power cord.
CAUTION: Use only the power cord supplied with this phone. If you need a replacement cord, call 1 800
Fit the power cord behind the strain relief tab. Then plug the smaller end of the power cord into the jack labeled POWER at the back of the system. Plug the power cord into a standard electrical outlet not controlled by a wall switch.
6Check for dial tone.
Press L, then lift the handset or press S and listen for a dial tone. Then press l and listen for a dial tone. If you do not hear a dial tone, see IN CASE OF DIFFICULTY.
7Confirm Lines 1 and 2.
Press L and call one of your phone numbers. If you hear a busy signal, you called Line 1. If you hear a ringing signal in the receiver, then you called Line 2.
8Select Display Language.
The screen displays ENGLISH (flashing) and ESPANOL. The flashing language is the selected language. Use CALL LIST + or CALL LIST - to select the other language, then use the softkey to select OK.
6