Trigger Setup
Exit
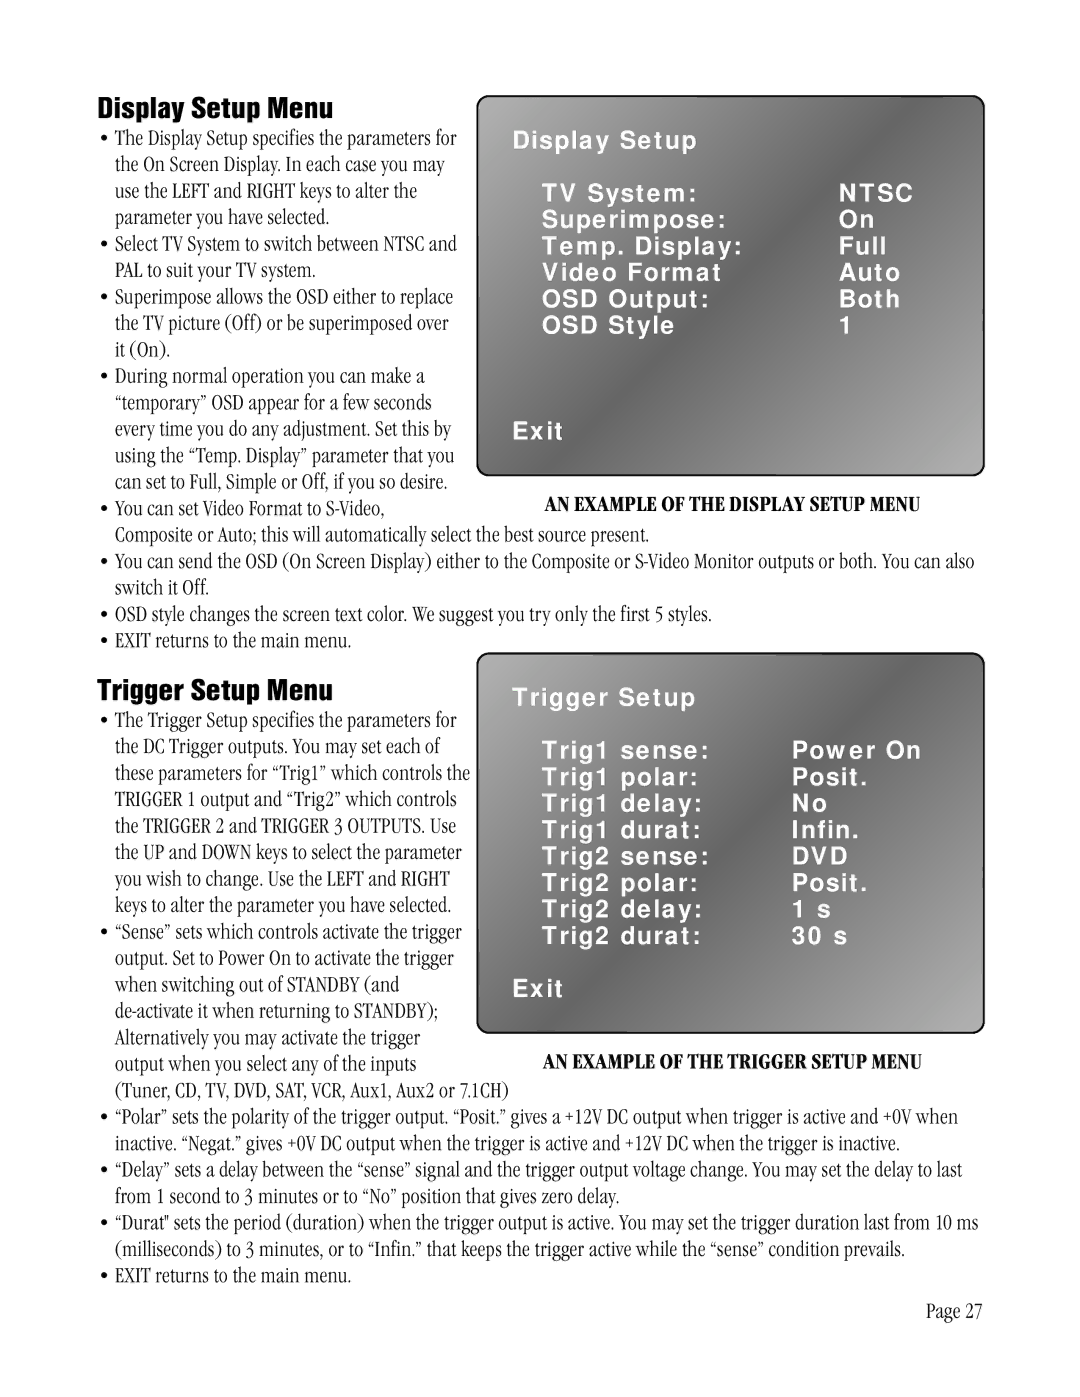
AN EXAMPLE OF THE DISPLAY SETUP MENU

Display Setup Menu

• The Display Setup specifies the parameters for

Display Setup


the On Screen Display. In each case you may

TV System:

NTSC

use the LEFT and RIGHT keys to alter the

parameter you have selected.

Superimpose:

On

• Select TV System to switch between NTSC and

Temp. Display:

Full

PAL to suit your TV system.

Video Format

Auto

• Superimpose allows the OSD either to replace

OSD Output:

Both

the TV picture (Off) or be superimposed over

OSD Style

1

it (On).


• During normal operation you can make a


“temporary” OSD appear for a few seconds


every time you do any adjustment. Set this by using the “Temp. Display” parameter that you can set to Full, Simple or Off, if you so desire.

• You can set Video Format to S-Video,

Composite or Auto; this will automatically select the best source present.

You can send the OSD (On Screen Display) either to the Composite or S-Video Monitor outputs or both. You can also switch it Off.

OSD style changes the screen text color. We suggest you try only the first 5 styles.

EXIT returns to the main menu.

Trigger Setup Menu

• The Trigger Setup specifies the parameters for

the DC Trigger outputs. You may set each of

Trig1 sense:

Power On

these parameters for “Trig1” which controls the

Trig1 polar:

Posit.

TRIGGER 1 output and “Trig2” which controls

Trig1 delay:

No

the TRIGGER 2 and TRIGGER 3 OUTPUTS. Use

Trig1 durat:

Infin.

the UP and DOWN keys to select the parameter

Trig2 sense:

DVD

you wish to change. Use the LEFT and RIGHT

Trig2 polar:

Posit.

keys to alter the parameter you have selected.

Trig2 delay:

1 s

• “Sense” sets which controls activate the trigger

Trig2 durat:

30 s

output. Set to Power On to activate the trigger


when switching out of STANDBY (and

Exit

de-activate it when returning to STANDBY);


Alternatively you may activate the trigger

AN EXAMPLE OF THE TRIGGER SETUP MENU

output when you select any of the inputs

(Tuner, CD, TV, DVD, SAT, VCR, Aux1, Aux2 or 7.1CH)


“Polar” sets the polarity of the trigger output. “Posit.” gives a +12V DC output when trigger is active and +0V when inactive. “Negat.” gives +0V DC output when the trigger is active and +12V DC when the trigger is inactive.

“Delay” sets a delay between the “sense” signal and the trigger output voltage change. You may set the delay to last from 1 second to 3 minutes or to “No” position that gives zero delay.

“Durat" sets the period (duration) when the trigger output is active. You may set the trigger duration last from 10 ms (milliseconds) to 3 minutes, or to “Infin.” that keeps the trigger active while the “sense” condition prevails.

EXIT returns to the main menu.

Page 27

Page 27
Image 27
ATI Technologies ATP 8500 manual Display Setup Menu, Trigger Setup Menu

ATP 8500 specifications

The ATI Technologies ATP 8500 is a significant graphics card that made its mark in the early 2000s, particularly among gamers and graphic designers looking for advanced performance at an affordable price point. Released as part of ATI's Radeon series, the ATP 8500 was lauded for its innovative technologies that set it apart from its competitors.

One of the primary features of the ATP 8500 is its support for DirectX 8, allowing it to render stunning graphics with realistic textures and effects. This capability was especially important during the early days of 3D gaming, where the demand for improved visuals was rising. The card utilized a 0.15-micron manufacturing process, which enabled better power efficiency and performance compared to its predecessors.

The ATP 8500 comes with 64MB or 128MB of DDR memory, offering respectable memory bandwidth speeds that were well-suited for most games at the time. This memory design facilitated quicker data access and improved overall rendering speeds, which enhanced the gaming experience without causing significant frame rate drops.

Another notable feature of the ATP 8500 is its implementation of the HyperZ technology. This was a revolutionary technology that improved memory bandwidth efficiency through techniques like occlusion culling and fast Z-buffering. As a result, the graphics card was capable of efficiently rendering complex scenes without overloading its memory resources, which was crucial for maintaining performance in graphically intense situations.

The card also introduced Adaptive Anti-Aliasing, which helped to smooth out jagged edges in graphics, creating a more visually appealing experience. This feature made it easier for gamers to immerse themselves in their virtual worlds, as the overall graphical fidelity was significantly enhanced.

In addition to its gaming capabilities, the ATI Technologies ATP 8500 also catered to multimedia applications. It supported video playback and included features for high-quality rendering of movies and animation, further broadening its appeal beyond just the gaming community.

In conclusion, the ATI Technologies ATP 8500 was a remarkable graphics card that combined cutting-edge technology with impressive performance characteristics. Its support for advanced graphics rendering, efficient memory handling, and multimedia capabilities made it a popular choice for users looking for a balance of performance and value during its time. The legacy of the ATP 8500 paved the way for future innovations in graphics technology, and it remains a memorable part of ATI's history in the competitive graphics card market.