ADJUSTING
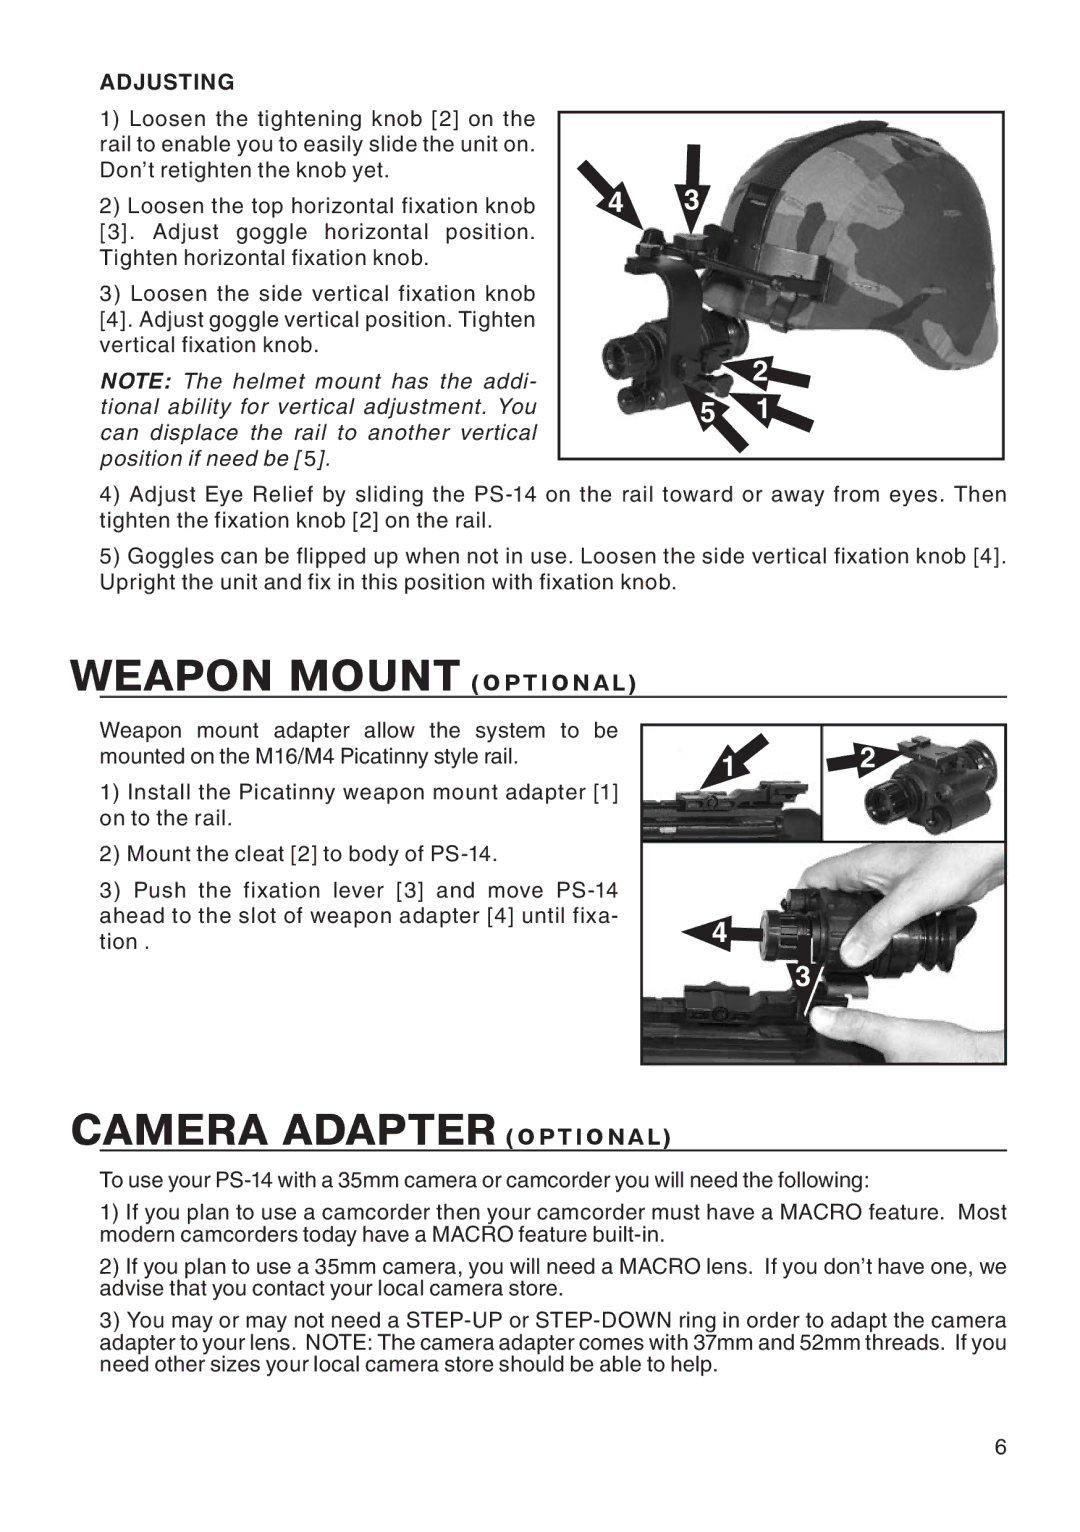
1)Loosen the tightening knob [2] on the rail to enable you to easily slide the unit on. Don’t retighten the knob yet.
2)Loosen the top horizontal fixation knob
[3]. Adjust goggle horizontal position. Tighten horizontal fixation knob.
3)Loosen the side vertical fixation knob [4]. Adjust goggle vertical position. Tighten vertical fixation knob.
NOTE: The helmet mount has the addi- tional ability for vertical adjustment. You can displace the rail to another vertical position if need be [ 5].
43
| 2 |
5 | 1 |
4)Adjust Eye Relief by sliding the
5)Goggles can be flipped up when not in use. Loosen the side vertical fixation knob [4]. Upright the unit and fix in this position with fixation knob.
WEAPON MOUNT (OPTIONAL)
Weapon mount adapter allow the system to be mounted on the M16/M4 Picatinny style rail.
1)Install the Picatinny weapon mount adapter [1] on to the rail.
2)Mount the cleat [2] to body of
3)Push the fixation lever [3] and move
12
4 3
CAMERA ADAPTER (OPTIONAL)
To use your
1)If you plan to use a camcorder then your camcorder must have a MACRO feature. Most modern camcorders today have a MACRO feature
2)If you plan to use a 35mm camera, you will need a MACRO lens. If you don’t have one, we advise that you contact your local camera store.
3)You may or may not need a
6
