9
3000 Series Installation and Operation
System Operation
Turn the receiver on by pressing in the Power switch. Do not switch on the transmitter yet.
The Alert indicator and the LCD window will light up; the normal- operation LCD display will appear after
Selecting/Setting Frequency
Selection of the desired operating frequency is made through the function menus. It’s usually best to start by setting the receiver’s frequency, to determine there is no local interference on that frequency. Then, always make certain to set the transmitter to the receiver’s exact frequency. The receiver’s unique Digital Tone Lock system squelches the audio only, permitting any RF energy on the frequency to show on the “RF”
Note: It is often convenient to start with the
Using the Automatic Scan Function to Set Receiver Frequency
1. | Press the Mode/Set button once; then the “RF” and “AF” scales will |
| disappear from the window and only the frequency will appear in |
| the LCD window. (The receiver is now in the Menu mode.) See |
| Figure |
2. | Use the Up arrow button to reach Group 1 through Group 9. Press |
| the Mode/Set button once to select one of these nine scan groups. |
| The lowest frequency in the selected scan group will appear in the |
| LCD window. |
3. | Press the Up arrow button to begin the scan. “G SCAN” will flash in |
Setting Receiver Frequency Manually
1.Press the Mode/Set button once; then only the frequency will appear in the LCD window. (The receiver is now in the Menu mode.) See Figure
2.Press the Mode/Set button again; the Alert light will come on and
the first three digits of the frequency will flash in the window. (The receiver is now in the Edit mode, Fig.
3.Use the Up/Down arrow buttons to change the first three digits (MHz) to the desired frequency. Choose a frequency appropriate for your area, avoiding frequencies with active TV channels. Press either arrow for single steps, or hold down either arrow for rapid cycling through the band. Frequencies “wrap around” to the other end of the range when the top or bottom of the band is reached.
4.Press the Mode/Set button once to set the first three digits to the desired frequency.
5.Use the Up/Down arrow buttons to change the second three digits (kHz) to the desired frequency. Again, be certain to choose a frequency appropriate for your area, avoiding frequencies with active TV channels.
6.To activate this frequency selection, press and hold the Mode/Set button until the word “STORED” appears in the receiver’s window. (If you do not wish to complete this particular selection, just press the Mode/Set button once. The word “ESCAPE” will appear briefly in the window and the receiver will return to the Menu mode.)
7.When finished entering a frequency, press the Down arrow button once to move to “QUIT”. Then press the Mode/Set button once to exit the menu. The “RF” and “AF” scales will reappear in the window, indicating the return to normal operation.
Transmitter On…
Turn on the transmitter by pressing and holding the Power/Mute button (Fig. E/F) for a second or two, until the green power indicator and the LCD window have come on.
the LCD window. |
4. The first available frequency will flash in the LCD window. To activate this frequency selection, press and hold the Mode/Set button until the word “STORED” appears in the LCD window. (If you do not wish to complete this particular selection, just press the Mode/Set button once. The word “ESCAPE” will appear briefly in the window and the receiver will return to the Menu mode.)
5. After you have activated your frequency selection (step 4), the “RF” |
and “AF” scales will reappear in the window, indicating the return to |
normal operation. |
6. If you are using multiple systems, all frequencies must be selected |
from the same group (Group 1 through Group 9). After completing |
the first receiver’s scan and frequency selection, set the transmitter |
to the same frequency (see Setting Transmitter Frequency |
instructions); leave the transmitter On, and run the next |
receiver’s automatic scan function. Always set a |
pair to the same frequency before using the automatic scan function |
to select a frequency for the next receiver. “End” will show on |
the receiver display when no further usable frequencies remain in |
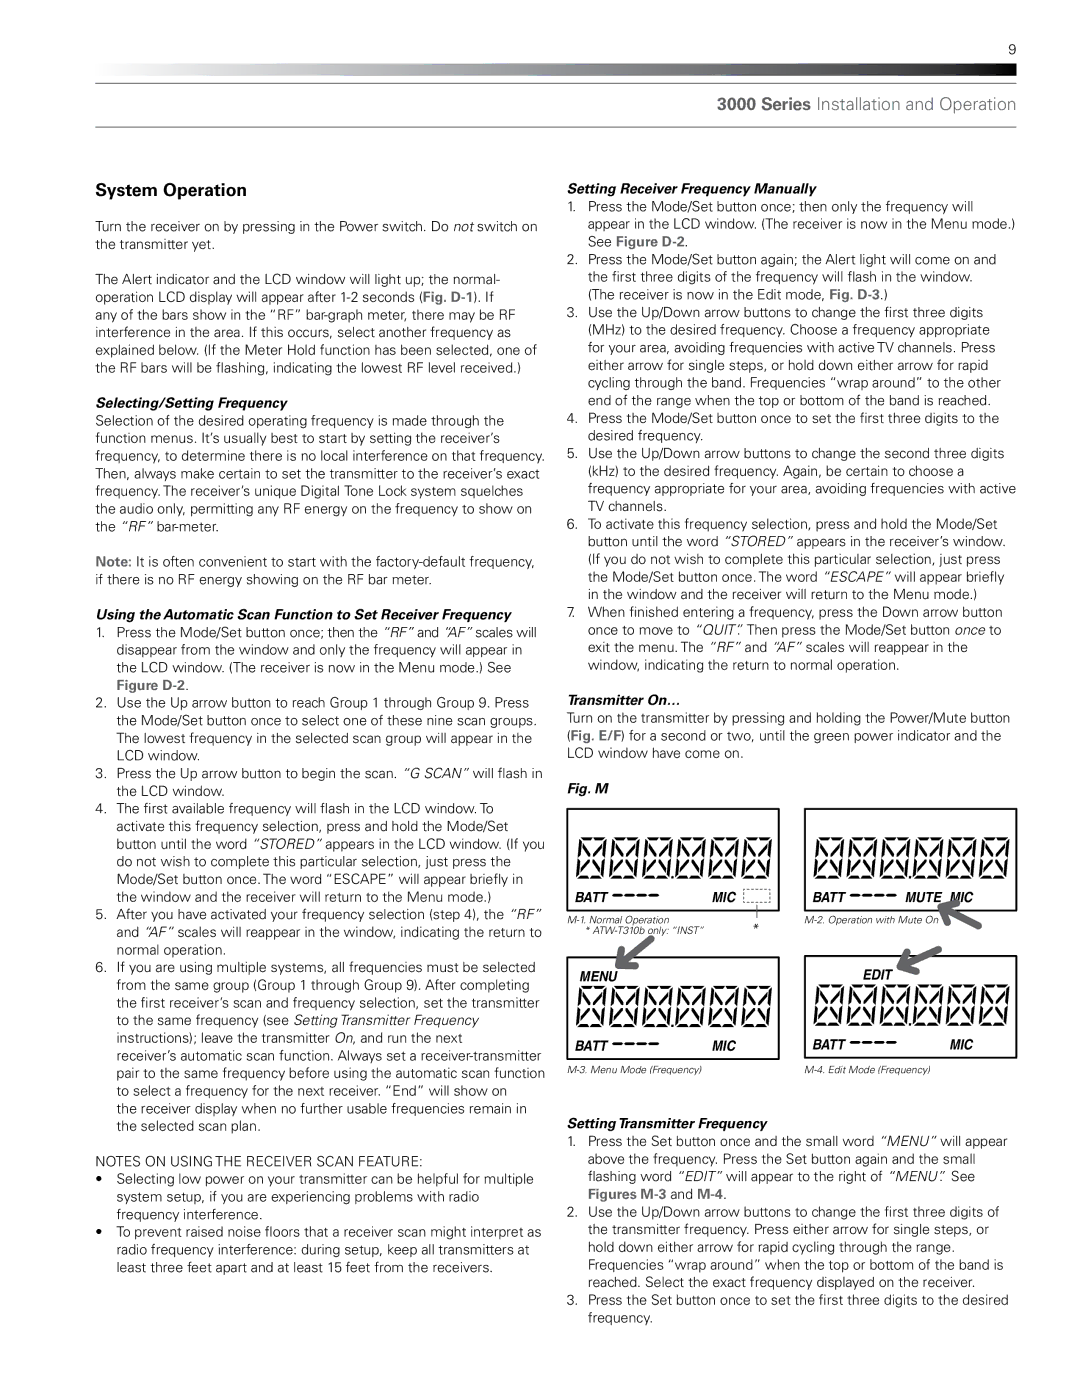
Fig. M
BATT | MIC |
* | |
* |
MENU |
|
BATT | MIC |
BATT | MUTE MIC |
| EDIT |
BATT | MIC |
the selected scan plan. |
NOTES ON USING THE RECEIVER SCAN FEATURE:
•Selecting low power on your transmitter can be helpful for multiple system setup, if you are experiencing problems with radio frequency interference.
•To prevent raised noise floors that a receiver scan might interpret as radio frequency interference: during setup, keep all transmitters at least three feet apart and at least 15 feet from the receivers.
Setting Transmitter Frequency
1.Press the Set button once and the small word “MENU” will appear above the frequency. Press the Set button again and the small
flashing word “EDIT” will appear to the right of “MENU”. See Figures
2.Use the Up/Down arrow buttons to change the first three digits of the transmitter frequency. Press either arrow for single steps, or hold down either arrow for rapid cycling through the range. Frequencies “wrap around” when the top or bottom of the band is reached. Select the exact frequency displayed on the receiver.
3.Press the Set button once to set the first three digits to the desired frequency.