6
3000 Series Installation and Operation
modulation. When the transmitter is
To mute the transmitter (cut off the audio, but continue the RF output), press and release the Power/Mute button once. A small “MUTE” will appear in the LCD window, just below the frequency (Fig.
To
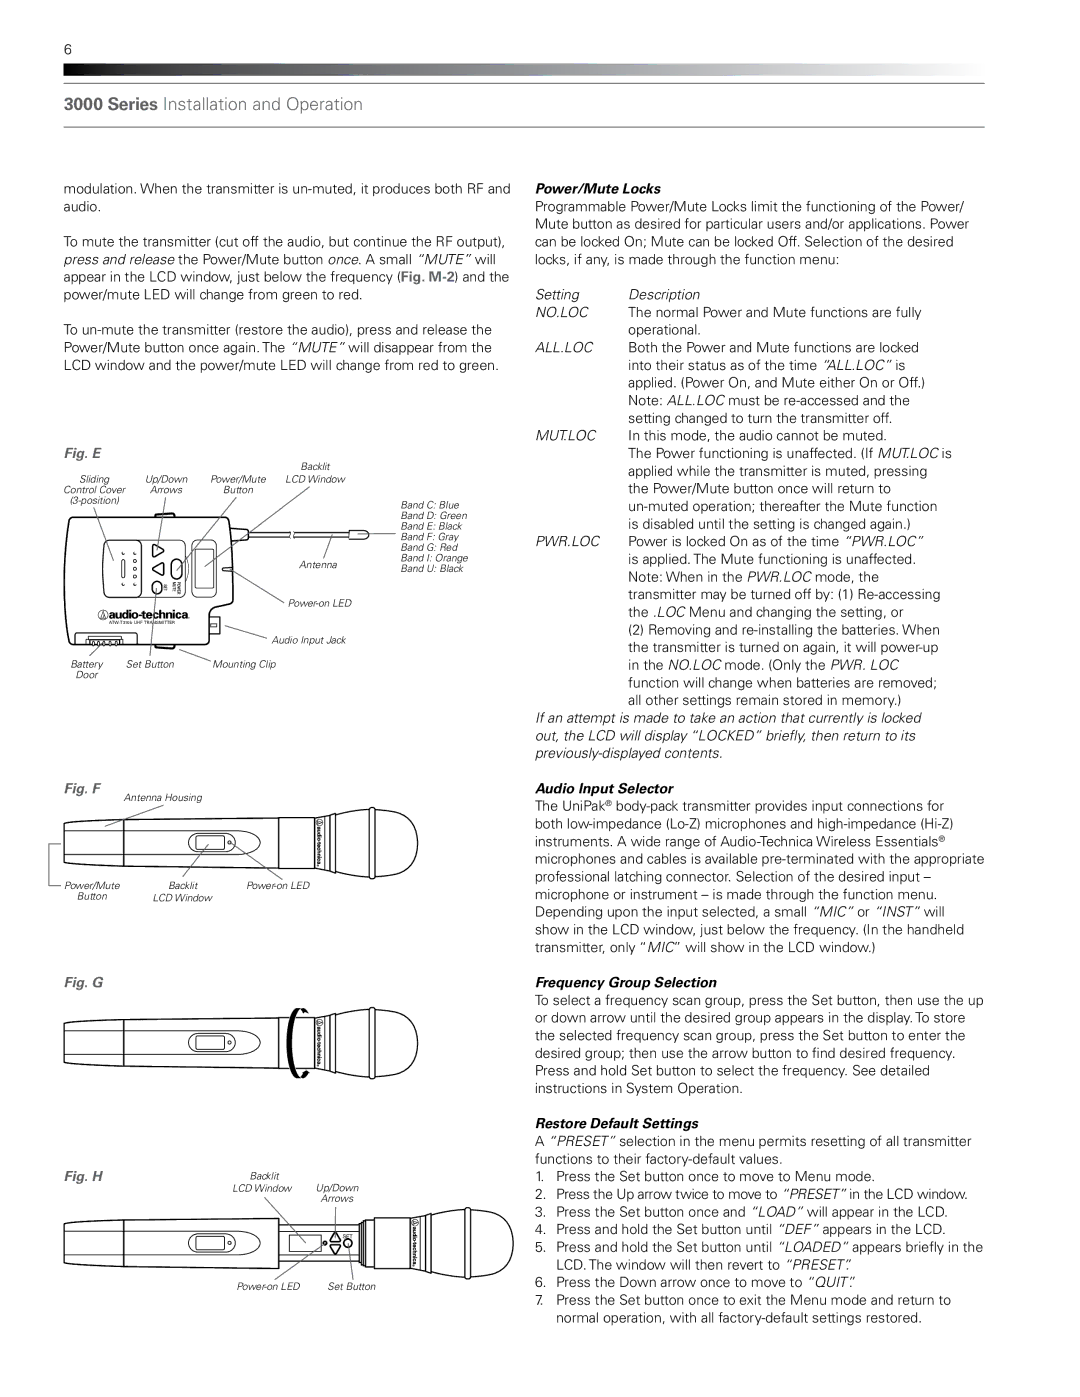
Fig. E
Sliding | Up/Down | Power/Mute | Backlit |
|
LCD Window |
| |||
Control Cover | Arrows | Button |
|
|
|
|
| Band C: Blue | |
|
|
|
| |
|
|
|
| Band D: Green |
|
|
|
| Band E: Black |
|
|
|
| Band F: Gray |
|
|
|
| Band G: Red |
|
|
| Antenna | Band I: Orange |
|
|
| Band U: Black | |
|
|
|
| |
|
|
|
| |
|
|
| ||
|
|
| Audio Input Jack |
|
Battery | Set Button | Mounting Clip |
| |
Door |
|
|
|
|
Fig. F
Antenna Housing
Power/Mute | Backlit | |
Button | LCD Window |
|
Fig. G
Fig. H | Backlit | Up/Down |
| LCD Window | |
|
| Arrows |
|
| SET |
| Set Button |
Power/Mute Locks
Programmable Power/Mute Locks limit the functioning of the Power/ Mute button as desired for particular users and/or applications. Power can be locked On; Mute can be locked Off. Selection of the desired locks, if any, is made through the function menu:
Setting | Description |
NO.LOC | The normal Power and Mute functions are fully |
| operational. |
ALL.LOC | Both the Power and Mute functions are locked |
| into their status as of the time “ALL.LOC” is |
| applied. (Power On, and Mute either On or Off.) |
| Note: ALL.LOC must be |
| setting changed to turn the transmitter off. |
MUT.LOC | In this mode, the audio cannot be muted. |
| The Power functioning is unaffected. (If MUT.LOC is |
| applied while the transmitter is muted, pressing |
| the Power/Mute button once will return to |
| |
| is disabled until the setting is changed again.) |
PWR.LOC | Power is locked On as of the time “PWR.LOC” |
| is applied. The Mute functioning is unaffected. |
| Note: When in the PWR.LOC mode, the |
| transmitter may be turned off by: (1) |
| the .LOC Menu and changing the setting, or |
| (2) Removing and |
| the transmitter is turned on again, it will |
| in the NO.LOC mode. (Only the PWR. LOC |
| function will change when batteries are removed; |
| all other settings remain stored in memory.) |
If an attempt is made to take an action that currently is locked out, the LCD will display “LOCKED” briefly, then return to its
Audio Input Selector
The UniPak®
Frequency Group Selection
To select a frequency scan group, press the Set button, then use the up or down arrow until the desired group appears in the display. To store the selected frequency scan group, press the Set button to enter the desired group; then use the arrow button to find desired frequency. Press and hold Set button to select the frequency. See detailed instructions in System Operation.
Restore Default Settings
A “PRESET” selection in the menu permits resetting of all transmitter functions to their
1.Press the Set button once to move to Menu mode.
2.Press the Up arrow twice to move to “PRESET” in the LCD window.
3.Press the Set button once and “LOAD” will appear in the LCD.
4.Press and hold the Set button until “DEF” appears in the LCD.
5.Press and hold the Set button until “LOADED” appears briefly in the LCD. The window will then revert to “PRESET”.
6.Press the Down arrow once to move to “QUIT”.
7.Press the Set button once to exit the Menu mode and return to normal operation, with all