C. Positioning Screen
To release the screen from its locked position, press the OPEN button located on the front panel this will unlock the screen and it will swing downward. Pivot the screen forward until a comfortable viewing angle is reached. The screen may also be rotated from side to side. NOTE: Do not force the screen beyond its rotational limit of fifteen degrees. In vertical mount applications it is not neces- sary to release and position the screen.
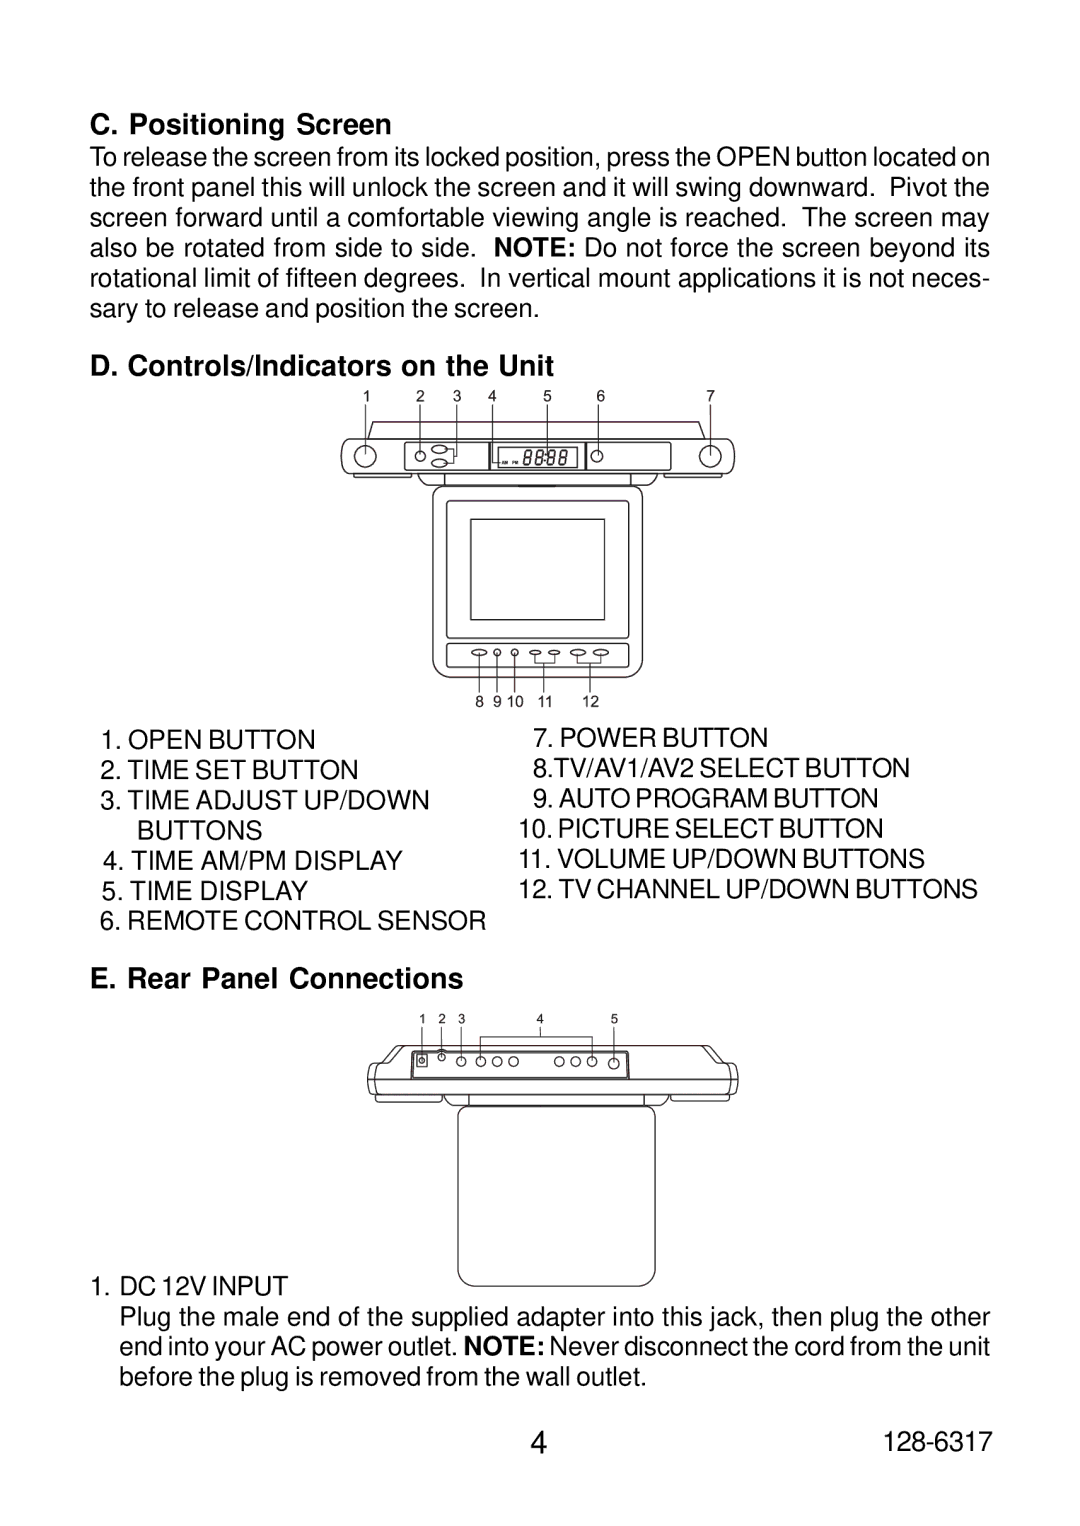
D. Controls/Indicators on the Unit
1.OPEN BUTTON
2.TIME SET BUTTON
3.TIME ADJUST UP/DOWN BUTTONS
4.TIME AM/PM DISPLAY
5.TIME DISPLAY
6.REMOTE CONTROL SENSOR
7.POWER BUTTON 8.TV/AV1/AV2 SELECT BUTTON
9.AUTO PROGRAM BUTTON
10.PICTURE SELECT BUTTON
11.VOLUME UP/DOWN BUTTONS
12.TV CHANNEL UP/DOWN BUTTONS
E. Rear Panel Connections
1.DC 12V INPUT
Plug the male end of the supplied adapter into this jack, then plug the other end into your AC power outlet. NOTE: Never disconnect the cord from the unit before the plug is removed from the wall outlet.
4 |