3
!CAUTION
To reduce the risk of a laceration hazard, wear protective gloves when handling parts that have sharp edges.
Preparation for Assembly
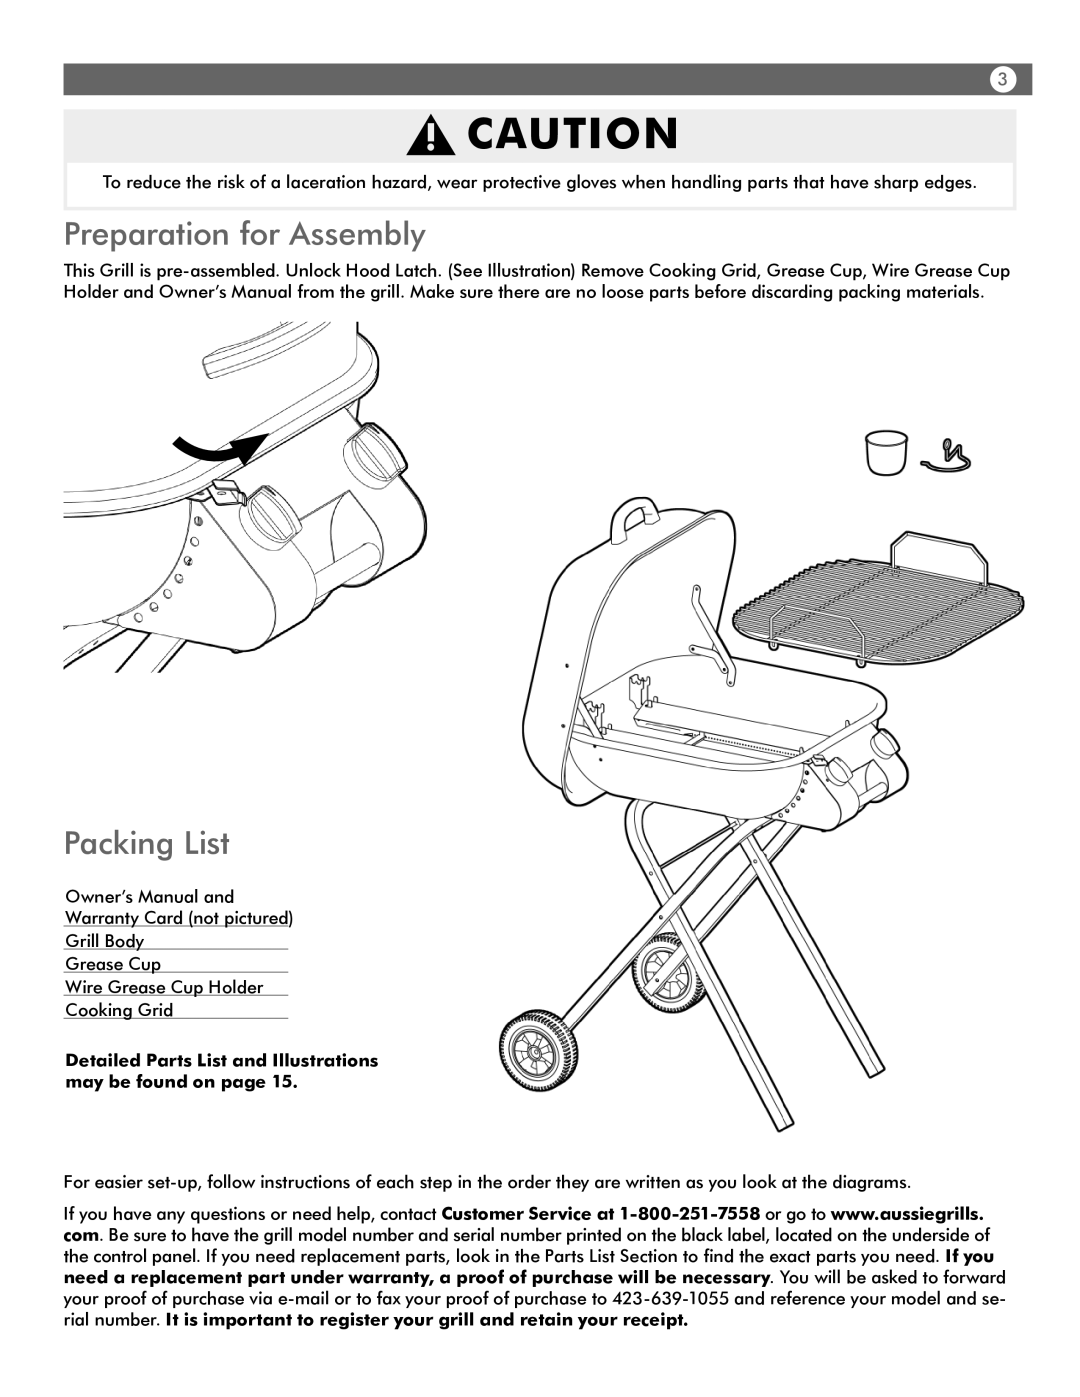
This Grill is pre-assembled. Unlock Hood Latch. (See Illustration) Remove Cooking Grid, Grease Cup, Wire Grease Cup Holder and Owner’s Manual from the grill. Make sure there are no loose parts before discarding packing materials.
Packing List
Owner’s Manual and
Warranty Card (not pictured)
Grill Body
Grease Cup
Wire Grease Cup Holder
Cooking Grid
Detailed Parts List and Illustrations may be found on page 15.
For easier set-up, follow instructions of each step in the order they are written as you look at the diagrams.
If you have any questions or need help, contact Customer Service at 1-800-251-7558or go to www.aussiegrills. com. Be sure to have the grill model number and serial number printed on the black label, located on the underside of the control panel. If you need replacement parts, look in the Parts List Section to find the exact parts you need. If you need a replacement part under warranty, a proof of purchase will be necessary. You will be asked to forward your proof of purchase via e-mail or to fax your proof of purchase to 423-639-1055 and reference your model and se- rial number. It is important to register your grill and retain your receipt.

