11
How to Clean the Burners
1.Make sure the Control Knobs are turned “Off” and the grill is completely cooled.
2.Carefully remove Cooking Grid and Flavor Activators.
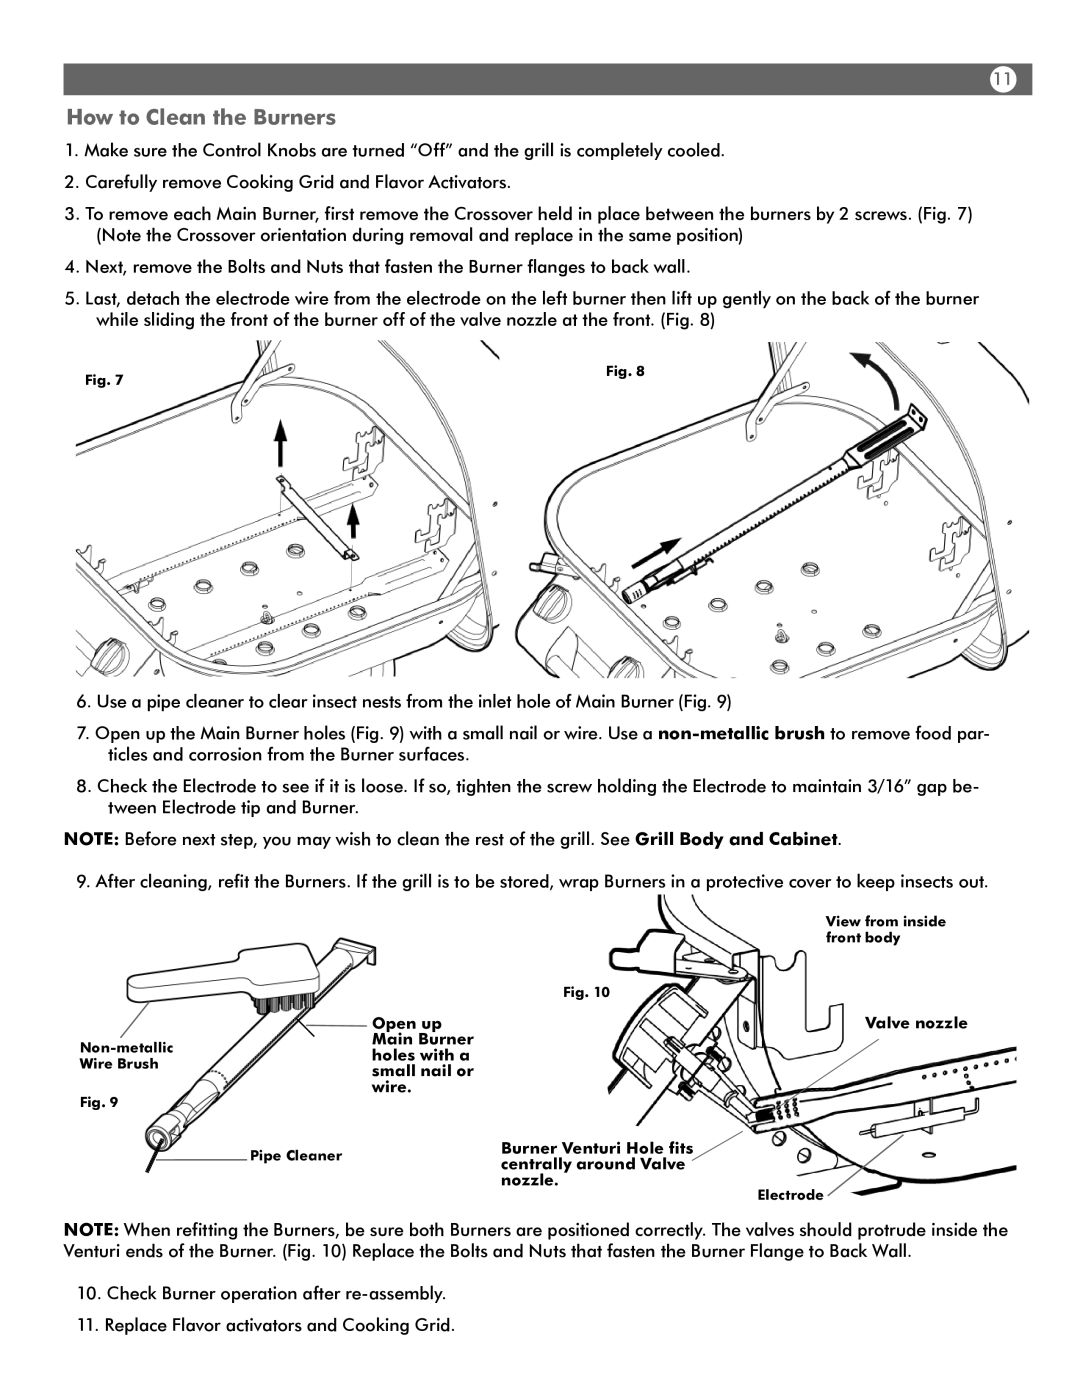
3.To remove each Main Burner, first remove the Crossover held in place between the burners by 2 screws. (Fig. 7) (Note the Crossover orientation during removal and replace in the same position)
4.Next, remove the Bolts and Nuts that fasten the Burner flanges to back wall.
5.Last, detach the electrode wire from the electrode on the left burner then lift up gently on the back of the burner while sliding the front of the burner off of the valve nozzle at the front. (Fig. 8)
Fig. 7 | Fig. 8 |
|
6.Use a pipe cleaner to clear insect nests from the inlet hole of Main Burner (Fig. 9)
7.Open up the Main Burner holes (Fig. 9) with a small nail or wire. Use a
8.Check the Electrode to see if it is loose. If so, tighten the screw holding the Electrode to maintain 3/16” gap be- tween Electrode tip and Burner.
NOTE: Before next step, you may wish to clean the rest of the grill. See Grill Body and Cabinet.
9. After cleaning, refit the Burners. If the grill is to be stored, wrap Burners in a protective cover to keep insects out.
|
| View from inside |
|
| front body |
|
| Fig. 10 |
| Open up | Valve nozzle |
Main Burner |
| |
holes with a |
| |
Wire Brush |
| |
small nail or |
| |
|
| |
Fig. 9 | wire. |
|
|
|
Pipe Cleaner | Burner Venturi Hole fits | |
centrally around Valve | ||
| ||
| nozzle. | |
| Electrode |
NOTE: When refitting the Burners, be sure both Burners are positioned correctly. The valves should protrude inside the Venturi ends of the Burner. (Fig. 10) Replace the Bolts and Nuts that fasten the Burner Flange to Back Wall.
10.Check Burner operation after
11.Replace Flavor activators and Cooking Grid.