10
Step 10
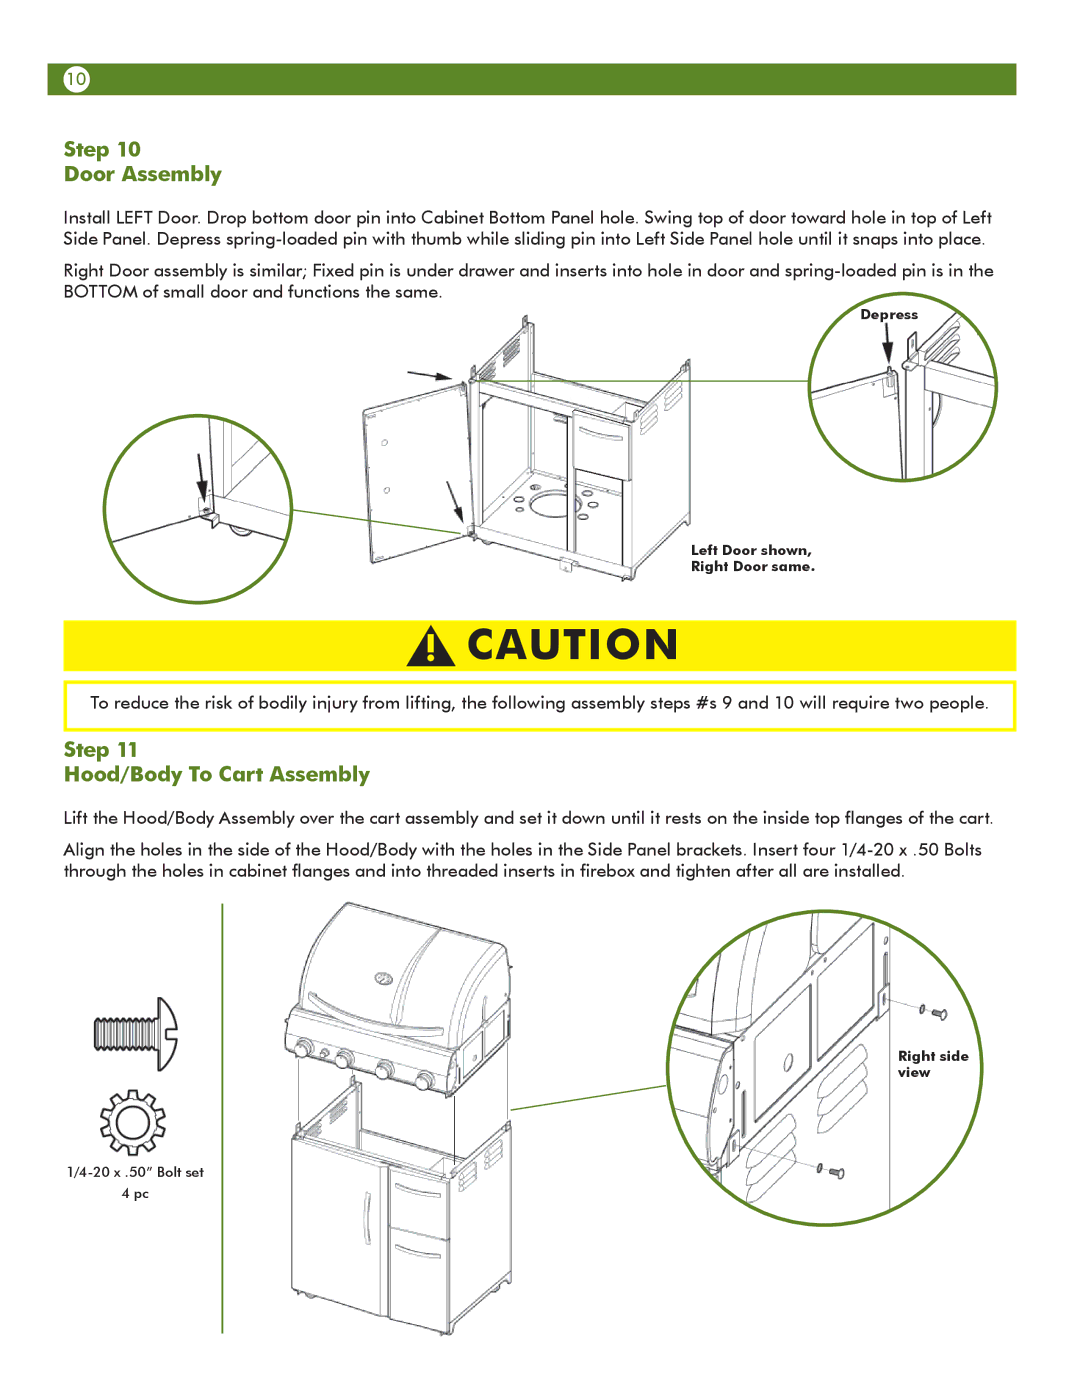
Door Assembly
Install LEFT Door. Drop bottom door pin into Cabinet Bottom Panel hole. Swing top of door toward hole in top of Left Side Panel. Depress
Right Door assembly is similar; Fixed pin is under drawer and inserts into hole in door and
Depress
Left Door shown,
Right Door same.
!CAUTION
To reduce the risk of bodily injury from lifting, the following assembly steps #s 9 and 10 will require two people.
Step 11
Hood/Body To Cart Assembly
Lift the Hood/Body Assembly over the cart assembly and set it down until it rests on the inside top flanges of the cart.
Align the holes in the side of the Hood/Body with the holes in the Side Panel brackets. Insert four
Right side view
4 pc