26
Manually Lighting the Side Burner
!WARNING
To reduce the risk of serious bodily injury or death from fire, explosion or burn hazard:
•Open Side Burner Lid before lighting the grill to prevent an explosion from gas
•When manually lighting Side Burner, use Matchlight Holder.
1.Open the Side Burner Lid.
2.IMPORTANT: Make sure Side Burner Control Knob is turned “Off” first.
3.Turn the LP Gas Cylinder valve open counterclockwise until it stops. (Fig. 8)
4.Push Side Burner Control Knob in and turn counterclockwise to the High position.
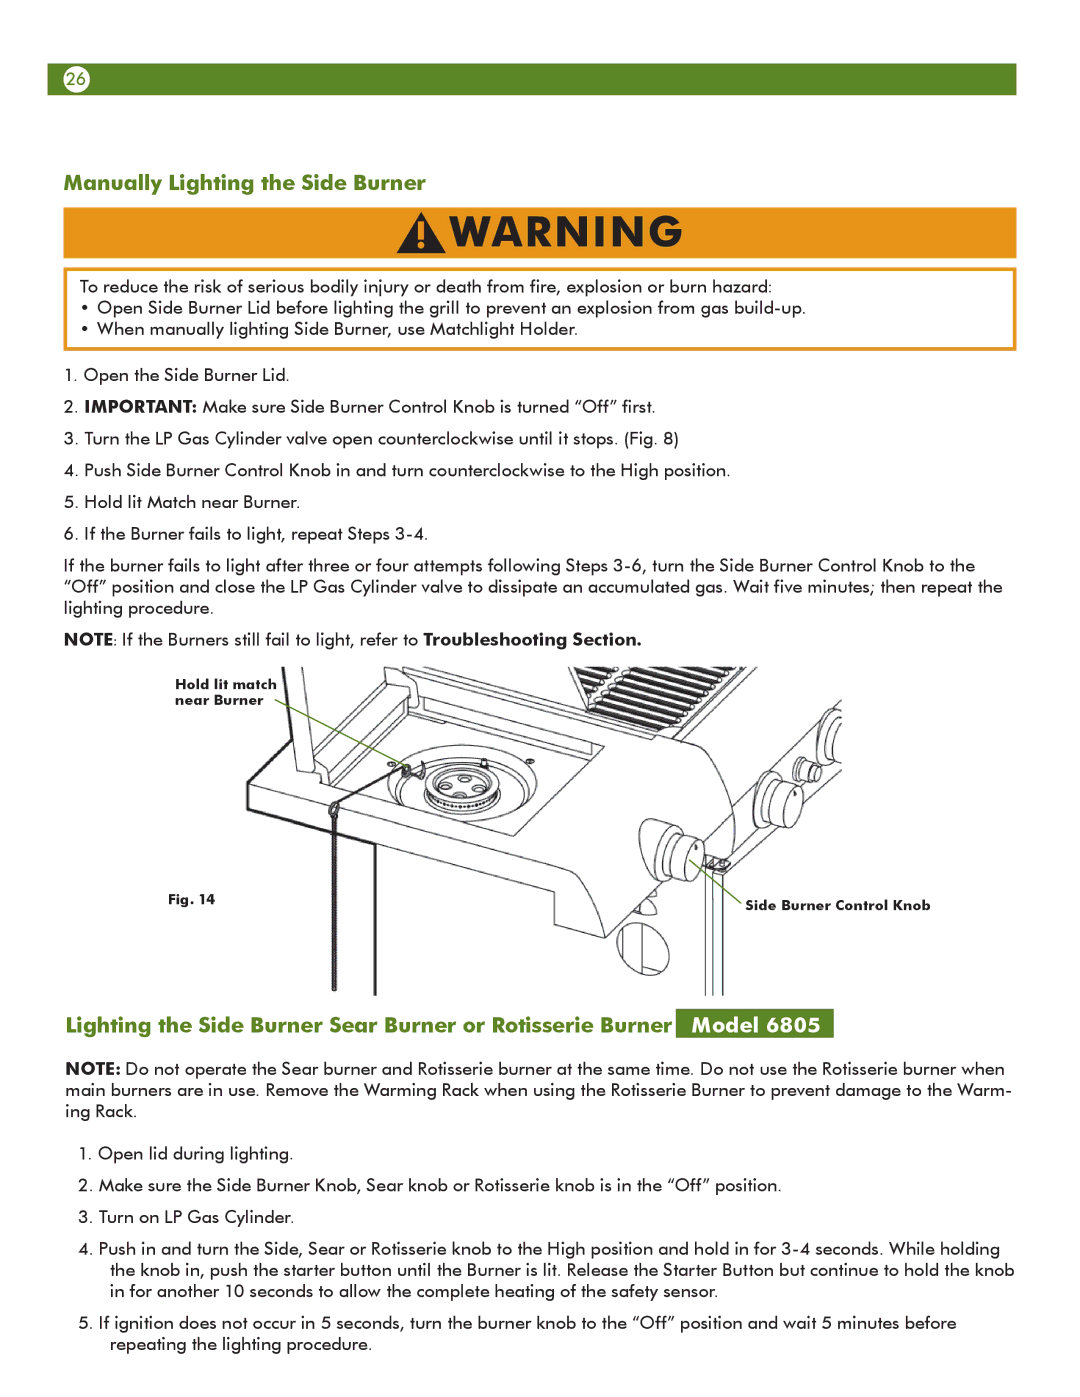
5.Hold lit Match near Burner.
6.If the Burner fails to light, repeat Steps
If the burner fails to light after three or four attempts following Steps
NOTE: If the Burners still fail to light, refer to Troubleshooting Section.
Hold lit match near Burner
Fig. 14 | Side Burner Control Knob |
|
Lighting the Side Burner Sear Burner or Rotisserie Burner Model 6805
NOTE: Do not operate the Sear burner and Rotisserie burner at the same time. Do not use the Rotisserie burner when main burners are in use. Remove the Warming Rack when using the Rotisserie Burner to prevent damage to the Warm- ing Rack.
1.Open lid during lighting.
2.Make sure the Side Burner Knob, Sear knob or Rotisserie knob is in the “Off” position.
3.Turn on LP Gas Cylinder.
4.Push in and turn the Side, Sear or Rotisserie knob to the High position and hold in for
5.If ignition does not occur in 5 seconds, turn the burner knob to the “Off” position and wait 5 minutes before repeating the lighting procedure.