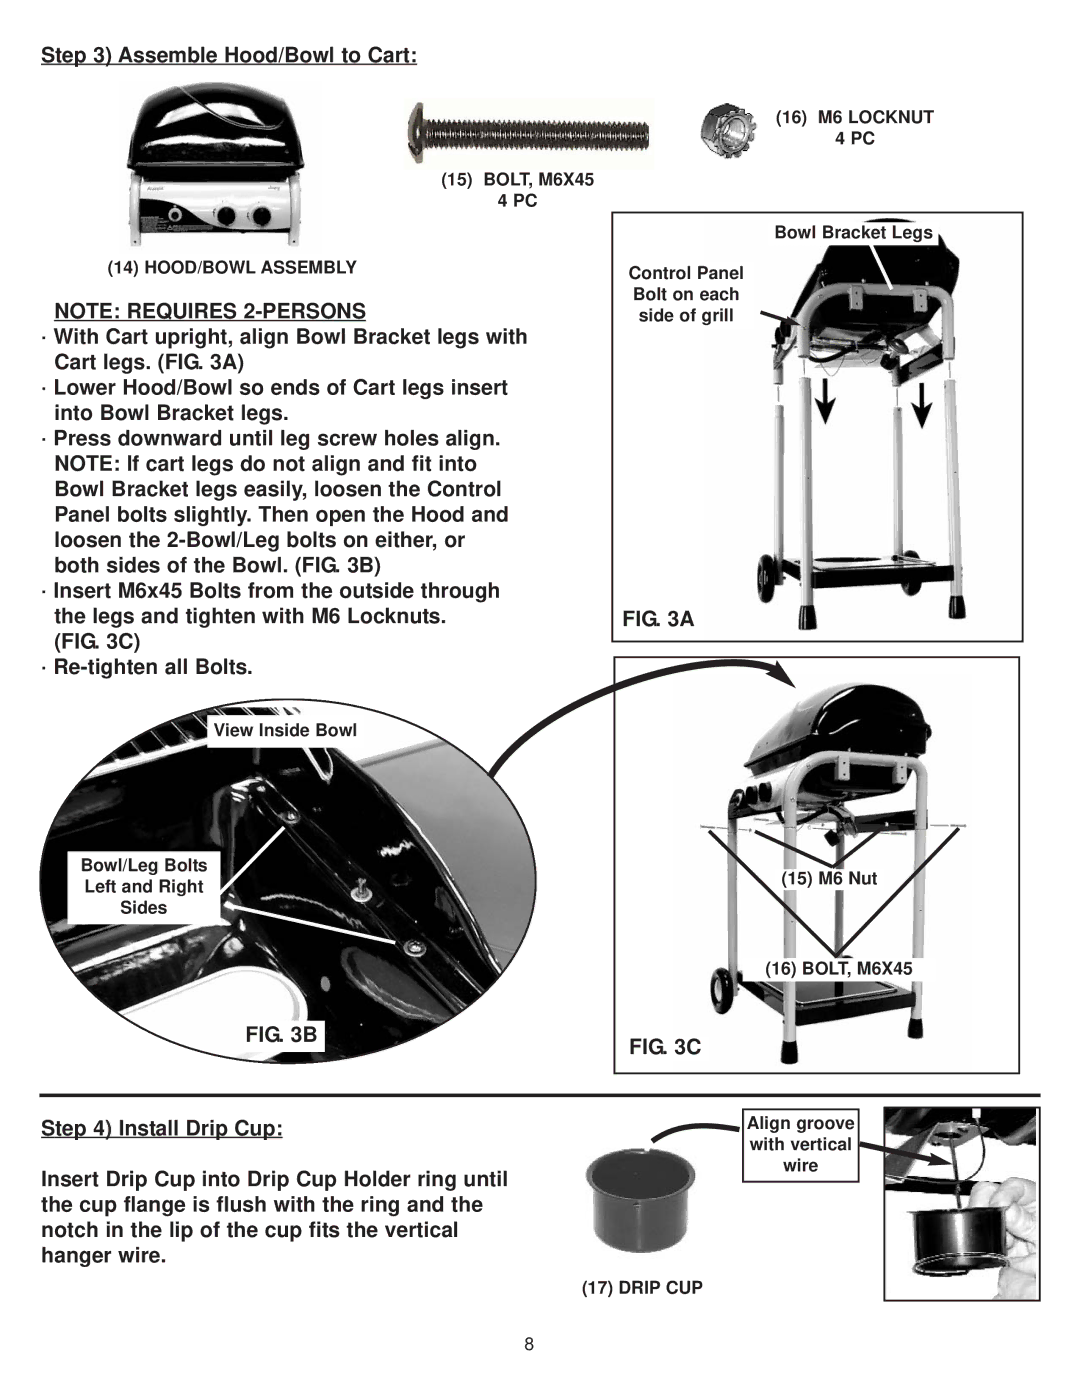
Step 3) Assemble Hood/Bowl to Cart:
(15) BOLT, M6X45
4 PC
(14) HOOD/BOWL ASSEMBLY
NOTE: REQUIRES
·With Cart upright, align Bowl Bracket legs with Cart legs. (FIG. 3A)
·Lower Hood/Bowl so ends of Cart legs insert into Bowl Bracket legs.
·Press downward until leg screw holes align. NOTE: If cart legs do not align and fit into Bowl Bracket legs easily, loosen the Control Panel bolts slightly. Then open the Hood and loosen the
·Insert M6x45 Bolts from the outside through the legs and tighten with M6 Locknuts. (FIG. 3C)
·
View Inside Bowl
Bowl/Leg Bolts
Left and Right
Sides
FIG. 3B
(16) M6 LOCKNUT
4 PC
Bowl Bracket Legs
Control Panel Bolt on each side of grill
FIG. 3A
(15) M6 Nut
(16) BOLT, M6X45
FIG. 3C
Step 4) Install Drip Cup:
Insert Drip Cup into Drip Cup Holder ring until the cup flange is flush with the ring and the notch in the lip of the cup fits the vertical hanger wire.
Align groove with vertical wire
(17) DRIP CUP
8
