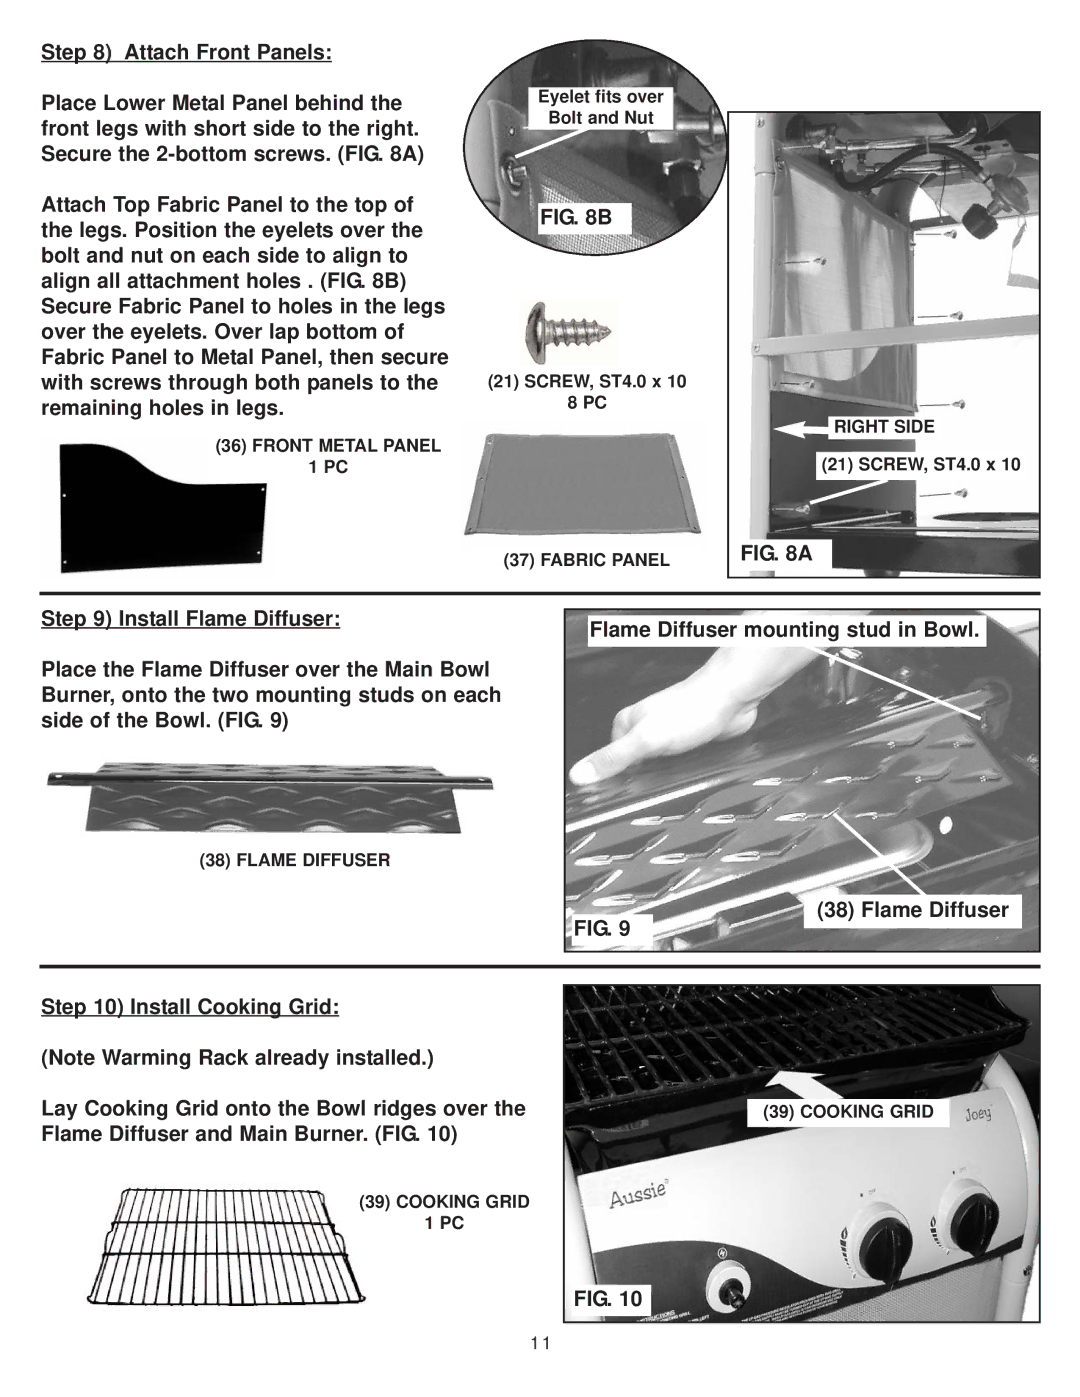
Step 8) Attach Front Panels:
Place Lower Metal Panel behind the front legs with short side to the right. Secure the
Attach Top Fabric Panel to the top of the legs. Position the eyelets over the bolt and nut on each side to align to align all attachment holes . (FIG. 8B) Secure Fabric Panel to holes in the legs over the eyelets. Over lap bottom of Fabric Panel to Metal Panel, then secure with screws through both panels to the remaining holes in legs.
(36)FRONT METAL PANEL 1 PC
Eyelet fits over
Bolt and Nut
FIG. 8B
(21)SCREW, ST4.0 x 10 8 PC
(37)FABRIC PANEL
RIGHT SIDE
(21) SCREW, ST4.0 x 10
FIG. 8A
Step 9) Install Flame Diffuser:
Place the Flame Diffuser over the Main Bowl Burner, onto the two mounting studs on each side of the Bowl. (FIG. 9)
(38) FLAME DIFFUSER
Flame Diffuser mounting stud in Bowl.
FIG. 9
(38) Flame Diffuser
Step 10) Install Cooking Grid:
(Note Warming Rack already installed.)
Lay Cooking Grid onto the Bowl ridges over the Flame Diffuser and Main Burner. (FIG. 10)
(39) COOKING GRID
1 PC
(39) COOKING GRID
FIG. 10
11