AXIS Camera Station Installation Guide | Page 19 |
Defining default camera views from
AXIS Camera Station
To define the camera views as seen from the main AXIS Camera Station user interface, click on Options > Views from the file menu.
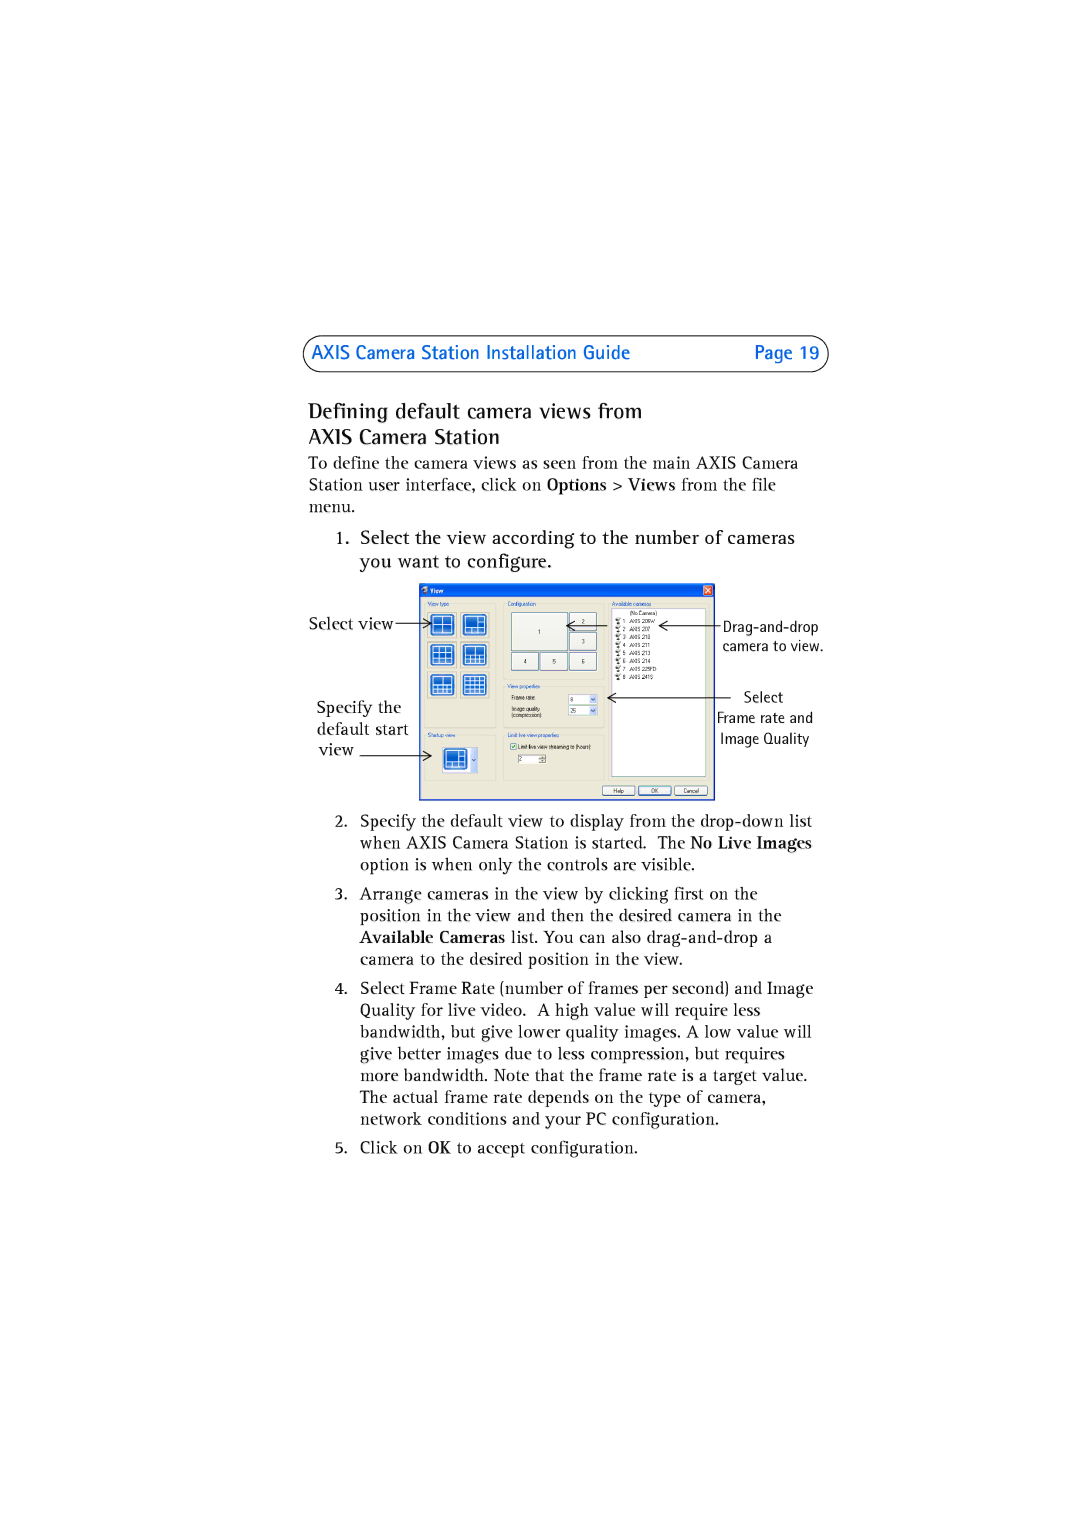
1.Select the view according to the number of cameras you want to configure.
Select view |
|
|
|
|
| |||
| ||||||||
|
|
|
|
| ||||
|
|
|
|
|
|
| camera to view. | |
Specify the |
|
|
|
|
| Select | ||
|
|
|
|
| ||||
|
|
| Frame rate and | |||||
default start |
|
|
| |||||
|
|
| Image Quality | |||||
view |
|
|
|
| ||||
|
|
|
|
|
| |||
2.Specify the default view to display from the
3.Arrange cameras in the view by clicking first on the position in the view and then the desired camera in the Available Cameras list. You can also
4.Select Frame Rate (number of frames per second) and Image Quality for live video. A high value will require less bandwidth, but give lower quality images. A low value will give better images due to less compression, but requires more bandwidth. Note that the frame rate is a target value. The actual frame rate depends on the type of camera, network conditions and your PC configuration.
5.Click on OK to accept configuration.