TO ASSEMBLE YOUR BASSINET
NOTE: Playard MUST be in a locked
CONTENTS (Fig. 1):
2Right corner supports
2Left corner supports
1 Nylon bassinet insert
2Long metal tubes
2Medium metal tubes
2Short metal tubes
ASSEMBLY
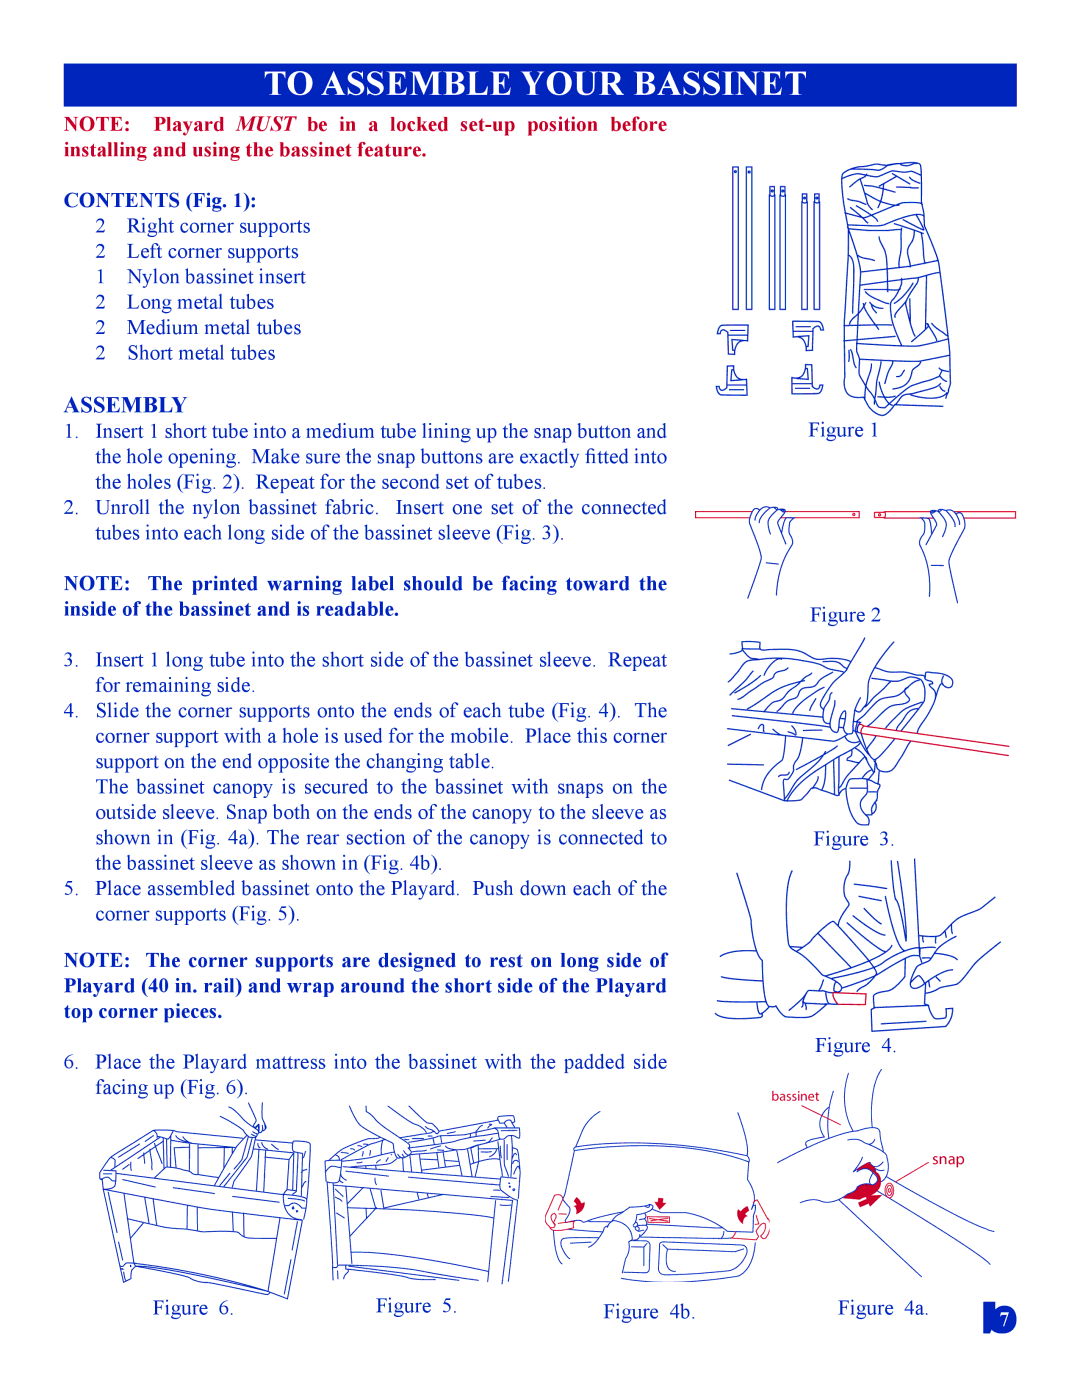
1.Insert 1 short tube into a medium tube lining up the snap button and the hole opening. Make sure the snap buttons are exactly fitted into the holes (Fig. 2). Repeat for the second set of tubes.
2.Unroll the nylon bassinet fabric. Insert one set of the connected tubes into each long side of the bassinet sleeve (Fig. 3).
NOTE: The printed warning label should be facing toward the inside of the bassinet and is readable.
3.Insert 1 long tube into the short side of the bassinet sleeve. Repeat for remaining side.
4.Slide the corner supports onto the ends of each tube (Fig. 4). The corner support with a hole is used for the mobile. Place this corner support on the end opposite the changing table.
The bassinet canopy is secured to the bassinet with snaps on the outside sleeve. Snap both on the ends of the canopy to the sleeve as shown in (Fig. 4a). The rear section of the canopy is connected to the bassinet sleeve as shown in (Fig. 4b).
5.Place assembled bassinet onto the Playard. Push down each of the corner supports (Fig. 5).
NOTE: The corner supports are designed to rest on long side of Playard (40 in. rail) and wrap around the short side of the Playard top corner pieces.
6.Place the Playard mattress into the bassinet with the padded side facing up (Fig. 6).
Figure 1
Figure 2
Figure 3.
Figure 4.
bassinet
snap
Figure 6. | Figure 5. | Figure 4b. | Figure 4a. | 7 |
|
|
|
|
