TO ASSEMBLE CHANGING AREA
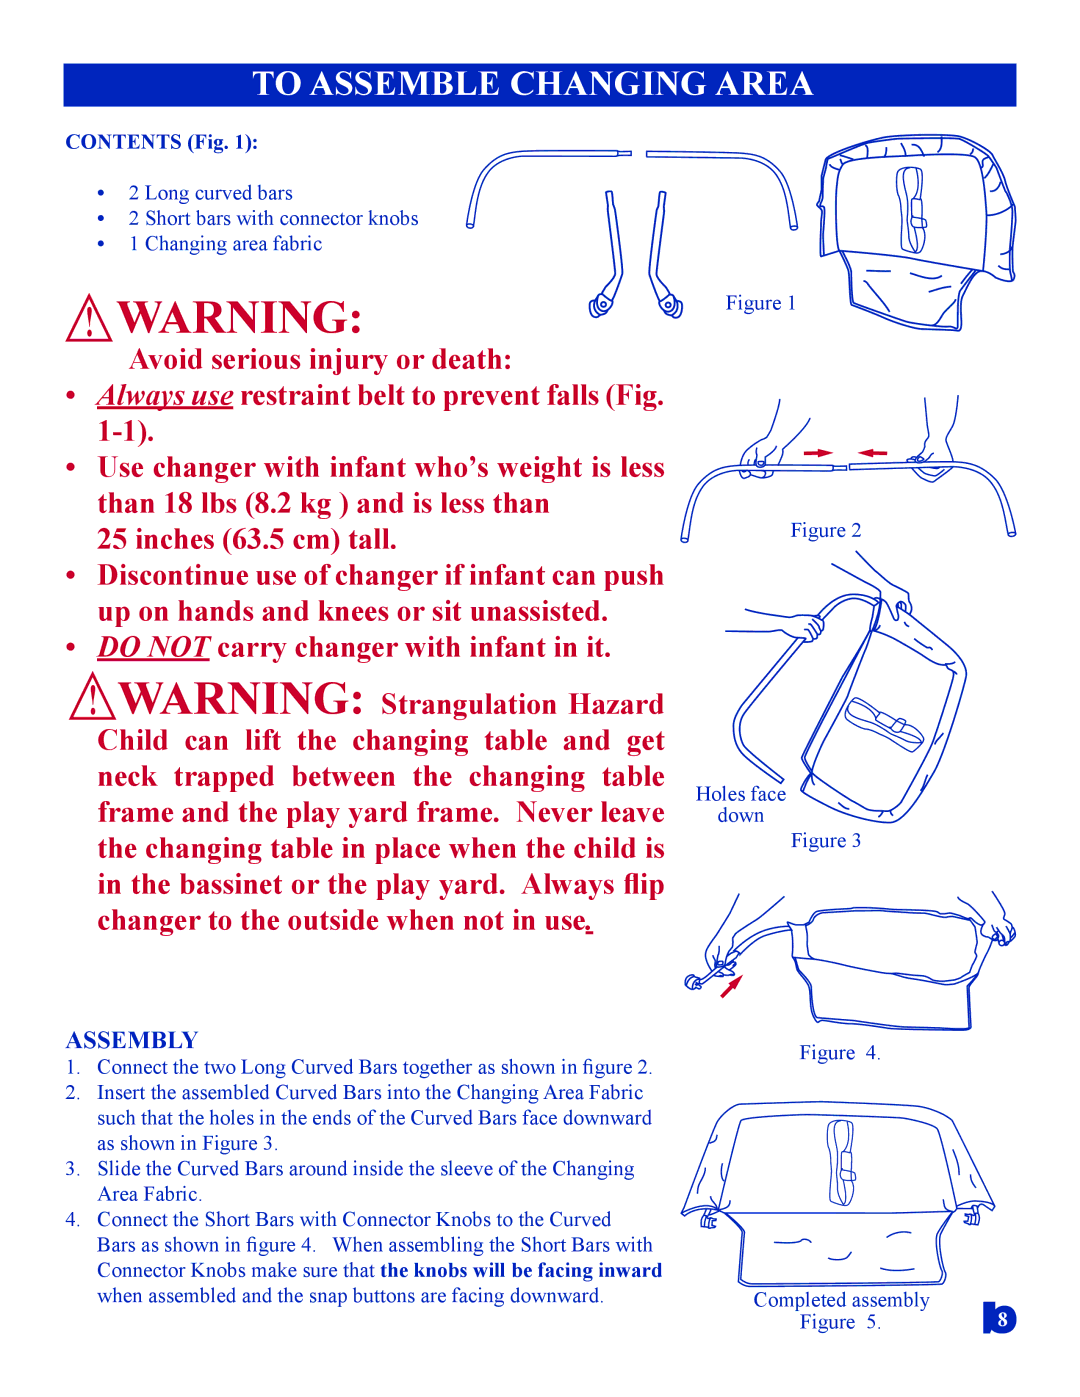
CONTENTS (Fig. 1):
•2 Long curved bars
•2 Short bars with connector knobs
•1 Changing area fabric
![]() WARNING:
WARNING:
Avoid serious injury or death:
•Always use restraint belt to prevent falls (Fig.
•Use changer with infant who’s weight is less than 18 lbs (8.2 kg ) and is less than
25 inches (63.5 cm) tall.
•Discontinue use of changer if infant can push up on hands and knees or sit unassisted.
•DO NOT carry changer with infant in it.
![]() WARNING: Strangulation Hazard Child can lift the changing table and get neck trapped between the changing table frame and the play yard frame. Never leave the changing table in place when the child is in the bassinet or the play yard. Always flip changer to the outside when not in use.
WARNING: Strangulation Hazard Child can lift the changing table and get neck trapped between the changing table frame and the play yard frame. Never leave the changing table in place when the child is in the bassinet or the play yard. Always flip changer to the outside when not in use.
ASSEMBLY
1.Connect the two Long Curved Bars together as shown in figure 2.
2.Insert the assembled Curved Bars into the Changing Area Fabric such that the holes in the ends of the Curved Bars face downward as shown in Figure 3.
3.Slide the Curved Bars around inside the sleeve of the Changing Area Fabric.
4.Connect the Short Bars with Connector Knobs to the Curved Bars as shown in figure 4. When assembling the Short Bars with Connector Knobs make sure that the knobs will be facing inward when assembled and the snap buttons are facing downward.
Figure 1
Figure 2
Holes face down
Figure 3
Figure 4.
Completed assembly
Figure 5. | 8 |
