IrDA Printer | Operation |
4.Press the SEL button to print the next parameter, and then use the FEED button to change that parameter to the desired value.
5.Repeat Step 4 as necessary to change all desired parameters.
6.Once all parameters have been set, press and hold down the SEL button, and then press the FEED button to save the new settings; after which, the message “Data Keeping, Setting mode END !!” should be printed.
Using the Printer
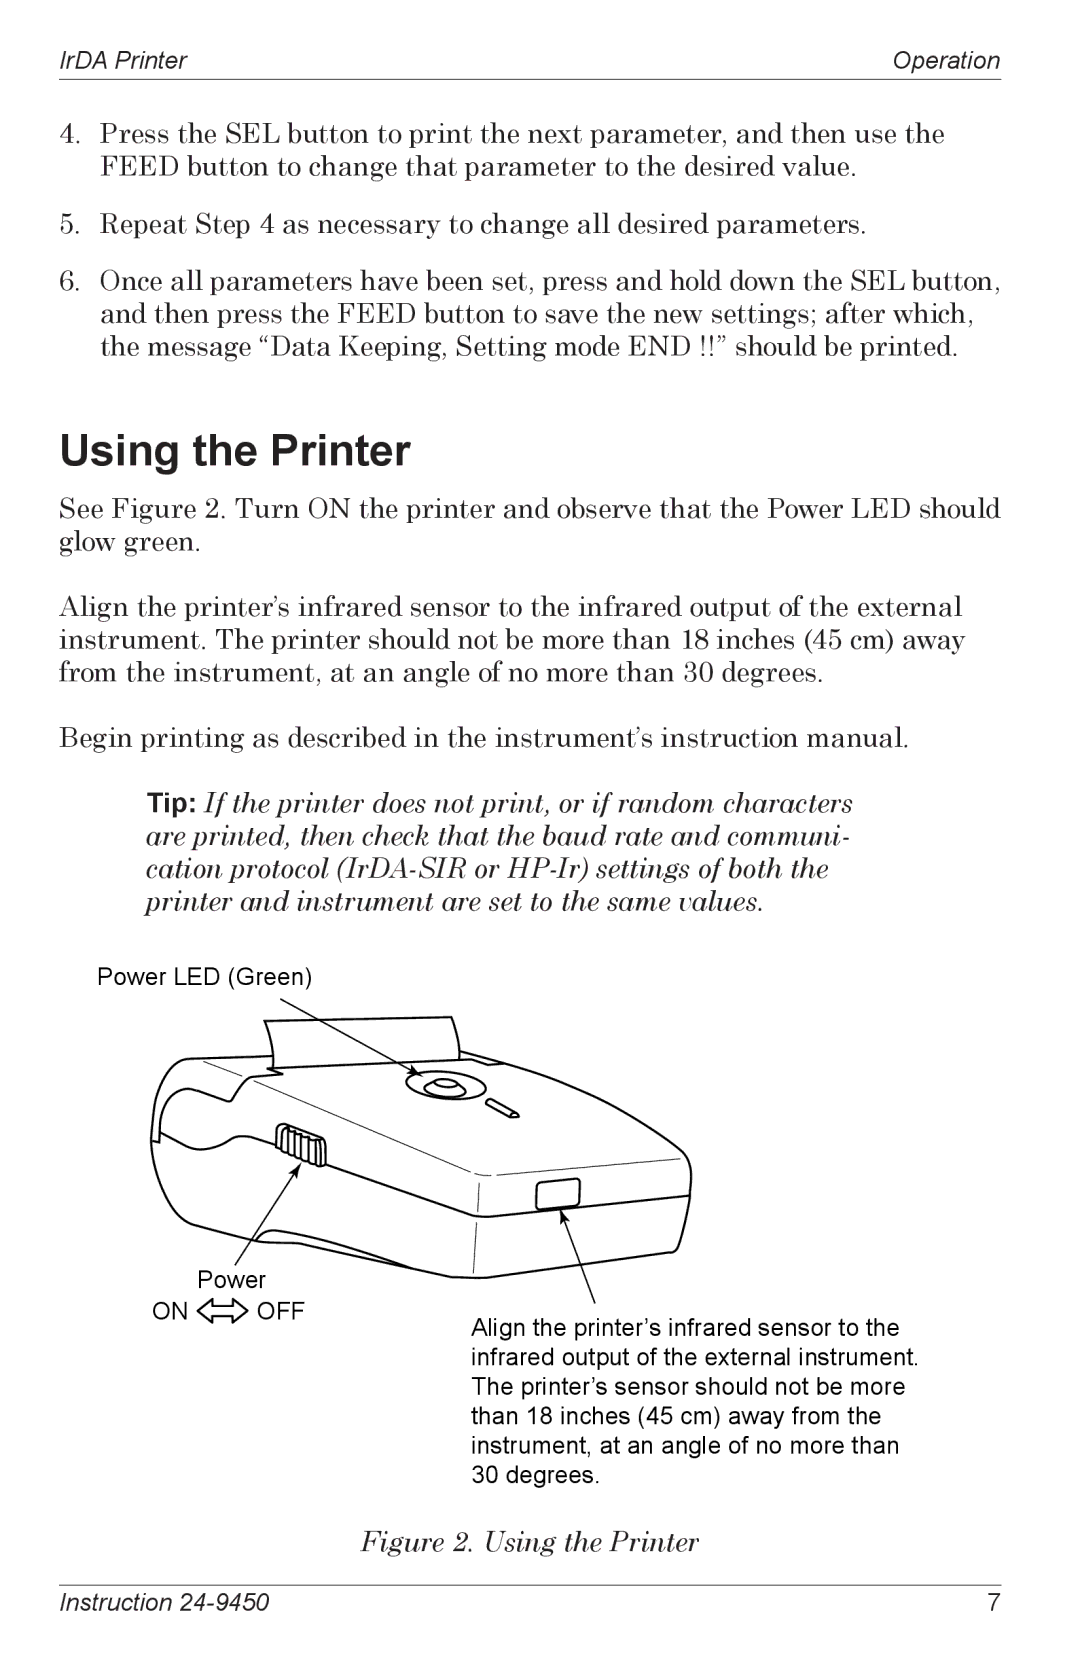
See Figure 2. Turn ON the printer and observe that the Power LED should glow green.
Align the printer’s infrared sensor to the infrared output of the external instrument. The printer should not be more than 18 inches (45 cm) away from the instrument, at an angle of no more than 30 degrees.
Begin printing as described in the instrument’s instruction manual.
Tip: If the printer does not print, or if random characters are printed, then check that the baud rate and communi- cation protocol
Power LED (Green)
Power
ON ![]() OFFAlign the printer’s infrared sensor to the infrared output of the external instrument. The printer’s sensor should not be more than 18 inches (45 cm) away from the instrument, at an angle of no more than 30 degrees.
OFFAlign the printer’s infrared sensor to the infrared output of the external instrument. The printer’s sensor should not be more than 18 inches (45 cm) away from the instrument, at an angle of no more than 30 degrees.
Figure 2. Using the Printer
Instruction | 7 |
